
/
/

The first thing I have to say about making cheddar cheese is: are you sure you really want to make cheddar cheese?
Cheddar cheese is often one of the first cheeses a new cheesemaker will aspire to make. Pretty much everyone is familiar with the mass-produced style of this cheese and can find a place for it in cheese sandwiches, grilled cheese, and many other dishes.
But… Cheddar is more complicated to make than other cheeses: it has extra steps and hands-on time involved, it needs a cheese press, and many of the places that we find on the table for a slice of Cheddar can readily be filled with cheeses that are easy to make.
If you want a simple, mild, sliceable, sandwich-ready, family cheese that is easy to make, check out my homestead hard cheese recipe.
If you want a melty cheese for toasted cheese, pizza, and so on, see my mozzarella recipe.
But… if you really really love traditional cheddar, please read on, and I’ll show you how to make cheddar cheese at home.

Real Cheddar, aged in cloth, is a completely different cheese to the industrial Cheddar aged in plastic that we’re most familiar with. Caerphilly is made in a similar way to Cheddar, but aged at high humidity with a natural rind, to bring some surface-ripening elements into the cheese.
Traditional Cheddar cheese originated in a time and place where there were a lot of cows to be milked, and a lot of milk that needed to be preserved. The Cheddaring, milling, curd salting, and heavy pressing processes make for a cheese that starts out quite dry and doesn’t need much shelf space for aging, and the clothbinding means it doesn’t need as much rind care as a natural rind cheese, and that it doesn’t dry out as much during long aging times.
The Cheddar style of cheesemaking can yield large wheels of cheese that will keep (and improve) over a year or more of aging. For small batches, I think anywhere between six weeks to nine months of aging is ideal, and this suits the seasonal cheesemaking cycle, preserving the summer and autumn milk abundance for the winter and spring.
Industrial cheddar, on the other hand, uses some of the basic techniques of real Cheddar, but instead of being aged in a way that the cheese can breathe, dry out, and develop more character, it is aged in airtight plastic bags instead.
Cheddar has a couple of extra steps involved. While the steps of culturing, coagulating, and stirring are all familiar to anyone who’s made cheese, a couple of extra steps happen after this which take extra time and equipment.
Instead of putting your cheese in its form once it passes the readiness test, as you would for a regular hard cheese, cheddar instead gets cut into slabs, and the process of cheddaring happens. Cheddaring is what gives cheddar cheese its character: slabs of curds are stacked on top of each other and kept warm, so they continue to ferment, acidify, lose whey, and firm up. During this process, the top slab needs to be moved to the bottom of the pile of slabs often, so that all the slabs get pressed evenly. This process adds an extra 30 to 40 minutes to your cheesemaking time.
Once the cheddaring has been done, the very firm curds are then ripped into pieces and salted. Because the curds are so firm, they then need to be pressed with a lot of weight. Most cheesemakers use a cheese press to do this, but if you don’t have a cheese press you can get creative, use a bunch of barbell weights plates and hope for the best, or rig up something using the kind of ratcheting straps that are designed to hold things down on trucks.

Making real Cheddar cheese is not something I do every day – it is a slow process that is ideally suited to more milk than my small herd of goats provides, but it can be a rewarding cheese to make every now and then.
I find there is something meditative in hovering close to the stove on a rainy day, gently flipping the slabs of cheddar curds as they become firm and acidic. There’s no need to be there the whole time – this process can be done every five minutes, just like the stirring process of any hard cheese.
Please feel free to double or triple the following recipe if you have enough milk to do this, and your Cheddar will be better for it. I have also successfully made Cheddars from four litres (1 gallon) of high-solids winter goats milk.
You can adjust this Cheddar recipe to make it from any amount of milk. In Natural Small Batch Cheesemaking the recipe is for a 6 litre batch. See my post about scaling cheese recipes up or down if you want to learn more about how to figure out the correct dosage of rennet and the amount of culture to use for any amount of milk.
Traditional clothbound Cheddar is covered in lard or ghee then wrapped in cloth, to stop the surface-ripening bacteria from having an effect on the cheese, while still allowing the cheese to ‘breathe’ more than it would if it were covered in wax or plastic, making for a cheese that is ripened from the inside out to bring out different flavours to natural-rinded cheese.
There is a noticeable difference between Cheddars that have been ripened in cloth and Cheddars from the same cheesery that are ripened in wax or plastic – the cloth-ripened ones have a better flavour and a slightly drier texture.
Cheddar can also be made with a natural rind, which when aged in humid conditions turns out similar to Welsh caerphilly cheese – to do this just ignore the clothbinding instructions and treat your Cheddar as you would any natural rind hard cheese.

1. Culture
Gently heat your milk to a lukewarm temperature of around 31ºC (88ºF). Thoroughly mix through the kefir, and leave it to ripen for 40 minutes.
2. Rennet
Dissolve the rennet in a quarter cup of water, stir it constantly and then pour it over the milk. Quickly and thoroughly mix it through all the milk for a minute or two in an up and down motion, then leave it to sit for around 30 minutes, until there is a clean break in the curd.
3. Cut curds, heat, and stir
Cut the curds into 1cm (1/2”) cubes.
Slowly heat the curds to 39ºC (102ºF) over 45 minutes while stirring often. The curds should shrink to around the size of peas.
Keep the temperature at 39ºC (102ºF) for around 45 minutes, while stirring gently and frequently. When the curds are ready for the next step they will feel springy and will stick together when you do the readiness test with your hands.
4. Drain whey and make curds into slab
Allow the curds to settle, and pour off as much whey as possible. Drain the rest of the whey from the curds in a cheesecloth-lined colander.
Keep the curds warm and use the cheesecloth to gently bring the warm curds together into a single slab. Allow the slab to rest for around 10 minutes, for the curds to knit together.
5. Cheddaring
Cut the slab into several slices around 5cm (2”) thick. Stack as many pieces as will go on top of each other without toppling over. You can cut the slabs in half to make smaller pieces to work with if you want.
Move the bottom slab to the top constantly (or as often as you can), to allow all the slabs to evenly press under their own weight while the acidity increases.
Make sure to keep the curds warm during this time, ideally between 32ºC and 39ºC (90ºF and 102ºF). You don’t need to be there constantly for this, but moving the slabs around as often as you can (at least every five minutes) will make for a better cheese. If they are left for too long they will start knitting together, so try to move them often.
The curds will be ready when they have a strong rubbery texture, similar to a cooked chicken breast. This will usually take around 30 to 40 minutes.
6. Mill and salt
For best results, weigh the curds and add in 2.5% of the curd weight in unrefined salt. This works out to be roughly 2 tablespoons if you’re making cheddar from 8 litres (2 gallons) cow or goat milk.
Break the curds up into pieces no bigger than an inch (2.5cm), add the salt, stir to combine, and leave to sit for 10 minutes while keeping the temperature warm to expel more whey.
7. Press
Put the salted curds into a cheese mould lined with cheesecloth, place in the cheese press, and press at half the maximum pressure for half an hour.
Remove the cheese, flip, and rewrap, then press for another half an hour at the same pressure.
Remove the cheese, flip, and rewrap, then press at the maximum amount of pressure for up to 12 hours.
8. Airing
Remove the cheese from the mould and allow it to dry in an airy place for a day or two, flipping it every so often, placing it on a dry place each time. Cheddar tends to be much drier than other cheeses for this stage.
9. Optional clothbinding
Bind your cheese in cloth by cutting four pieces of cheesecloth that will fit over the top and bottom of the cheese with an inch of excess cloth to go around the sides, also prepare two rectangles of cheesecloth to bind the side of the cheese.
Smear lard or ghee on the top of the cheese, press one piece of cheesecloth on this, smear or brush more lard where the excess cloth needs to stick on the sides, and press the rest of the cheesecloth into this. Cover the cheesecloth with more lard, and stick the second piece of cheesecloth over the top of this. Flip the cheese over and repeat for the other side, then cover the sides of the cheese with lard. Place one piece of cheesecloth around the sides, smear that with lard, and finish with the second rectangle of cloth.
10. Age
Age this small batch Cheddar for at least four weeks in cheese cave conditions. For larger wheels, some people prefer milder Cheddars aged for the minimum time, others prefer 6 months of aging. After 12 months Cheddar has a sharper flavour which some people prefer, and it can be aged even longer than this if you have a very large cheddar. If any mould develops on the cheesecloth during aging, wipe it off with some vinegar.
Caerphilly (high humidity natural rind Cheddar) is generally eaten younger than Cheddar. 1 to 3 months of aging in humid cheese cave conditions with a natural rind is ideal.
What kind of milk do I need to make Cheddar cheese? Can I make Cheddar with goats milk?
The pictures in this post are of cheddar made from goats milk. You can also make cheddar cheese from cows milk or sheeps milk and get beautiful results. The sheep milk cheddar will be white, like my goats milk cheddar, and cows milk cheddar will have a lovely natural yellow colour which changes throughout the year, depending on what the cow is eating.
You will get a higher yield of cheese from this recipe if you are using very fresh milk. Raw milk makes the best cheese, but you can also make this recipe with low temperature pasteurised milk (but not homogenised milk or UHT milk).
Why are some cheddar cheeses coloured orange?
When a cow has been eating the most nutritious green grass and creating the most nutritious milk and cheese, and the milk has not been skimmed of its fat, cheese will naturally develop a more intense yellow colour when compared to cheese made from cows fed mainly on hay. Adding orange colouring (annatto) to cheese began as a way to cheat people into thinking that the cheese was made from this highly nutritious milk, and later on just became something that was expected in Cheddar cheese in most of the USA.
Outside the USA, Cheddar is not usually coloured with orange.
What can I do if I want to make something more similar to industrial Cheddar?
Many cheesemakers use vacuum-sealing plastic bags or cheese wax to age Cheddar. This recipe can be aged this way instead of the cloth or a natural rind if you prefer a moister Cheddar. There are instructions for waxing cheese in my cheesemaking book.
This recipe seems really complicated, is there any easier way to make hard cheese?
Yes! See my homestead hard cheese recipe for how to make a basic mild hard cheese without a cheese press.

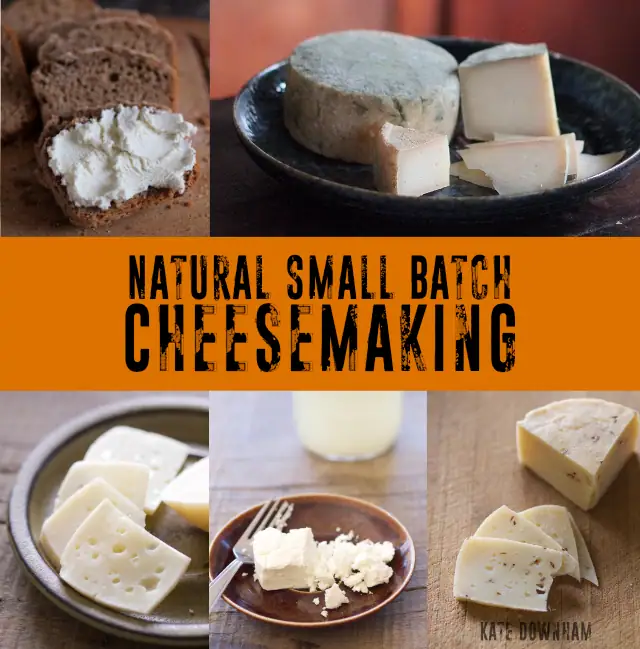
Making your own home dairy products was once an everyday essential skill – and it still is. It builds real resilience, cuts food costs, and gives you truly nourishing food no matter what’s happening in the wider world.
Wherever you are, you can make delicious, natural cheeses in your own kitchen. Start with just one litre (or one quart) of milk and scale up or down as needed. Natural Small Batch Cheesemaking is written for homesteaders, farmers, and anyone who loves real cheese.
• Work with any type of milk and adapt to seasonal conditions
• Make rennet at home
• Keep it budget-friendly: use tools you already own and press cheese without a cheese press
• Understand every step – the “why” as well as the “how”
• Age cheeses successfully on or off the grid
• Turn leftover whey into a homestead resource
• Master easy small-batch recipes for cheeses, plus make your own yoghurt, kefir, sour cream, butter, and ice cream
• Troubleshoot when things don’t go to plan
• Build true dairy self-reliance with flexible, affordable techniques from a successful off-grid cheesemaker
Ready to go deeper and make cheese with confidence?
Grab your copy of Natural Small Batch Cheesemaking today ↓

Join The Nourishing Hearthfire for real food recipes, traditional skills, and monthly inspiration for your hearth and homestead.
We respect your inbox. Unsubscribe anytime.

Kate Downham has been growing, preserving, and cooking real food since 2007. She is the author of four books on homestead skills: A Year in an Off-Grid Kitchen, Natural Small Batch Cheesemaking, Backyard Dairy Goats, and Sourdough Without Fail.
Off-grid with her family of nine in the Tasmanian forest, Kate milks her own goats, makes all their cheese, mills all her own grain, and bakes fresh sourdough bread daily.






The Nourishing Hearthfire is reader-supported and mostly ad-free
Leave a Reply