
/
/

A cheese culture (or starter culture) is helpful bacteria that convert the lactose in milk into lactic acid. This process can also be called acidification, ripening, or just plain ‘culturing’. Some of these cultures are already present in raw milk, but for more faster and more reliable culturing, we will usually add something to the milk to ensure it develops the best kinds of flavours. In industrial cheesemaking, these cultures come in packets from a lab, in natural cheesemaking, there are a variety of options that can be made at home.
Starter cultures are usually divided into two categories: mesophilic and thermophilic:
Some natural starter cultures contain both mesophilic and thermophilic cultures, and can be used in any kind of cheese, others are more specific. For people using lab-grown cultures, the range of bacteria in the lab-grown cultures is more limited, and needs to be selected carefully
Packaged cultures are grown in a lab, probably on the other side of the world, probably run by people with values I don’t agree with. My aim as a cheesemaker and homesteader is to source as much of our needs as possible from our own land, and producing our own cheese cultures not only makes us more resilient, it also makes great cheese.
I’ve been making cheese for 12 years, and most of that time has been without packaged cultures of any sort. There are some learning curves and challenges, but I find that the benefits of using homemade cultures outweigh the convenience of having a packet of lab-grown stuff in the freezer.
Resilience
Packet cultures need to be purchased again and again. If supply disruptions happen, or if you forget to re-order in time, you can’t make cheese. Homemade cultures are homemade and if cared for correctly, can be passed down forever as heirloom cultures.
Gut health
The range of good bacteria in natural cultures is far more diverse than in packaged cultures.
Taste
I love the taste of homemade cheeses made with natural cultures.
Traditional health
Homegrown cultures such as kefir, clabber, and yoghurt have been around for a long time, and we have proven to thrive on them. Isolated strains of lab-grown cultures are a modern invention, and it is hard to say whether these isolated strains are good for health or not.

A yoghurt (or yogurt) with live cultures from the shop will work in recipes that prefer a thermophilic culture, such as alpine cheeses. The fresher the yoghurt is, the better the culture will be. With careful handling, you can keep this same strain of yoghurt alive at home, see my yoghurt recipe here for how to do this.

Kefir is my favourite cheese culture. It contains both mesophilic and thermophilic starter bacteria and can be used in any cheese, it is pretty invincible, and if you forget about it, you can usually bring it back to life again by rinsing well and feeding it (it may need to be rinsed and fed twice or more to be active again).
Real milk kefir comes from milk kefir grains, which look like tiny cauliflowers. Because the culture is in the kefir grains rather than the liquid, it’s less likely to get contaminated than liquid cultures, as the kefir grains can be rinsed out every time and fed with fresh milk.
To use kefir for cheesemaking, first rinse your grains really well in cold water, and culture some milk with them – around 1 cup (240ml) of milk to 1 teaspoon of grains.
Allow the milk to culture for around 8 to 16 hours, then taste it – it should be pleasantly sour and tasty, but have no unpleasant flavours. If you don’t like the taste of it, use the milk in a smoothie, rinse the grains well, and start over again – it may just be that the culture needs to be woken up and won’t develop its true flavour until you’ve made a few batches. Different strains of kefir have different tastes, so if you don’t like the first batch of kefir you try, you can experiment with kefir grains from different sources.
You don’t have to like the taste of kefir to make cheese from it, but it is best to try and treat it well.
I think of it in some ways as similar to sourdough baking – if I want the best results from my sourdough, I feed it a few hours before using it and feed it often, and if I want the best results from my kefir for cheese culturing, I will rinse and feed the grains, and allow it to culture for several hours before using it.
I find that kefir, like sourdough, really benefits from being brewed often. The best cheeses I’ve made have been when I’ve been making fresh kefir every day, so that my kefir grains are very active and will culture the milk quickly. I keep a small jar (around a cup and a half (375ml) in size) with around a teaspoon-sized piece of kefir grains and top it up with fresh raw goats milk every day. This provides enough kefir for a drink every day, while not brewing so much that I can’t find a use for it.
Kefir works best with a room temperature of around 74ºF (23ºC), so if your kitchen is hotter or colder than this, try to find the perfect spot in your house to culture the kefir, which can change throughout the year, for example, in winter I might keep the kefir near my woodstove, and in summer I might keep it further away from the stove.
In hot weather, the kefir may separate into curds and whey in 12 hours, and in cold weather, it may take 48 hours to culture the milk sufficiently to make cheese with it. If the weather is consistently hot, it may help to reduce the amount of kefir grains in the milk, to brew larger batches, or to reduce the amount of time it is brewed for. In cold weather it may help to increase the amount of kefir grains in the milk, as well as letting it brew for twice as long as usual.
To get kefir, you can ask around – often there is someone in your circle of friends or community that makes kefir, or you can purchase a dried kefir culture from the internet.

Raw milk can be soured on its own and then be used to culture a cheese. To achieve this, start with a healthy animal, a very clean udder and a very clean jar. Milk the first three squirts out of the udder onto the ground, to get rid of any unwanted bacteria lurking in the teat, and then milk around a half a cup of milk directly into a 250ml (half pint) jar.
Leave the jar with a covering of light cheesecloth, out somewhere where it can be exposed to good bacteria, such as outdoors somewhere pleasant, or on an open airy place within the house. Leave this for 24 to 48 hours at around 18ºC (65ºF) then taste – is it nicely sour? If there is any kind of off taste, then don’t use it, but if it tastes pleasantly sour, this can now be fed in a similar way to a sourdough starter, just remove some of this for your cheese (the same amount as you would use with kefir or whey), and then add in some very clean fresh milk and leave at around 18ºC (65ºF), covered, to culture.
For this culture, there is more chance of contamination than there is with kefir, so I prefer to stick with kefir, but if for some reason you were stuck on an island with a herd of goats and no kefir, it’s helpful to know that you can harvest a wild culture from the air in this way.
To avoid contaminating your culture, once it’s established, you could feed it with pasteurised milk, and the cultures will feed on the milk but the milk won’t add anything new of its own. Another option would be just to feed it straight after milking (only if the milk is very clean), as this will give the good cultures in the starter a chance to take over before anything unwanted begins to grow.
For best results, keep your raw milk culture below 20ºC (68ºF). If you need to store it for longer than two days, store it at fridge temperatures.
Many traditional cheeses are made with whey leftover from the last batch of cultured cheese. This works really well when cheese is being made every day or two, but the whey becomes less active and more likely to spoil if it is left for longer. To make whey last as long as it possibly can, allow it to sit for a short time, for the milky-looking whey to rise towards the top of the bowl, scoop the milky stuff off and feed it to the chickens, then strain the watery whey through a few layers of cheesecloth. This watery whey will now store for slightly longer, and can also be used as a starter culture for fermented vegetables.
Whey as a starter culture will only work when made with whey from raw cultured cheeses, not from vinegar cheeses such as ricotta, paneer, and fast mozzarella.
Lately I’ve been making many cheeses with no added culture at all. To do this, first get milk that is still fresh and warm from milking your dairy animals and leave the jars to sit at room temperature for 3 to 4 hours (preferably in a room temperature between 10ºC and 20ºC (50 to 68ºF)), to allow some of the native cultures in the raw milk to multiply.
This method may or may not work for you, depending on your animals, your milk handling practises, and other conditions on the homestead, but if you accidentally kill your kefir grains, or if you want to make cheese and don’t have any other cultures made up, it’s worth trying. I’m really enjoying the simplicity of this method.

All of the above liquid cultures can be added to the milk at roughly 1 tablespoon (15g) for every 1 litre or 1 quart of milk. If you find that your cheeses are getting too acidic with this amount, simply reduce the amount of culture next time. You can also use the amount of culture to tinker with cheese recipes so that they better fit your schedule and culturing temperatures- for instance, in summer you might use less culture in your chèvre and other cheeses, in winter more, in order to help your cheese get optimally cultured in a timeline that works for you

I haven’t noticed much difference between the various homemade cheese cultures when it comes to aging raw milk cheese, so feel free to use any of the above cheese cultures for making beautiful aged raw milk cheeses.
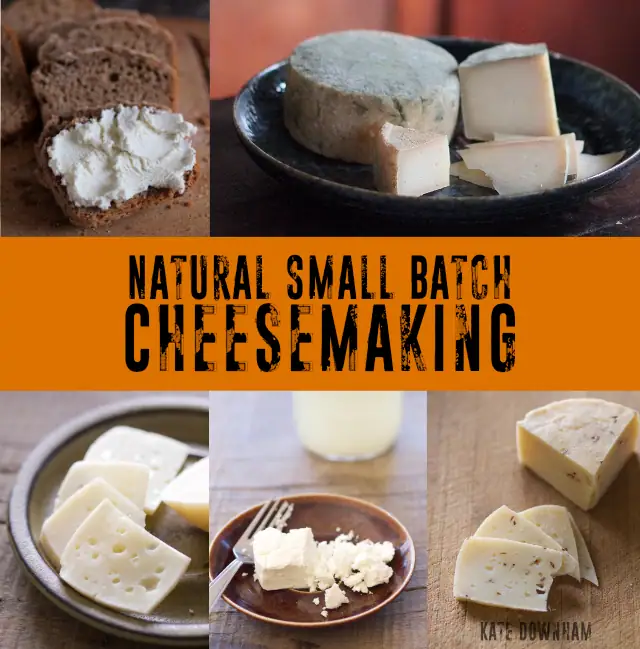
Making your own home dairy products was once an everyday essential skill – and it still is. It builds real resilience, cuts food costs, and gives you truly nourishing food no matter what’s happening in the wider world.
Wherever you are, you can make delicious, natural cheeses in your own kitchen. Start with just one litre (or one quart) of milk and scale up or down as needed. Natural Small Batch Cheesemaking is written for homesteaders, farmers, and anyone who loves real cheese.
• Work with any type of milk and adapt to seasonal conditions
• Make rennet at home
• Keep it budget-friendly: use tools you already own and press cheese without a cheese press
• Understand every step – the “why” as well as the “how”
• Age cheeses successfully on or off the grid
• Turn leftover whey into a homestead resource
• Master easy small-batch recipes for cheeses, plus make your own yoghurt, kefir, sour cream, butter, and ice cream
• Troubleshoot when things don’t go to plan
• Build true dairy self-reliance with flexible, affordable techniques from a successful off-grid cheesemaker
Ready to go deeper and make cheese with confidence?
Grab your copy of Natural Small Batch Cheesemaking today ↓

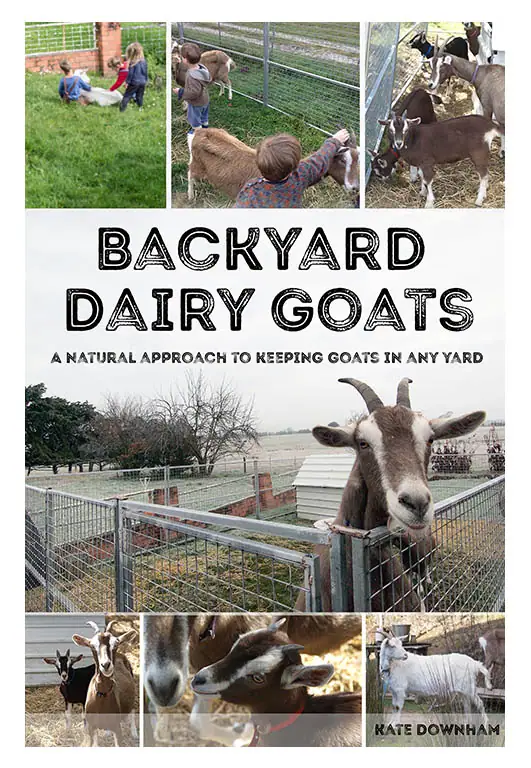
Kate Downham has been growing, preserving, and cooking real food since 2007. She is the author of four books on homestead skills: A Year in an Off-Grid Kitchen, Natural Small Batch Cheesemaking, Backyard Dairy Goats, and Sourdough Without Fail.
Off-grid with her family of nine in the Tasmanian forest, Kate milks her own goats, makes all their cheese, mills all her own grain, and bakes fresh sourdough bread daily.


The Nourishing Hearthfire is reader-supported and mostly ad-free
Leave a Reply