
/
/
The cheese I make the most often doesn’t really have a name. It turns out a different cheese at different times of year, but making it is always the same process. When I’m asked what cheese I’m making, I often just reply “hard cheese”. We are on a homestead, this is a basic staple hard cheese that is easy to make and feeds us, so I’ll call it “homestead hard cheese” for now.
Most cheese recipes have exact timings written down, but in this one I’m going to be inexact, sharing how to make hard cheese as a part of day-to-day life, without stressing or watching the clock. Many cheese recipes also call for a specialist cheese press, but this recipe works really well without a cheese press – all you need to press it is a jar filled with water. You can use any kind of raw milk for this cheese: cows milk, goats milk, or sheeps milk.
You’ll get slightly different results each time you make this, depending on your room temperature, and how long you allow between each stage, but the most important thing about this cheese is to make it in a way that works for your life.

This is a long post, not because making hard cheese is complicated or difficult, but because I want to show you just how flexible this recipe can be with timing, batch sizes, and aging. I am trying to keep this post as short as I can, while still giving you enough detail to confidently make and age your own hard cheeses. In my cheesemaking book I discuss all these things in much greater detail.
This cheese uses some of the methods of Swiss cheeses and other Alpine cheeses to create several cheeses in one:
This is a cheese that doesn’t need a cheese press, the timing is flexible, and because most of the culturing happens during the lengthy pressing time, the actual hands-on making of the cheese is fast. The hands-on cheesemaking tasks can be lumped together into 2 short bursts when you’re in the kitchen doing other things anyway, so that you don’t have to watch the clock worrying about whether it’s time to do the next stage or not when you’re away from the kitchen.

Cheesemaking can be divided into hands-on time and hands-off time. One of the keys to making hard cheese work in real life is to figure out ways to make the hands-on time be time when you’re in the kitchen anyway.
This cheese is typical of many cheese recipes. There’s a brief hands-on time when you are heating the milk to culturing temperature, then the coagulating time is hands-off. The next burst of hands-on time is a bit longer, where you’ll be stirring the cheese and heating it, so you’ll need to be around to keep an eye on it and stir every now and then.
Many cheese recipes involve culturing, and then coagulating, and then stirring. This recipe combines the culturing and coagulating to make a mild, milky cheese, with less clock-watching involved.
If you look at your day, and the times when you are naturally in the kitchen anyway, you might do the first hands-on time for this recipe when you are coming into the kitchen to cook a meal. The second bit of hands-on time could be done either while you are cooking, or after you have eaten (depending on how long the meal takes to cook). If you allow the combined culturing and coagulation to go on for too long, shorten the stirring time. If your coagulating time has been short, take a little longer with stirring.
The key to remember with any kind of fermentation, including cheese, is that you can look at all the steps together as “total fermentation time”, and adjust recipe timings to work with your schedule. The beauty of this particular recipe is that much of the fermentation is happening while the cheese is pressing, which means there’s less time spent standing over a pot, and more time to enjoy eating homemade cheese.
Stainless steel pot with lid
Cheese thermometer
You can make cheese without a thermometer and measure temperature by hand, which I discuss in detail in my cheesemaking book, but for more accurate results, having a dairy thermometer is recommended, especially if you are new to making hard cheese. This is what I use.
Slotted spoon
You can do without this if you want, but it does make adding rennet and stirring curds slightly easier.
Large balloon whisk
This is used for cutting the curds into small pieces. If you don’t have one of these, you can also just use a long kitchen knife and cut the cheese into small cubes, like you would for mozzarella, but I really like using a large whisk because it is really quick and easy to cut the curds up into the small size needed for this cheese recipe.
Cheesecloth
I use the same organic cotton cheesecloth that I use for my other cheeses, but any kind of tightly woven cheesecloth or butter muslin will work for this recipe.
Cheese mould with follower
A cheese mould (also called a cheese form, or cheese basket) is the most specialist piece of gear you will need for making hard cheese, but if taken care of, it will last a long time and reward you with many wheels of delicious hard cheese. You can also use it for feta or halloumi, and depending on the size, you could also use it for camembert, brie, or aged chèvre.
For best results, a cheese mould should be the right size for the cheese you are making (too big, and you’ll make a thin wheel, too small and your curds won’t fit in it). It should be taller than it is wide, so that it can shrink down while it’s pressing whey. Many of the hard cheese moulds for sale online will produce thin wheels that won’t age well, so I’ll go into detail here a bit more about what I use, and what I recommend.
I really like my 800g cheese mould, but it seems to be hard to find one of these now. It measures 12cm (4 3/4”) wide and 13.5cm (5 1/4”) high. I use this for winter goat milk cheese or sheep milk cheese made from as little as 3 litres (3 quarts) of milk, and for summer goat milk cheeses made from between 6 and 10 litres (1 1/2 to 2 1/2 gallons) of milk.
This set of three moulds is a good option for small batch cheeses – the largest of these is slightly bigger than my one and would be suited to around 12 litres (3 gallons) of milk, and the smaller ones would work well for cheeses made from around 4 litres (1 gallon) of milk.
For batches of cheese made from around 20 litres (5 gallons) of milk, you can make your own cheese mould out of a 2 litre yoghurt bucket or any small straight-sided bucket by drilling lots of holes into the base and sides.
A follower is a piece of plastic or wood that sits snugly inside your cheese mould, and then gets pressed down on top of your cheese. You can easily make your own one by cutting down some yoghurt bucket lids, or cutting a piece of wood to the right size.
A jar full of water that will fit in your form, for pressing the cheese
Anything that will fit inside your cheese mould is fine – I use a tomato passata (sauce) jar or a canning jar filled with water.
A large bowl to catch the whey
Whey is precious and can be used to make bonus cheeses, which I’ll discuss below.
1. Milk your animals, strain the milk, and bring it indoors. Don’t bother to cool it down, just bring whatever you will need for cheesemaking into the kitchen.
2. When you’re in the kitchen doing other things, decide on your batch size and get your cheesemaking gear and ingredients ready:
3. Add rennet to your heated and cultured milk
4. Check for coagulation and cut curds

5. Stir and heat curds


6. Drain and press cheese

7. Flip cheese


8. Salt the cheese

9. Now it’s time to age your cheese…
The conditions that you age this cheese in have a huge effect on it.
Ideally, you want the humidity to be quite high and the temperature quite low and stable, and for there to be some airflow.
The ideal temperature range for aging cheese is between 8ºC (46ºF) and 15ºC (59ºF), but you can get away with aging this cheese at up to 20ºC (68ºF). I discuss cheese aging more fully in my book. Here are some options:
The temperature and humidity of cheese ageing will impact the kind of rind and texture you get to your cheese, so if you prefer a Swiss-style cheese with lots of eyes, you can encourage this by aging it a bit warmer (20ºC (68ºF)). If you want less moulds, age with less humidity (but you still definitely need some humidity, otherwise the cheese can dry out too much and crack).
With all cheeses I like to just work with what nature provides: in my climate we have dry summers and damp winters, so I get less mould and more eyes in summer, more mould and less eyes in winter. I make this same recipe year-round, and it tastes like two completely different cheeses depending on the aging temperature and humidity.
In the early stages of cheese aging, you will want to flip and move you cheese to a dry bit of wood every few days. At some stage, if the humidity is high enough, your cheese will start to get moulds. If the moulds seem excessively furry, you can pat them down or rub them off with some cheese cloth, but mostly, if you’ve salted your cheese well and your aging conditions are good, you’ll get nice white and blue moulds, which don’t need much attention.
The size of your cheese will determine how long it takes to age. For a small cheese (between 1 and 2 gallons of milk), it will be ready after around four to six weeks, or you can leave it aging for several months. For a larger cheese, you’ll want to leave it at least 2 months or longer, depending on the size of the cheese.
The longer you leave a cheese aging, the more it dries out, and the more complex its flavour becomes: if you prefer mild cheeses, eat it earlier, if you prefer more complex, parmesan-like cheeses, leave it longer.
Cheese will age more quickly at higher temperatures, slower in colder temperatures. In summer, once your cheese has dried out and aged enough to be tasty and edible, you can wrap it in baking paper, followed by a tight layer of foil, or an airtight container, and move it to the fridge, where it can continue aging more slowly until you’re ready to eat it.
The leftover whey from this cheese is so sweet and mild, and makes the best gjetost and ricotta.
To make ricotta: Heat the whey up on the stove until almost boiling, and the ricotta curds will form on top. Skim them off and eat them as-is, or use them in recipes
To make gjetost: You can either make gjetost from whey with ricotta removed, or with the ricotta left in. Yields are higher with the ricotta left in.
To make gjetost, allow your pot of whey to boil with the lid off until it’s reduced by half or more. Keep boiling, stirring every now and then, until it starts to thicken, then add some milk or cream, and continue to stir. The thicker it gets, the lower the temperature it needs, or the more stirring it needs, just keep heating and stirring until it passes the ‘jam test’ and tastes delicious.
Making gjetost on a conventional gas or electric stove is very energy-intensive, but you can use a slow cooker like Leigh Tate does, or a wood stove or wood heater.
How much milk do I need to make hard cheese?
The amount of milk you’ll need to make hard cheese will depend on the size of your cheese form. For my 800g cheese form, I use anywhere between 3 litres (3 quarts) of winter goat milk or sheep milk and 10 litres of summer goat milk.
The key to making hard cheese from any amount of milk is to know exactly how much rennet and culture to add to your milk, see my post about scaling cheese recipes for more details.
Do I need to sterilise everything with boiling water for making hard cheese?
I do in the early stages of the recipe, just as an extra precaution against unwanted stuff getting into my cheese, but plenty of cheesemakers don’t do this, so it’s completely up to you.
For natural rind cheese aging, the aging happens on wooden surfaces which do not get sterilised, but can be cleaned with salt and water.
Can I make hard cheese with milk that’s been stored in the fridge or freezer?
You can, but the yield will be lower, and the quality not as good.
Can I make hard cheese with milk from the grocery store?
If you can find high quality raw milk, or non-homogenised low-temperature pasteurised milk, then you can make this hard cheese recipe. For best results, make cheese from the milk when it is as fresh as possible.
Do I need a cheese press to make hard cheese?
No. The purpose of pressing a cheese is to get the curds to knit together. If your curds are very dry, like for Cheddar, then you’ll probably want a cheese press, but for most hard cheeses like this one, you can get away with using a jar of water or some other weight to press the cheese.
What do I do if the curd has stuck to the cheesecloth?
Next time make sure that the cheesecloth is cool before you add your curds, and also pour the whey over the cheesecloth to change the acidity of it before you add the curds.
If you’ve let cheesemaking go on for too long, it could also be that it’s become too acidic and you’ve accidentally made cultured mozzarella! You can test for this by taking a small amount of curd, putting it on a hot frying pan, and once heated, seeing if it stretches.
If you want to avoid accidental mozzarella, next time, use your milk earlier in the day (or keep it in a slightly cooler (but not fridge) place), use less culture, and shorten the coagulation and stirring times.
What kind of rennet do I need for making hard cheese?
I recommend using animal rennet, such as Walcoren. If you can’t get animal rennet, microbial rennet is another GMO-free choice that will work for this recipe.

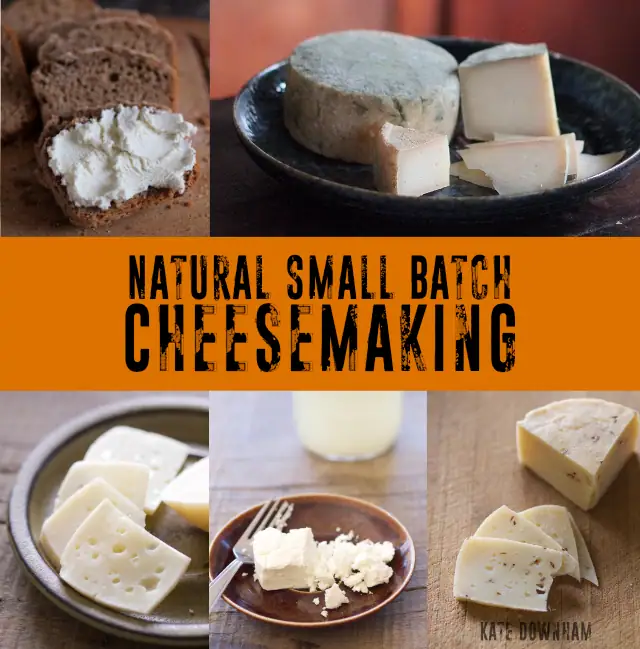
Making your own home dairy products was once an everyday essential skill – and it still is. It builds real resilience, cuts food costs, and gives you truly nourishing food no matter what’s happening in the wider world.
Wherever you are, you can make delicious, natural cheeses in your own kitchen. Start with just one litre (or one quart) of milk and scale up or down as needed. Natural Small Batch Cheesemaking is written for homesteaders, farmers, and anyone who loves real cheese.
• Work with any type of milk and adapt to seasonal conditions
• Make rennet at home
• Keep it budget-friendly: use tools you already own and press cheese without a cheese press
• Understand every step – the “why” as well as the “how”
• Age cheeses successfully on or off the grid
• Turn leftover whey into a homestead resource
• Master easy small-batch recipes for cheeses, plus make your own yoghurt, kefir, sour cream, butter, and ice cream
• Troubleshoot when things don’t go to plan
• Build true dairy self-reliance with flexible, affordable techniques from a successful off-grid cheesemaker
Ready to go deeper and make cheese with confidence?
Grab your copy of Natural Small Batch Cheesemaking today ↓

Join The Nourishing Hearthfire for real food recipes, traditional skills, and monthly inspiration for your hearth and homestead.
We respect your inbox. Unsubscribe anytime.

Kate Downham has been growing, preserving, and cooking real food since 2007. She is the author of four books on homestead skills: A Year in an Off-Grid Kitchen, Natural Small Batch Cheesemaking, Backyard Dairy Goats, and Sourdough Without Fail.
Off-grid with her family of nine in the Tasmanian forest, Kate milks her own goats, makes all their cheese, mills all her own grain, and bakes fresh sourdough bread daily.






The Nourishing Hearthfire is reader-supported and mostly ad-free
Leave a Reply