The last three times that I’ve finished writing a book, I’ve been really motivated towards my writing my next one, sometimes concurrently putting the finishing touches on the last book while excitedly mapping out and researching the next one.
This time it’s a bit different.
I have some possible ideas for new books, but nothing that is really shouting out to me as something I need to work on right away. At the same time, I feel like I want to share more online for free about sourdough.
I’ve created a free email list. On Friday every week, from now until October, I’ll be to be sending out a short “Floury Friday” email looking at various aspects of sourdough. This is your chance to deepen your knowledge of sourdough baking, one bite-sized email at a time. There’s going to be recipes, explanations of sourdough techniques, answers to obscure questions, and more.
If there’s anything sourdough-related that you’d like to learn about, please leave a comment here and I’ll add it to my list of post ideas.
As a bonus, I’m giving away a copy of my sourdough discard recipes eBook to everyone that joins the mailing list. To join in, simply visit the signup page here: https://katedownham.kit.com/779eefc56e
I’ve been getting some questions about the phytic acid in whole grains and sourdough, and thought it would be a good idea to go into detail about how this works, and why you don’t need to be alarmed about it.
Along with a bunch of good stuff that is not in refined flours, phytic acid is present in whole grains. If phytic acid is not broken down by the phytase enzyme by soaking, sprouting, or fermenting, it can bind to the iron, zinc, magnesium, and calcium in the grain, making it so these nutrients in the grain are not absorbed by your body when you eat the grain.
During sourdough fermentation, the enzyme phytase is activated. Phytase breaks down phytic acid. As sourdough ferments and gets more acidic, phytase is more active. Phytase converts phytic acid into phosphorus, making it beneficial for bone health.
Phytic acid also has anti-inflammatory properties, and helps to stabilise blood sugar.
A longer sourdough fermentation will reduce the phytic acid by up to 90%, compared to less than 30% for yeast breads, and less than 50% for soaking whole grains. Sprouting will reduce phytic acid in similar amounts to sourdough fermentation.
In A Year in an Off-Grid Kitchen I wrote about my approach to this issue: if you are relying on a lot of grains and not eating much in the way of mineral-rich foods such as bone broth, red meat, and dairy, it’s probably best to always soak, sprout, or ferment your grains and legumes. If you are eating plenty of nutrient-dense animal foods, then you can get away with baking unsoaked whole grain cookies, muffins, and other treats every now and then.
I have not bought flour for over seven years. I also don’t have the setup to reliably dehydrate sprouted grains, so if we want to make a favourite recipe that isn’t soaked or fermented, we just make it from the home-milled flour, enjoy it, and that is that.
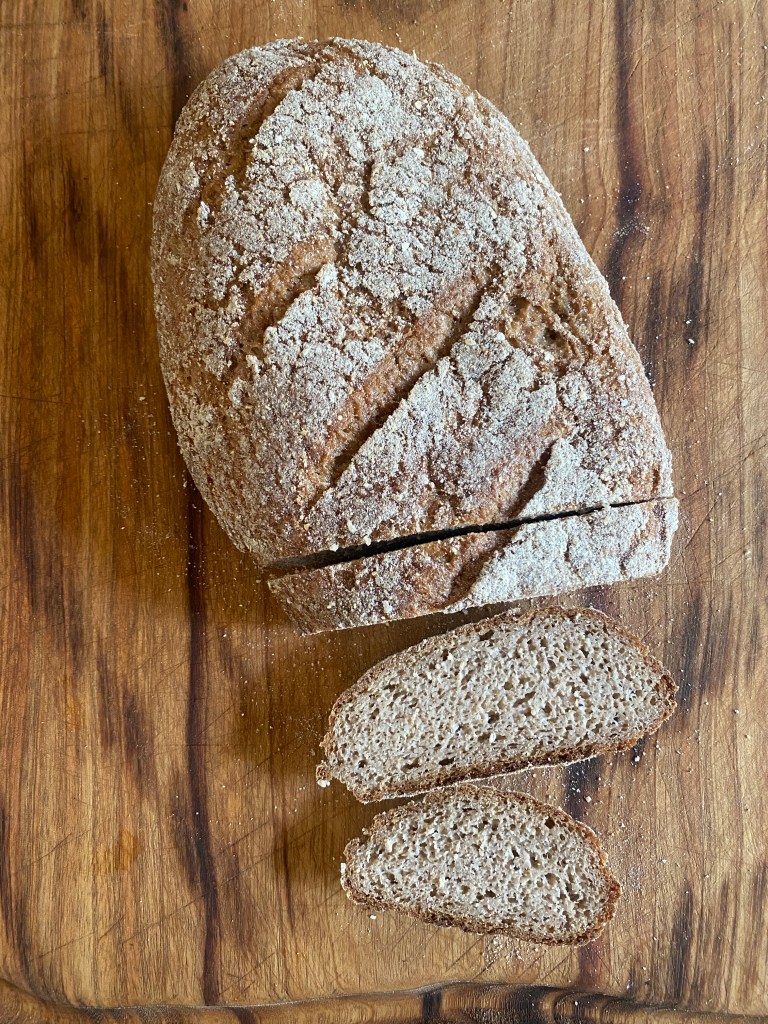
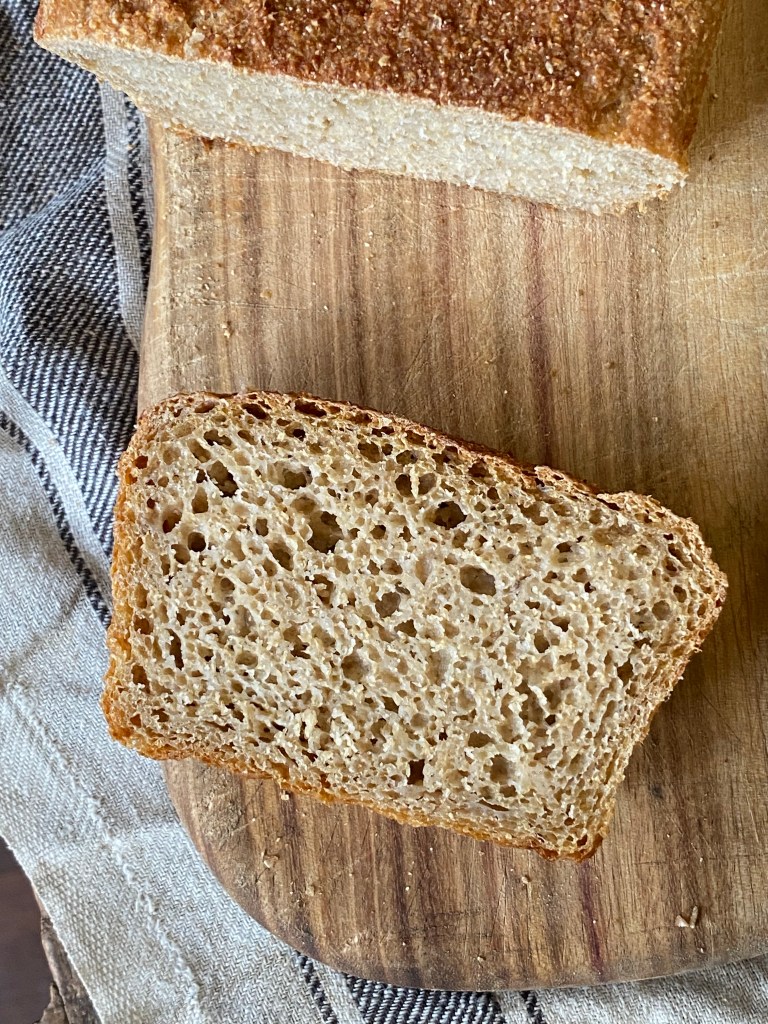
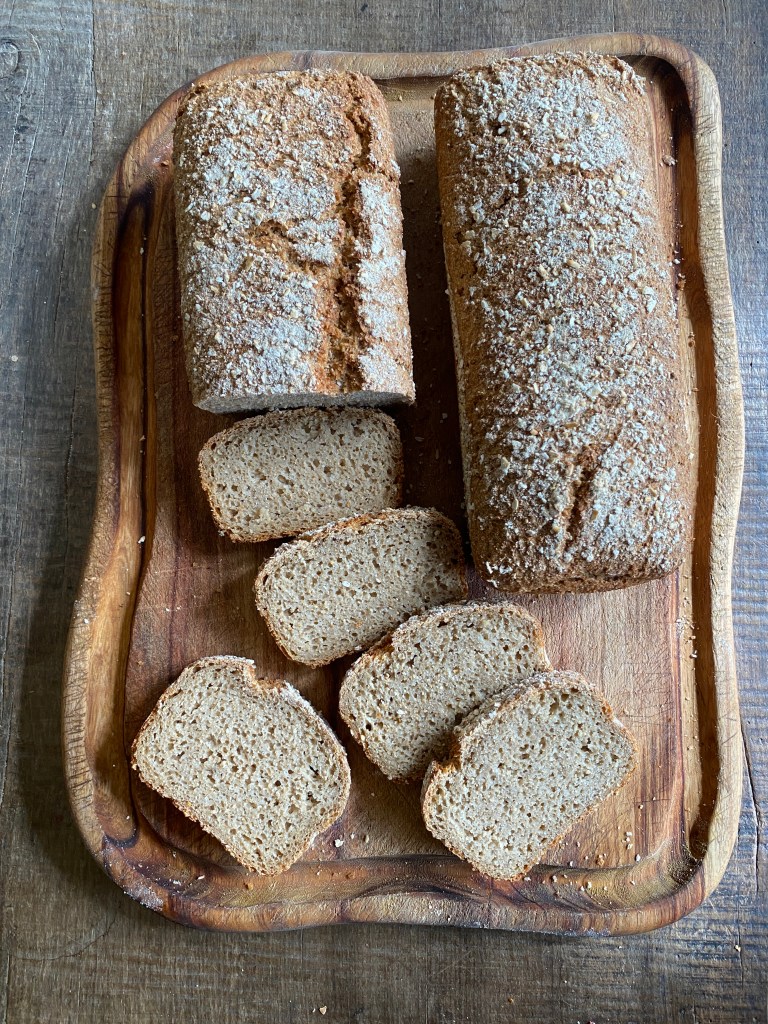
For our bread, which we eat every day, we make 100% whole grain sourdough.
How to reduce phytic acid as much as possible:
• Slow down your fermentation. Reduce the temperature or the amount of starter in a recipe, to make fermentation take longer.
• Cold proofing (also called retarding) is probably the most reliable way to reduce phytic acid, because the phytase enzyme is more active in the acidic environment of fermented dough. To cold proof, simply follow your recipe up until it’s time to proof the dough, then move it to a place below 8ºC (46ºF) for up to 24 hours. Make sure to cover it with something airtight if you’re proofing it in a fridge.
• You can also retard the dough during bulk fermentation. This may not be quite as effective as cold proofing, but it will still make a big difference, and can be a great way to make bread if you want to mix the dough at night and then have dough that’s ready to bake any time the next day.
• Using larger amounts of sourdough pre-ferment will start the dough off more acidic, so although the bulk fermentation time is faster than it is for a loaf with only a tiny amount of starter, the increased acidity at the start of fermentation means that phytase is more active from the very start.
• Add some rye flour. Rye is high in phytase.
• Just bake sourdough! I use pre-ferments, cold proofing, and cold fermentation at different times of the year, in order to make recipe timings that work with my schedule in seasonal conditions.
Why not just eat white flour instead?
The phytic acid in the whole grains is binding to the minerals in the whole grains. These minerals aren’t present in white flour, so you’re not getting any nutritional benefit by using white flour instead of whole grains.
Whole grains can be stored for many years, whereas flour of any sort will not keep long. If you want to grow your own grains in the future, the grains are not going to transform into white flour on their own, so it’s good to get used to baking with 100% whole grain flours now.
In some ways I’m grateful for the haphazard way I started with sourdough. I had previously been baking with yeast and had never found any recipes that really suited me, so I’d figured out my own. Switching over to sourdough, I took the same approach. I made some terrible loaves to begin with, but eventually figured out how to tinker with the starter amount, hydration, timing, temperature, and technique to produce breads with better flavour and texture.
If instead I’d followed finicky instructions from the internet or a book, maybe I would have been put off the whole idea.
I think a lot of books are written from a specialist perspective: someone that has focused on just one thing, written about it in isolation, without providing any guidance for those who do not have the same perfect conditions. I like to think of my book as being written by a generalist: Yes, I am making all my family’s bread, it’s an important part of how we eat and I love it, but I am also making cheese, fermenting, canning, preserving, gardening, caring for family and animals, building infrastructure, and all the other tasks that make for a diverse homestead.
Sourdough does not have to be difficult. You do not need to follow someone else’s schedule. By learning to understand why different techniques are done, you can decide for yourself whether it is really worthwhile to make a levain, autolyse, knead, stretch and fold, preshape, score, or any other aspect of sourdough.
By learning to really understand fermentation, and how the balancing act of timing, temperature, and prefermented flour percentage works, you can confidently adjust recipes to suit your lifestyle and your seasonal conditions.
Sourdough Without Fail has over 75 easy and adaptable sourdough recipes, along with detailed information to help the home baker really understand sourdough and learn how to tinker with recipes to get different results.
Not just bread
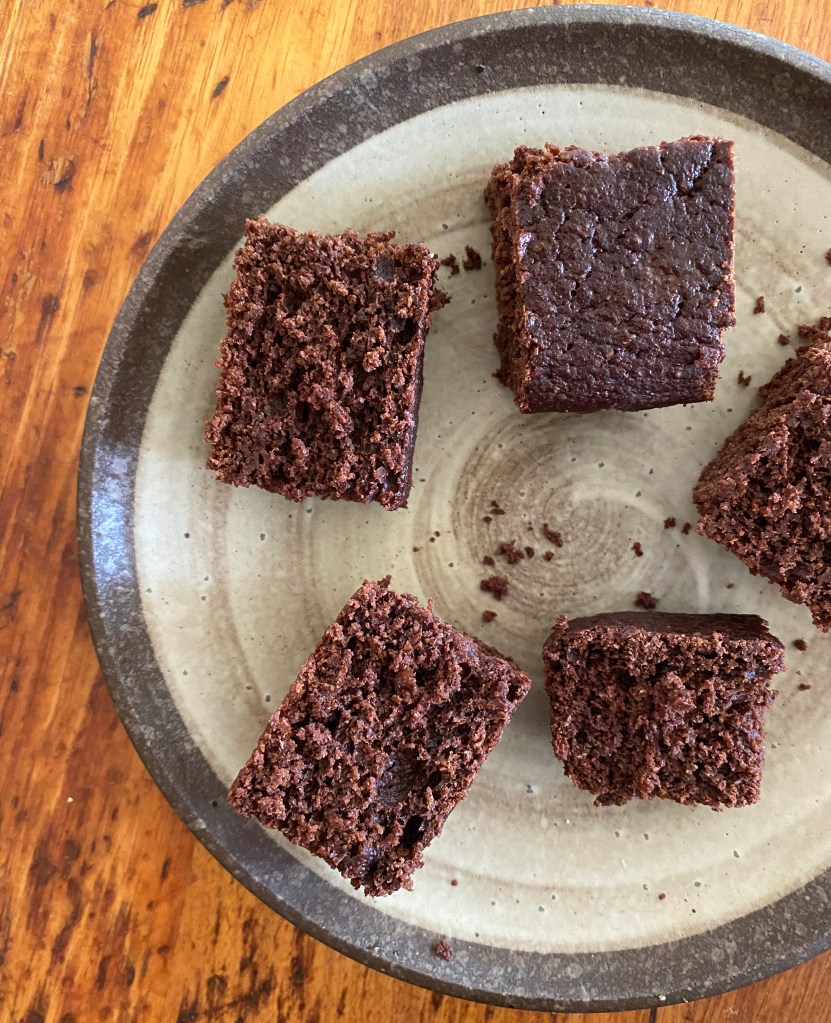
Sourdough chocolate cake
Sourdough is so much more than bread. Sourdough discard is a resource that I actually make on purpose, so that I can make the chocolate cake, apple pie, soda bread, pancakes, cookies, pie crust, and other discard recipes that I share in the book.
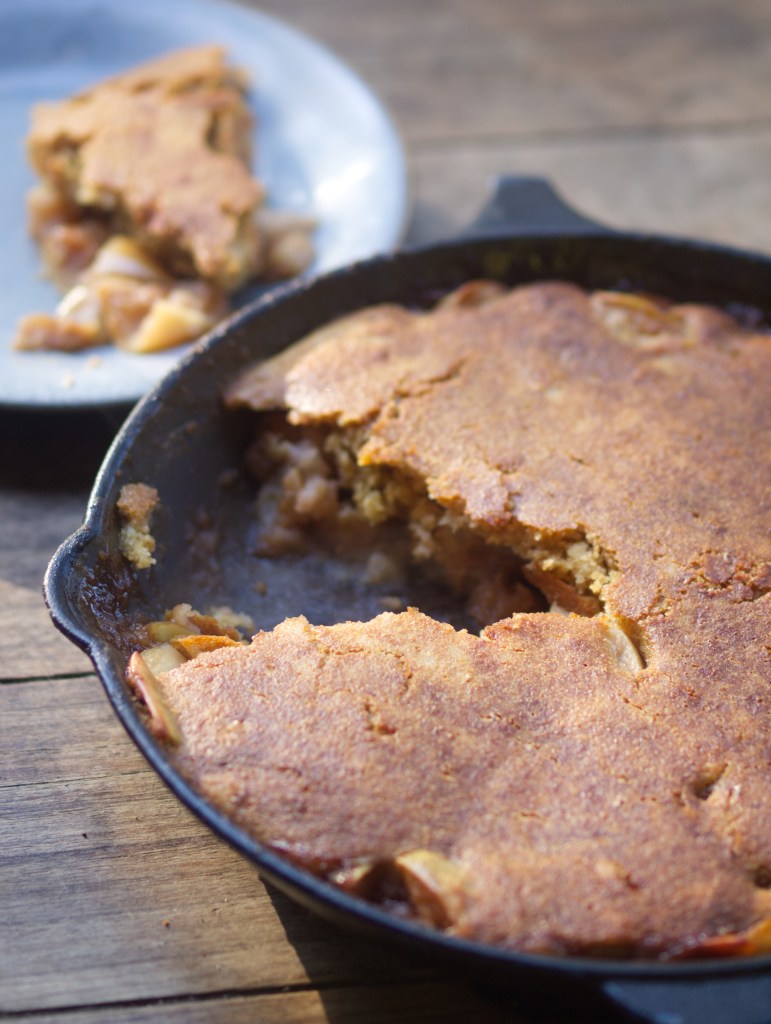
Sourdough skillet apple pie
With sourdough you can make great pizza from wheat, spelt, einkorn, emmer, Khorasan, or gluten-free flours, and I will show you how.
Sourdough pizza with olives and mozzarella
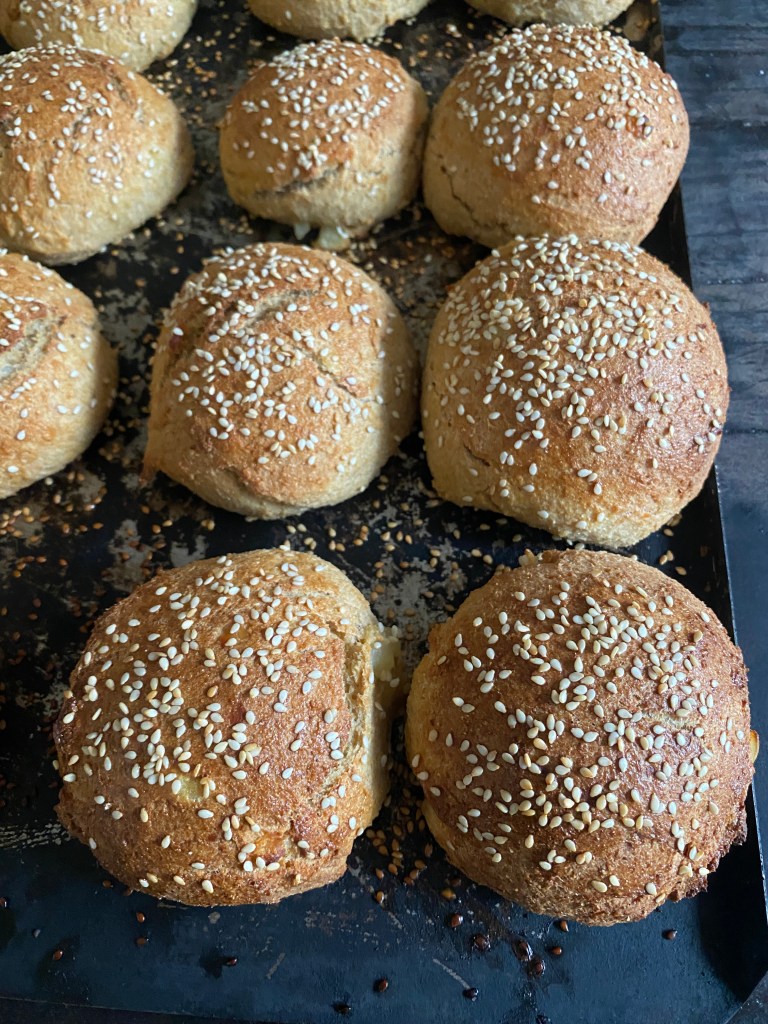
After years of making terrible burger buns, I’ve created two excellent roll recipes that will work for burgers, sandwiches, and more.
Best ever burger buns
Taking my fuss-free, busy homesteader’s approach to baking one step further, I’ve developed a recipe for Danish pastry that is more adaptable and down-to-earth than other Danish pastry recipes. I also share the most delicious doughnut recipe, and several recipes for different sweet buns, fruit breads, and more. All of these are 100% sourdough leavened, with 100% real food ingredients.
Sourdough jam doughuts with homemade cherry jam
I’ve created a chapter of gluten-free breads from 100% natural whole food ingredients, with something for everyone, and also tested gluten-free versions of the sourdough discard recipes, so that you can make gluten-free pancakes, cookies, cakes, pies, and more.
Gluten-free sourdough bread made from oats, rice, and buckwheat
Sourdough without fail!
If you’ve tried sourdough in the past (or if you’ve wanted to) and it hasn’t worked out, don’t despair. This book will help you to make your own sourdough bread, pizza, pastries, and more. Some of the best feedback I’ve had has been from recipe testers, including the quote from Gina that I’ll post below. If your past sourdough experiences have been like Gina’s, I hope you will also look forward to baking the recipes in my new book.
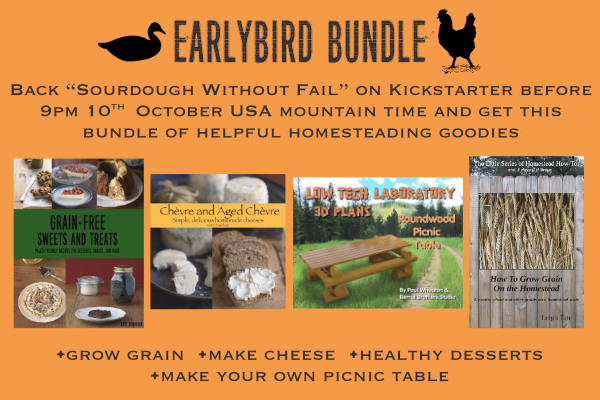
If you’re interested in learning more, please feel free to visit the Kickstarter page about my book. I’ve provided a discounted price and lot of bonuses that are only available while the Kickstarter is live for the next month. If you back the Kickstarter in the first couple of days you’ll also get access to this extra earlybird bundle of plans and ebooks.
Making bread The time involved in making bread can be divided into hands-on time and hands-off time.
Some bakers might use a lot of hands-on time, kneading a lot to develop strength in the dough. Other bakers might use a no-knead approach and use more hands-off time, with just a couple of minutes of hands-on time.
You don’t need to knead your bread at all. The purpose of kneading is to strengthen the gluten. The purpose of having strong gluten is to trap the gasses that add more flavour to you bread, and to make the bread light in texture. By handling the processes of strengthening and shaping bread a bit differently, it’s possible to have light, open, flavoursome bread with minimal hands-on time. Here is a rough guide to how I do this:
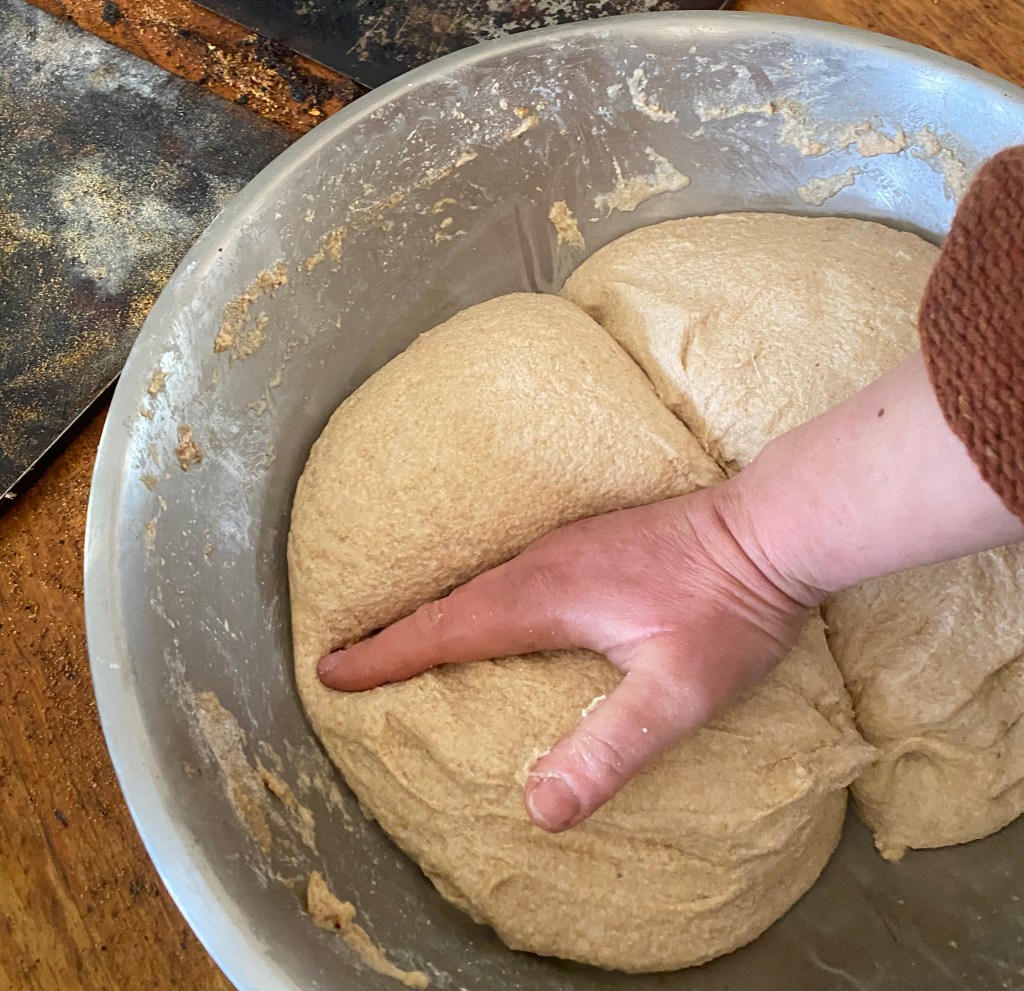
Mix until just combined, then rest for at least fifteen minutes. Mix until no traces of flour remain, not any longer. When working with 100% whole grain flours it’s important not to over-mix, as the tiny pieces of bran in the flour can cut into the gluten and weaken it.
Stretch and fold, or squash and fold. Allow your dough to sit for around 20 minutes, then do a series of stretch and folds by lifting up half the dough, folding it over the other half, rotating the bowl a quarter turn, then repeating the stretching, folding, and rotating, until all four sides have been stretched and folded. Stop this if the dough starts to tear at any point.
Optionally repeat the resting (rest for 15 to 30 minutes), stretching, and folding up to three more times if you want to.
It’s really not the end of the world if you don’t have time to do this (or if you forget). You’ll still get good bread without it.
Ferment Leave your dough alone until it’s fermented. If your room is warm enough, it will puff up. If your room is cold, it may not rise much.
The amount of time your dough will take to ferment will depend on how much starter is in the dough, the water temperature, and the room temperature. I adjust the amount of starter and the water temperature to work with whatever room temperature conditions I am facing at different times of the year, as well as adjusting these things to suit my schedule: sometimes I need a bread that ferments rapidly, and make a dough where 50% or more of the flour is prefermented, other times I need a dough that ferments more slowly, and use a smaller amount of starter.
Be gentle when dividing and shaping If you want nice airy bread, you don’t want to destroy all those bubbles that have been created during fermentation. Don’t pick pieces off one bit of dough to add to the other or try to get it to an exact weight on a scale, just divide into what looks about right.
Shaping Some doughs don’t need to be shaped at all. If you are really busy and want bread, you can simply just dump your dough into a greased loaf tin (or into a floured towel-lined bowl) and you’ll still get bread. Maybe not as neat as if you’d shaped it properly, but it will still feed you, and will still taste good.
If you want to shape the dough, it helps to observe and to feel what the dough is like. If you haven’t done many stretch and folds earlier, the dough might be a bit weak, and can benefit from preshaping. To preshape, simply fold the dough in half, to form a semicircle, and then fold that in half, to form a quarter circle. Allow it to rest for a few minutes if you like, and then get on to the final shaping.
I do most of my shaping in midair, and it takes a few seconds. Shaping can also be done quickly on a bench. Shaping a boule is simply a matter of imagining an invisible dot on one side of the ball of dough, and tensioning the outside of the dough towards that dot. When the dough looks tight and tense, stop shaping.
For a pan loaf or bâtard, sometimes I am folding it up in thirds like a letter or rolling it like a cinnamon bun, other times I am shaping it as if it were a boule, but instead of an invisible dot, it’s an invisible line. Shaping bread has become instinct for me, and it only takes a few seconds per loaf.
Proofing Proofing can happen at any temperature. Your bread will proof quickly and rise up in warm room temperatures, or you can delay the baking by moving your bread to a cooler part of the house, or proof it in a fridge for up to 24 hours.
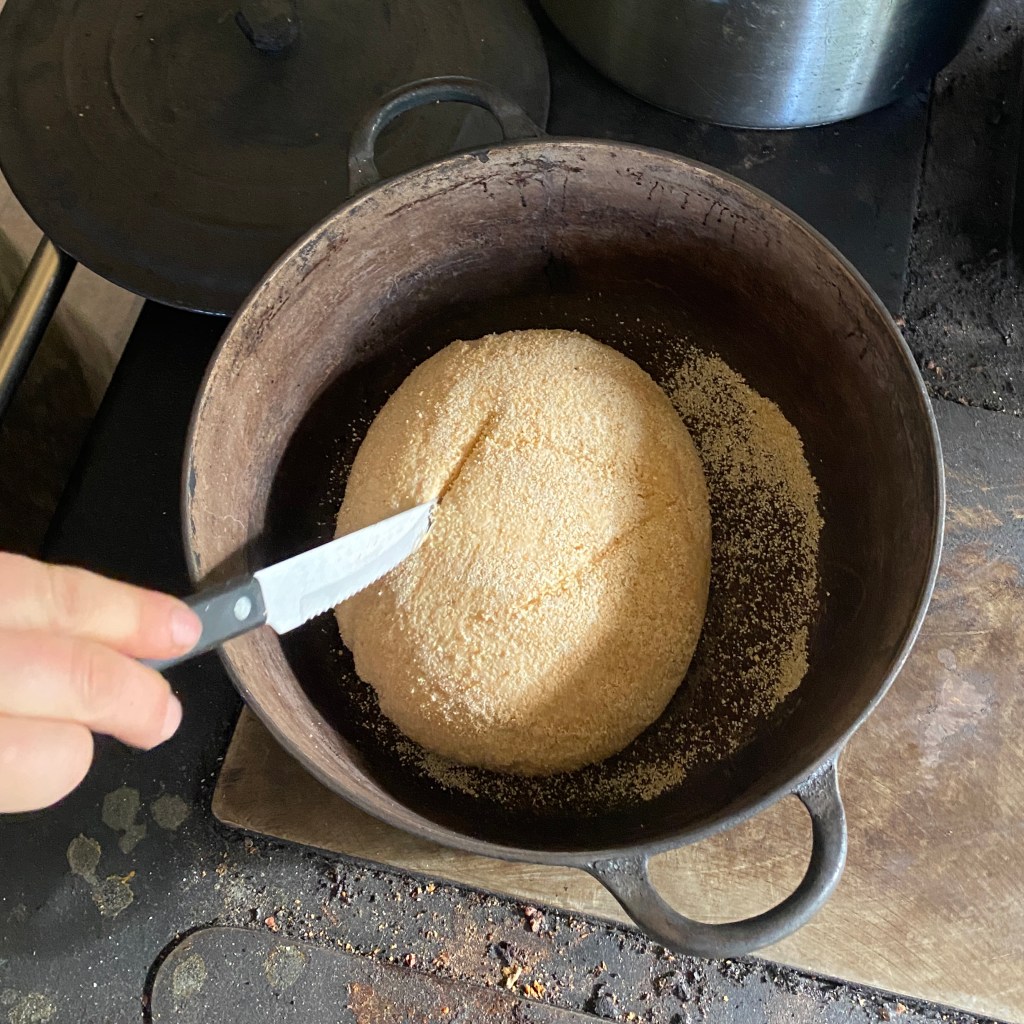
Scoring or not scoring If you’re baking with a lot of white flour, or if your wholegrain loaf hasn’t risen much in proofing, you might want to quickly slash the top of it with a knife a couple of times before you bake it. I use a serrated steak knife to do this, but most of the time I usually skip this step.
Baking Baking itself is simply a matter of putting the bread in a preheated oven and waiting.
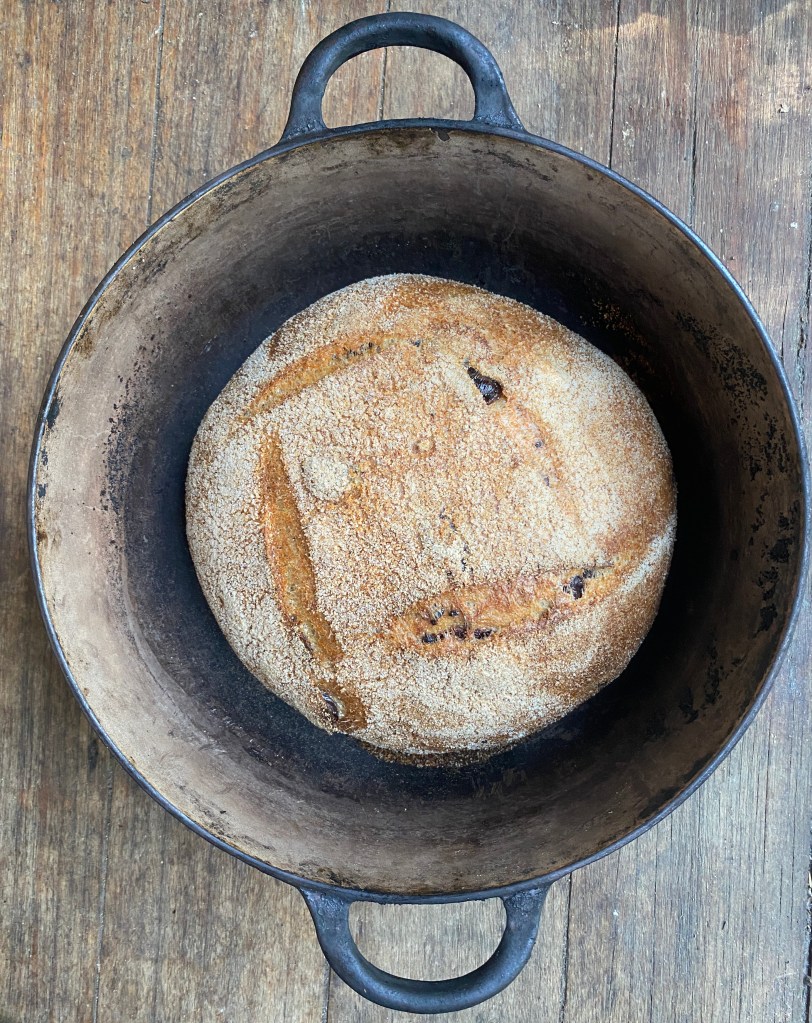
If you’re using the dutch oven method, you’ll want to remove the lid half an hour into baking, but other than that quick step, baking is another hands-off part of making bread.
In conclusion You can make great bread with only a couple of minutes of hands-on time per loaf. There’s a bunch of steps along the way that you can do (or that you can skip), but for good baking with minimal time, it helps to take a step back and think “what do I actually want to do? And what kind of baking will work in my life?” There are a lot of finicky instructions around about creating special levains, autolyse, pretty score marks, and more, but all these instructions do no good if you are too busy to follow them. Think about your schedule, and when it would suit you to do each real stage of baking (mixing, strengthening, shaping, baking), and by tinkering with the amount of starter, water temperature, and room temperature, you will be able to create breads that work in your life.
These past couple of years I’ve been working on a book of sourdough recipes to help more busy people make all their own bread, pizza, and pastries. Along with the recipes, I’ll be showing how to adjust recipes to get them to work for different schedules and seasons, and strategies for baking bread even at the very busiest of times. The book will be launching on Kickstarter in a few days time. I will share a bit more about it in my next post.
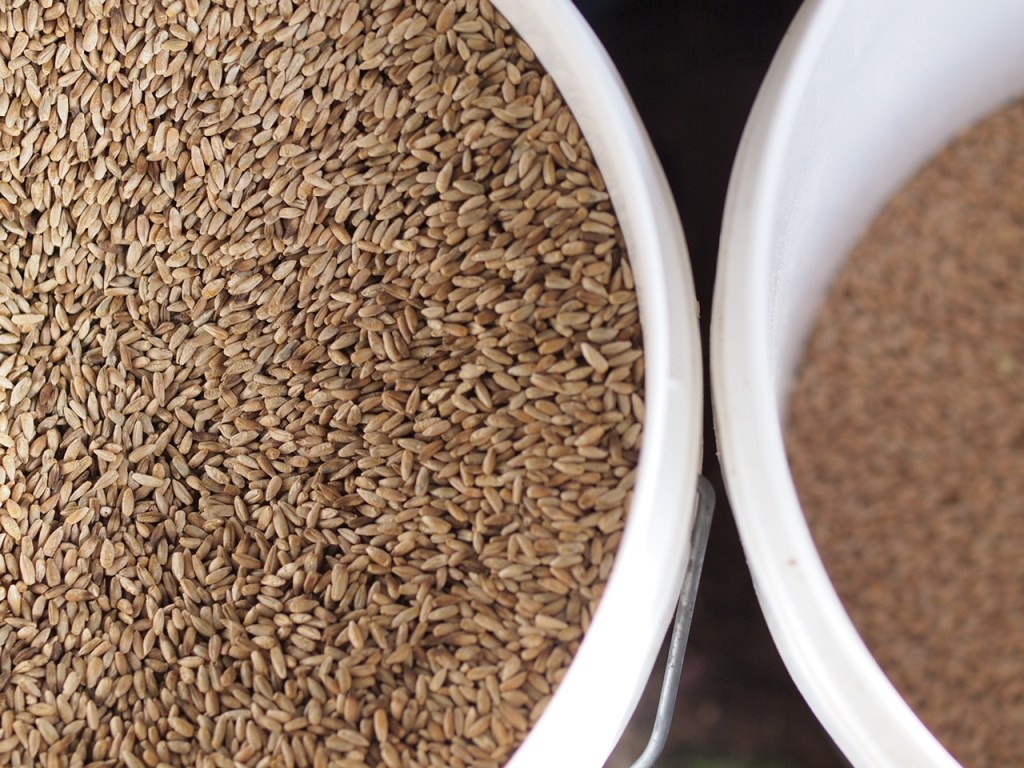
Be adaptable Don’t get fixated on baking with this or that heritage grain. Look at which grains and flours are most affordable where you live, and work with that. Wheat gets a lot of negative attention, but wheat can be a nourishing food for many people if it is organic and made into sourdough bread.
Buy in bulk Buying directly from farmers and distributors in large bags can bring a lot of savings. Buying a 20 to 25kg or 50 pound bag is usually the best value. Whole unmilled grain will keep for many years in buckets or barrels, and whole grain flours can keep for several weeks if they are in a cool part of the house.
A grain mill can make sense if you bake a lot. I save roughly $2 per kilo (or $1 per pound) by milling my own grain. In one year of milling enough flour for my family, I am saving enough money to nearly pay for two grain mills! Many grain mills come with a 12 year warranty, and in 12 years of milling even a small household is likely have saved enough in flour costs to justify the grain mill. Freshly milled flour is more nutritious and has more flavour than old flour too.
My grain mill. A simple motor turns one stone against another and grinds grains into flour.
Look at what homemade bread can replace The most obvious thing to replace is store-bought bread: replacing this with homemade will save money and bring better nutrition, but we can go beyond that and find ways to make other meals cheaper by using homemade bread instead of more expensive foods.
Once upon a time I used to bake a lot of sweet foods and treats, at that time I used to also wonder where all our money disappeared to. These days I bake a lot of bread, we eat a lot of bread, and I might make a dessert or sweet treat every week or two. Bread served with butter has better nutritional value than sweet foods, and is a lot cheaper and faster to make. Toast with some jam or honey can be enough to satisfy a sweet tooth, and works out to be a lot cheaper than baking a cake. The same goes for breakfast cereals and snack foods, which can be very expensive to buy: we just don’t buy or make these things, but we always have homemade bread on hand.
Make your staple bread recipes be lean breads I bake three or four loaves a day of simple bread that is made from just flour, water, sourdough starter, and salt. If I were instead to make sandwich bread, brioche, or other breads enriched with fat, sweeteners or eggs every day, the cost of my bread would increase massively. The lean breads I make are wonderfully tasty, can still be used for sandwiches, and are nutritious, affordable, and sugar-free.
Don’t rush out and buy all the gear that people say you need to buy A bowl and a tea towel works just as well as an expensive bread proofing basket. Loaf tin breads can be just as tasty as dutch oven breads. You can still produce good bread without a baking stone or a way to steam the oven. Start with what you have, figure out what you like to bake, and slowly get the gear over time to bake in the way that best suits you.
You can get started making bread with nothing more than a mixing bowl and a loaf pan.
Sourdough is cheaper than yeast, and it doesn’t have to taste sour Yeast is something that needs to be purchased again and again, but your own sourdough starter can be kept alive at home, at no more cost than a bit of flour. There are many techniques and recipes around, some are designed to get a lot of sour flavour, others designed to have less: experiment and see which recipes you like the taste of. There are ways of managing a sourdough starter that create no waste, so that you can completely remove any yeast costs from your food budget.
Bread can be the cornerstone of your kitchen: toast for breakfast, bread on the side of a meal, a slice of bread served with soup or stew to make the meal more filling. There are ways to make great bread on a budget, and ways to make bread in a busy life. In a few days time I’ll be sharing my strategy of making great sourdough bread with minimal hands-on time.
If you eat bread, the quality of bread you are putting on the table could be contributing to your health, or slowly making you sick. The best way to have healthy bread on the table is to make it yourself.
It can be overwhelming to get started, but it doesn’t have to be.
Many years ago when my husband and I were working on a farm on the other side of the world, I made a list of things I wanted to start doing when we got back home. Making bread was at the top of the list. When we got back, I borrowed a book from the library, followed the instructions, and made my own bread. It wasn’t as healthy or as tasty as the bread I make now, but it was homemade bread, and it changed my life.
Before that time, needing to get bread was what made us go shopping twice a week. We didn’t eat soy, and at that time there was only one kind of bread that didn’t have soy in it. If anything happened to that bakery’s deliveries, if other people bought it before we could, or if the bakery closed up for a week to go on holiday, we were out of bread. By taking charge of one small aspect of our food supply, it made us more resilient to emergencies and supply disruptions, and meant that I had more time at home.
In our home, bread has always been an important part of how we eat. It makes an easy breakfast or light meal, a quick snack, and something extra to fill in around the corners of lunch or dinner. By making our own bread, we have healthy and tasty bread, in abundance, made at home for less than it costs to buy bread.
There is a rhythm to making bread that can be nourishing and grounding in a busy life. Every night I feed the starter or begin a dough, every day I finish the dough, shape it, leave it to rise, and then bake it. For me it’s not one extra thing to have to remember in a busy day, it’s an essential part of life.
Even if I didn’t bake every day, I would still enjoy the process of mixing ingredients, developing the dough, watching it ferment, smelling and feeling it to see if it’s ready, and baking it. These processes don’t actually take up much time, and can fit in here and there among other kitchen tasks. It is an amazing feeling to pull a loaf out of the oven, smell the delicious smell of freshly baked bread, see how it’s sprung up in the oven and developed a golden-brown crust, and know that this is our bread, and that I’m making something this delicious from scratch.
5 reasons to make your own bread
Frugality Making bread at home is far cheaper than buying it. The savings don’t stop at bread, there are many other recipes you can make at home with sourdough, from pizza, to flatbreads, burger buns, pancakes, pastries, chocolate cake, soda bread, pies, and more.
Health When you make your own bread, you know exactly what goes into it.
Taste You can create the best tasting bread at home. By making bread at home, you can enjoy the very freshest bread, the best ever pizzas, cinnamon buns, and other treats.
Lifestyle The more food you can produce at home, the more you can stay at home doing the things that you like to do. The process of making sourdough bread can also be relaxing in a busy lifestyle.
Resilience In the time of supply disruptions and panic buying in 2020, bread was one of the first things to be emptied from the shelves. By making our own bread, this wasn’t something we had to worry about. Making bread is something anyone can do towards self reliance.
Around two years ago I wrote a big update about what we were up to, and our homesteading plans for the next year or so. There have been so many changes and reflections since then, so here is an update some changes here, and on our progress with self reliance and growing food on old logging land.
Changes
New baby Born in April 2024. She is beautiful and healthy and loves homemade cheese.
No hay, no cow Every year in my memory, hay has been easy to find, and relatively cheap, so I had figured we could rely on bought hay to feed a cow while we worked on transforming parts of our land into pasture. With dry weather in the springtime, and possibly also from the media constantly bombarding everyone talking about how dry it is going to be here for the next few years, hay was extremely scarce, and I’d never seen anything like this before. If hay could be found, $20 for a square bale was considered cheap, $30 being the usual price, and round bales were extremely hard to find. Even lucerne, which is irrigated and has never changed in price much in the past is was selling for $45 a square bale.
I am glad that we had the sense to attempt to secure a years’ supply of hay before we found a cow. Not getting a cow was a bit of a setback, but nowhere near as bad as it would have been if we had a cow and found that we couldn’t feed her.
The hay supply problems have really brought home the importance of being self reliant in animal feed. I was reading the “5 Acres and a Dream” book a while ago and admire that animal feed self sufficiency has always been one of their top priorities. Animal feed is often taken for granted, but in times like these, it reminds me to never take anything for granted. Animal feed self reliance has become a bigger priority for us.
I’ve stopped selling food at markets I liked the idea of helping to create a local food system and a cash-only business, but found it was interfering with actual self sufficiency, and it was annoying my family.
I can’t drive, so to get to the larger market, I would have to get all the children up, and my husband would drive all of us to the market, and they would sit in the van playing board games and reading while I had my stall. The market organisers started getting fussy about wanting all stallholders to stay until the official end of the market, even if my stall had sold out, or if the market was really slow, making it a much longer day that it could have been. In winter the goats were nowhere to be found before daylight and wouldn’t come when they were called, and sometimes I was also running late, so I was having to go to the market without milking, and then do the milking when we got back from the market at 2pm. The goat’s milk supply decreased.
My heart was not in it, and I started feeling happy whenever I had a reasonable excuse to not be at the market – one month I was sick, the next month there was a problem with one of our dogs, the month after something else, and the way I was feeling about going to that market was starting to feel like the way I felt when I used to have a 9-5 job. I enjoy baking, but I don’t enjoy standing around for 5 hours dealing with customers.
The smaller market closer to home I kept going to for a while longer, but felt frustrated a lot of the time because most of the people going to it were not going there to support a localised economy, but going to it as a social event while they continued relying on food from the supermarket. In the end I decided I’d rather be homesteading, so I decided to stop going to that market as well.
Producing enough sauerkraut and kimchi for the market also was making me less appreciative of the vegetables that we were growing ourselves: when I am making larger amounts of ferments, what we were producing in the garden seemed like a drop in the ocean compared to the amount of vegetables I needed to bring in for the fermenting business, and when there are bulk carrots and cabbages in the larder left over from the kimchi making, it’s sensible to eat those first, before they go bad, before we harvest the roots growing in the garden, so the roots in the garden kept getting left until later and not appreciated as much as they should have been.
The whole market experience reminded me of an episode of “The Good Life” when Tom discovers that he’s actually really good at pottery, and has a bunch of people wanting to buy his crafts, in the end, he decides his heart is in self sufficiency, and that the pottery business was sidetracking him from where he really wanted to be.
Changes of plans bringing inspiration
After experiencing the issues with the hay and the market stall, I began to see more where my heart really is. Sometimes it might be important to remind myself of what I don’t want to be doing, before I can understand once again where I really want to be. Self sufficiency has been what propelled me to start this life, and the thought of creating a self-sustaining system that feeds us, feeds our animals, and grows the soil is what sends shivers of excitement down my spine.
With the market stuff, I lost sight of this focus for a short time. Getting debt-free, and having a cash income that doesn’t rely on the internet are both good goals to have, and can help towards the goal of self sufficiency, but where my heart really is, is in not relying on money at all, and providing for our own needs, and that is how I want to live my life.
Self sufficiency priorities for the year ahead
Potatoes For many years here I grew all our own potatoes, and they were a big staple food for my family. In 2023, when my husband started getting inflammation reactions to potatoes, they became less of a priority, I focused on other crops, did not give the potatoes the attention they deserved, and for the first year in many we didn’t not grow all the potatoes that we needed. Last year, I started with new seed potatoes, and we’ve had all the potatoes we need, plus some to use for this year’s seed potatoes
I planted them a bit close together last time I think, with around 2 feet between rows it doesn’t give much space for hilling them up. This year I’ll either plant in rows spaced 3 feet apart, or put a double row down the middle of our 5 feet wide garden beds.
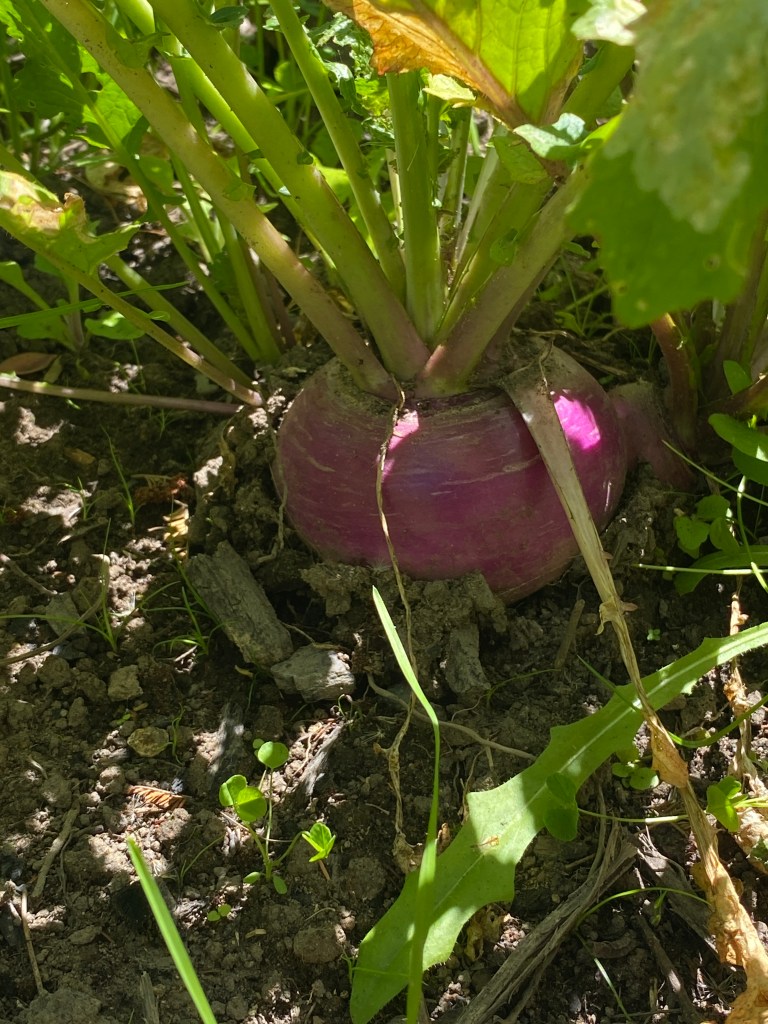
Fermenting vegetables Turnips and daikon radish are easily-grown fermenting crops, and we are growing lots of these. I am getting better at growing carrots every year too. Cabbages I am not going to bother with much this year. I’ve recently heard that zucchini put through a mandolin can be used for kimchi, so this is something I’m keen on trying too.
Vegetables in general Vegetables are a more efficient use of a small amount of land when compared to grains. I still grow grains in the garden, but mainly for the purpose creating organic matter to feed the soil.
Animals We’ve slowly been replacing our hybrid brown laying hens with Australorps and mongrels, with the hope of having more broody hens and chicks, and hens that thrive on homemade feed. Last year none of them went broody, so we are planning to get some sikie bantam hens to hatch the eggs.
We’ve started keeping pigs every year again. For a while we had a breeding sow and a young boar, but that didn’t work out, so for now we will rely on buying piglets from other homesteaders. Maybe we will have things better set up later on and will be able to keep some breeding pigs in future, but it’s not something I want to do again unless we’ve got a better rotational system set up and are growing more of their food.
Dairy self sufficiency was going really well last year but has recently suffered a big setback that I don’t want to go into detail about. This is always a big priority for us so we will find a way through it, and I’ll go more into detail about this when things are looking more settled than they are now.
A new system in the top garden Two years ago I was working with 75cm (30”) beds, with each section of the garden containing eight of these beds, which were part of a four year rotation. While this was good for confusing pests and having more diversity in the garden, it was easy for weeds to creep in from the paths, harder to delegate garden work, harder to harvest, and harder to irrigate where it was needed.
Last year I observed the patterns of the irrigation sprinklers and divided the garden up into twelve ‘fields’ made up of 3 150cm (60”) by 5 to 6 metre (19’) long beds, with paths in between. Each of these fields can be irrigated by one sprinkler. The paths are sown to clover, which can be used to feed the garden beds, and provide living roots in the soil year-round for mycorrhizal fungi, while keeping weed pressure down.
If sheep sorrel and other weeds continue being a problem, the new field system can be scratched over by chickens, one field at a time, and we can also focus our weeding efforts on one area at a time.
Although not quite as diverse as the old system, this new system is still not a monoculture. It’s done on a tiny scale, I grow companion plants with my main crops, and I have perennials around the edges of the garden, along with the clover on the paths. It’s been a lot easier to manage than the old system.
Animal feed Hay and grain in large quantities continues to mostly be something that is more easily done on a larger scale than ours for now, but I am figuring out ways to produce more of it here, even if it takes a few years. This year we got an acre and a bit cleared, which we sowed to pasture and are in the process of fencing off from wallabies. I am also planting more tagasaste and other trees to use for animal feed.
Reflections on self sufficiency priorities
Reflecting on my post in mid-2023, I wonder if I was approaching things in the wrong way. I think we can achieve a lot more self sufficiency if we produce more of what we are already producing well, and rely more on that. It might sound simple to say this, but in practise it is easy to just eat what we are used to eating and to want to produce that, rather than focusing on being more self sufficient with our current situation, even if it’s not 100%. So far we’ve been replacing some butter by drinking more goats milk and eating more goats cheese. We had five does in milk last year. I made cheese every day or two, and I also made a lot of gjetost. Once we got out of the habit of having butter and gjetost together, the bread is fine with gjetost alone and a glass of milk, and we don’t go through as much butter this way.
It feels awesome to be more self sufficient and to be grateful for what we do have.
I still am dreaming of cows, pasture, workhorses, field crops, sheep, and more, and maybe we’ll get some of that (or all) in time. The way I am approaching this is to be a bit slower about it, to be more observant of the land, to keep our true goals in mind, and to use the land we have wisely, dedicating more space to staples like turnips, carrots, and potatoes, and less to experimental crops.
Successes and failures last season
Over the years I’ve been encouraging the dandelions with the biggest tastiest leaves to flower and spread. This success turned one failure into not as much of a failure.
With the 2024 busy spring planting season taken up by focusing on larger crops that needed to be planted on time and tending garden areas further away, I didn’t stay on top of succession planting of greens. Once the overwintered mustard greens and kale all bolted to seed, and the earliest plantings of salad and stir fry greens were finished, we didn’t have much left in the garden to eat.
While some of the chicken tractor beds sat idle, the dandelions thrived, providing us with lots of nutritious greens. There are so many dandelions now that if I can get over the outrage of ripping perfectly good dandelion plants out of the ground I’ll be able to harvest the roots to cut up finely, roast, and make into roasted dandelion tea.
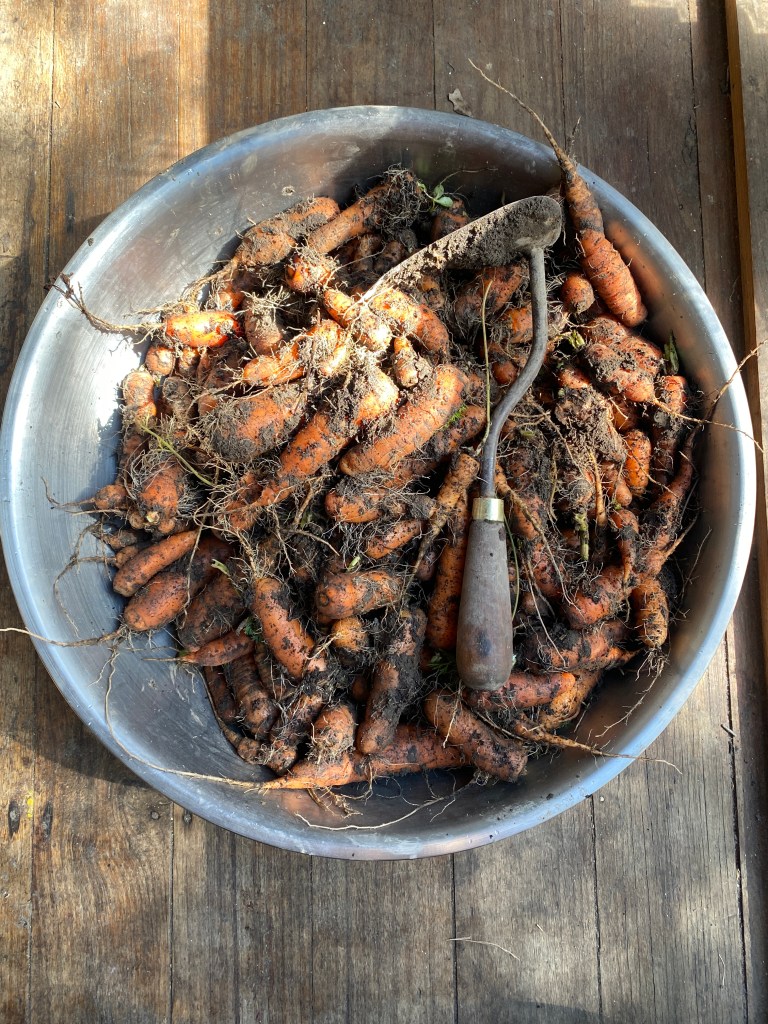
Our root crops went a lot better than the previous year because I’ve stayed on top of weeding and thinning, and not felt bad every time I cull perfectly good carrot seedlings to let the other ones have more space to grow.
The garden is feeding us I felt anxious here and there over last spring. There was so much overgrown, so much to plant, urgent fence repairs needed to stop naughty goats, clearing took longer than expected, and some things got delayed. After our failures the year before with not producing much in the way of potatoes or roots, it brought a lot of joy to be harvesting turnips, broad beans, snow peas, new potatoes, followed by garlic, beans, tomatoes, zucchini, carrots, pumpkins, mustard greens, salads, swedes, and lots more potatoes and turnips.
It’s hard to find balance between not pushing myself enough, and feeling stressed and worried that there’s not enough being done. It’s something I need to work on, and I’m getting better with it over time.
Stir fry is one of those basic meals that is often overlooked. My way of making it is a bit different to most, and I don’t think I’ve posted a recipe for how I make one anywhere, so I’ll share it here.
Ingredients
My formula is usually something like:
1 part onions or leeks
1 part carrots
2 parts turnip or cabbage
1 to 2 parts dark leafy greens
A bit of garlic and maybe some ginger
However much meat we’d normally eat in a meal
Some lard or tallow, for cooking
Maybe some coconut aminos, and maybe some cider vinegar and honey
Method
1. Cook rice
If you’re serving this with rice, first get the rice fully cooked. Keep it warm while you cook the stir fry.
2. Chop vegetables
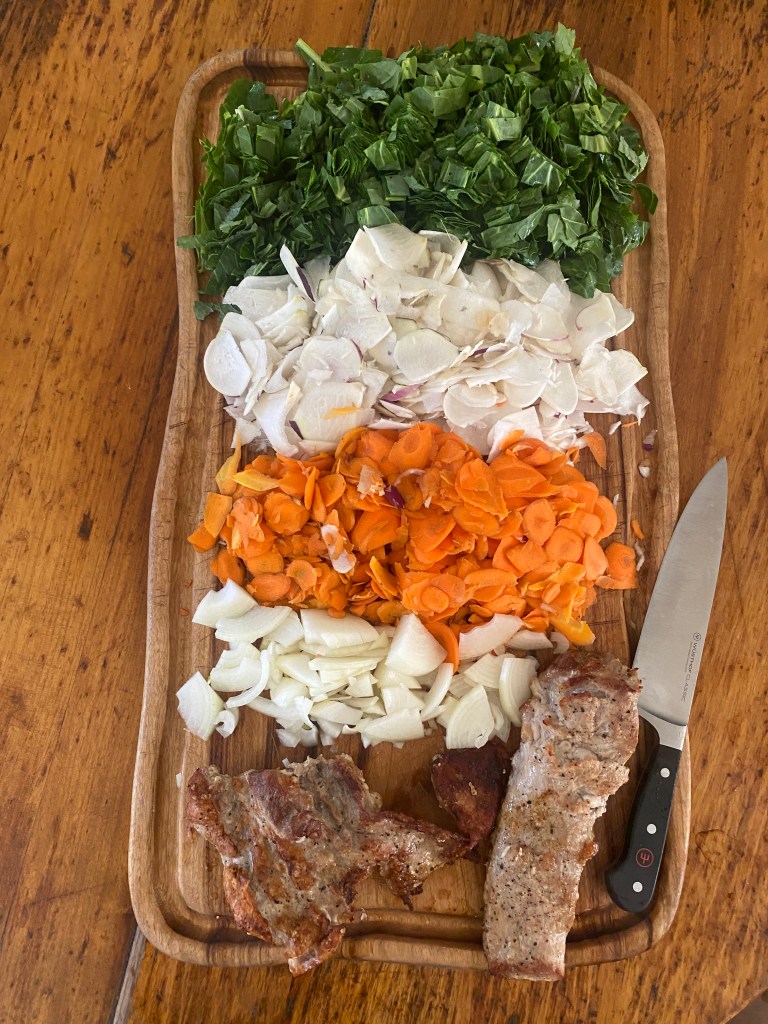
Next, get all your vegetables chopped and ready. For most meals I don’t do this, I just chop stuff up as other things get cooked, but stir fry cooks very quickly and needs a lot of hands-on attention, so it’s easiest to just get everything chopped up and ready to throw in the pan before you begin cooking.
3. Cook meat
After that, cook your meat. This is where I probably do things a lot differently to most people, but I really like the results from doing it this way – there’s no doubt about whether the meat is cooked through or not, no overcooking the vegetables, the meat gets browned and not boiled, and cooked meat is easier to chop up than raw meat. You can either use steaks such as round, rump, or topside, of some sort or mince (ground beef). Boneless skinless pork goes well in this stir fry too.
To cook the meat, heat your pan over medium-high heat and add enough lard to coat the base of it. When a drop of water jumps up in a lively, noisy way when dropped onto the hot fat, it’s ready to cook. Put whole steaks on the fat (or meatball-sized chunks, if using mince) and sprinkle with salt and pepper Cook on one side without moving them until juices start to run off the steak and into the pan. Flip over and cook the other side until juices rise to the top for beef, allow slightly longer than this if you’re cooking pork or chicken.
Put the meat in a bowl and allow it to rest for a couple of minutes, then cut it across the grain into thin slices or bite-sized pieces, return to the bowl so that any meat juices stay with the meat.
For the stir fry in the photos, I used misshapen bits of pork loin that I’d messily butchered, they were thicker in some places than a steak, so I just roasted it instead of frying it. You can also just use leftover bits of roast meat.
4. Cook vegetables, then add cooked meat
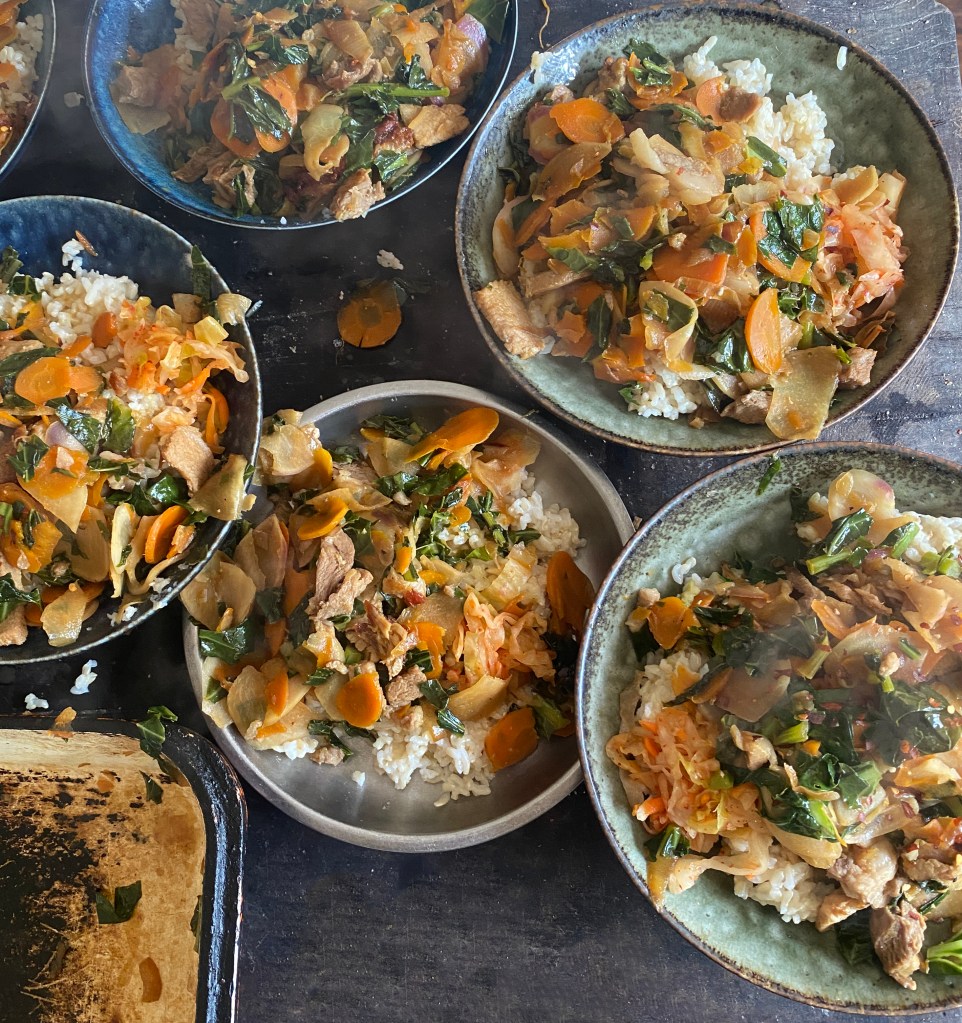
Next, add a bit more fat to the pan and throw in the onions. Stir them around a bit until they start to soften and smell nice. Next throw in the carrots, stir them around until they are hot all the way through. Next add turnips or cabbage, and garlic, if using, stir around until this is hot all the way through, then throw in the greens and a dash of salt. Stir everything around until it is cooked through, then add in the meat and the meat juices. Taste, and add any other flavourings – for this pork stir fry I used a big chunk of honey, about half that amount in coconut aminos, and then a dash of cider vinegar.
Serve on its own, or on top of rice, with a scoop of fermented vegetables on the side. Sprinkle with chilli flakes (red pepper flakes) if you want to make it a bit spicier.
Making pasta at home is easier and cheaper than you may think. In this post I’ll share my method and thoughts on homemade pasta.
Why make pasta at home?
Dry pasta is pretty much empty calories, wrapped up in plastic. Homemade egg pasta is a really tasty way to eat eggs that even picky eaters enjoy, and because it’s so rich in nutrition from the eggs, sauces can be really simple to make a nourishing and filling meal.
Every week when we have enough eggs from our hens, we make pasta every Monday. This helps me with meal planning because it means there’s less days when I have to figure out completely what I’m making, but there’s still enough variety in pasta that we never get sick of it – sometimes it’s carbonara, other times pesto, sometimes a creamy cheesy sauce, sometimes garlic butter and greens, sometimes it’s oriental noodles with bacon and vegetables, sometimes just lots of butter and grated homemade cheese, if you think of any possible pasta or noodle dish, it can be made with homemade pasta, and that gives a huge amount of variety.
How to make pasta
1. Start with eggs.
Crack eggs into a small bowl, sniff each one to make sure it’s not off, fish out any bits of shell, and put them in a mixing bowl. Use around 2 eggs per hungry person.
2. Mix in flour and salt.
Use around half a teaspoon of salt for every five eggs. For flour, the amount you’ll need will depend on the kind of flour you’re using. I don’t measure. I just beat the eggs with a wooden spoon, mix in as much flour as I can mix with the spoon, and then keep adding flour, mixing with my hands. If the dough still seems sticky, keep adding more flour, kneading it in with your knuckles. Break the dough apart, and if it’s still sticky inside, sprinkle the sticky sides with more flour and knead that in with your knuckles. The trick to adding flour is to just add a small amount at a time, and keep adding until the dough is very stiff. I use 100% wholemeal wheat flour from my grain mill, but other kinds of wheat and spelt flour will work too.
3. Rest
Allow the dough to rest for at least half an hour, covered with a tea towel or plate. A longer rest is fine too.
4. Roll out and cut
Divide the dough into manageable pieces. Use a rolling pin or a clean glass bottle to roll each piece as thin as it will go, or as thin as you have patience for, dusting the dough with flour to prevent it from sticking. Use a butter knife to cut into strips, or your choice of pasta shapes. When you’ve cut some pasta shapes, spread them out on a tea towel (dish towel) to dry out. Keep in a single layer if possible, as they can get stuck together if you stack them too high.
5. Cook
This next bit happens really quickly once the water is boiling, so make sure you have the sauce ready, along with all the bowls, cutlery, drinks, telling everyone it’s nearly ready, and so on. Bring a large pot of salted water to a rolling boil over high heat. Add the pasta, and bring it back to the boil. Once it’s boiling, cook for three minutes. Drain in a colander. You can either mix the pasta into the sauce, or put the pasta in bowls and top with the sauce, whichever you prefer.
Many events in recent years have caused me reflect on the expectations of the industrial food system and modern lifestyles, and how rewarding it is to return to simpler ways. Olive oil is in short supply this year, and this offers another opportunity to create better alternatives for cooking that can be produced on a homestead or by local farmers.
Most of the olive oil in supermarkets is adulterated with seed oils, so is not the healthy fat that many people imagine it to be. Real olive oil also should not be heated above 180ºC (350ºF), so it is not an ideal all-purpose cooking fat, even if it can be found.
Animal fats, such as lard and tallow, are usually local and small-scale by nature – so local that most of the time you will need to render it in your own kitchen (a simple process, see my method below). The saturated fats and cholesterol found in tallow are needed for hormone function, memory, neurological health, kidney, liver, and lung health. The healthiest fats are those from animals that are raised naturally outdoors – animals raised in this way are often raised by small farmers, so it’s possible to directly ask questions and make sure the animals aren’t being fed any weird additives and other stuff.
Most recipes I see use liquid oils such as olive oil or seed oils as the main cooking fat. I can understand the temptation for food writers to use ingredients that people are familiar with and can find in a supermarket, and to not clutter ingredients lists with a bunch of alternatives, but animal fats have so many benefits and can be used for all kinds of cooking. To create a resilient local foods system for real food sovereignty I think it’s essential to choose local animal fats as a staple cooking fat, which is why in my cookbook the recipes use lard and tallow.
Most people are used to cooking with liquid oils these days, but it can be just as easy to cook using tallow, lard, and other animal fats.
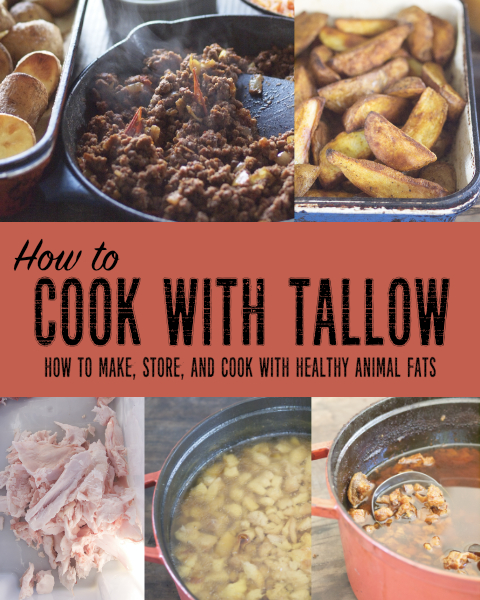
How to cook anything in tallow and lard
To cook anything in solid fats, we first need to turn it into a liquid fat by melting. This is easily done by heating it directly in the roasting dish if it’s made from cast iron, enamelled cast iron, enamelled steel, or stainless steel. Simply put your roasting dish in the hot oven or on a hot stovetop, with as much tallow as you think you’ll be using, and allow it to melt until it’s a hot liquid. This doesn’t take long. Add your vegetables, toss them around in the hot fat with a wooden spatula to coat them, sprinkle with salt, and bake. For meat, just place it on the hot fat and cook it – I get beautiful steaks and burgers every time by making sure my pan and fat are extra hot (a drop of water should violently jump up when splashed on it) – allow the meat to fully sear on one side before turning it.
If you use glass or ceramic pans for roasting, to avoid cracking them with sudden temperature changes, don’t preheat the pan, just melt the fat in a saucepan, mix the vegetables in the fat, and then add it to your pan.
Sautéing, stir frying, and deep frying are even easier – just heat your tallow in the pan and cook in it.
How to make your tallow or lard
Finding ready-made tallow and lard from healthy sources is not often possible, but making your own is really simple and affordable. If you buy beef by the quarter, half, or whole, you can probably get tallow for free just by asking the farmer or butcher in advance.
Lard and tallow either come as leaf lard or suet, or as offcut fat. Leaf lard and suet are pure fats from around the organ meats, these have a very mild flavour and can even be used in pastries. Offcut fat usually contains small amounts of meat, so can have a stronger flavour and may benefit from a bit of trimming, but is still good for most uses in the kitchen.
Leaf lard from homegrown pigs
To render fats, first chop it into small pieces and place in a heavy pot with a lid or in a slow cooker, Add just enough water to cover the base of the pot, then stir to coat the fat in the water. Bring the pot to the boil with the lid on, stir, and the reduce the heat to a simmer. Allow the fat to slowly render in the pot for as long as it takes, sometimes just a couple of hours, other times for a larger batch it can sometimes take a day or two. Stir the fat every now and then as it renders.
If you’re concerned with water remaining in the tallow and impacting its storage life, allow the pot to render with the lid off over a gentle heat for some of the rendering time.
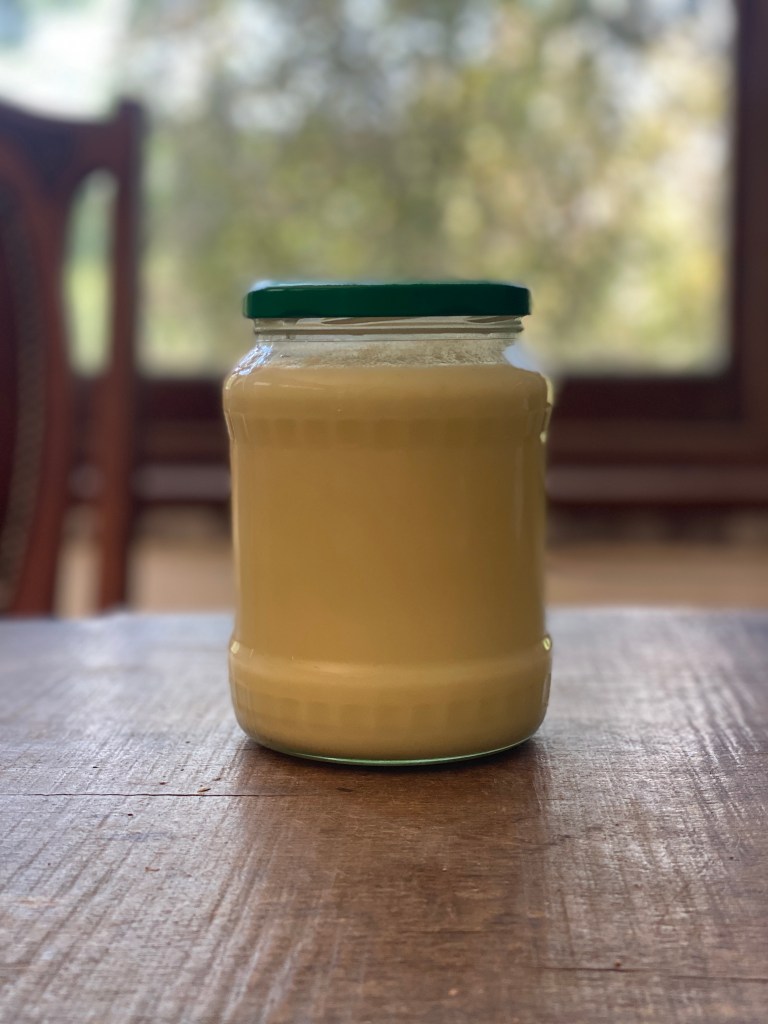
As the fat renders, there will be more and more liquid fat, and the pieces of solids will shrink, and sometimes go crispy. Once all the solids are crispy (or at least empty-looking and light in weight), allow the bubbling fat to cool slightly, before carefully straining through cheesecloth or a mesh sieve into warm heat-sterilised jars. Put the lids on tightly, and for the best keeping qualities, flip the jar over onto the lid as you would for old-fashioned jam, and then flip back onto the upright side and allow to cool before storing.
The storage life of lard and tallow depends on how well it was strained, if all the water evaporated as it cooked, and how clean the jars are. The temperature you store the lard in will also impact the storage life – the ideal situation is larder or root cellar temperatures of around 10ºC (50ºF) or lower, but room temperature is also often fine. Lard and tallow can also be stored in a fridge or freezer.
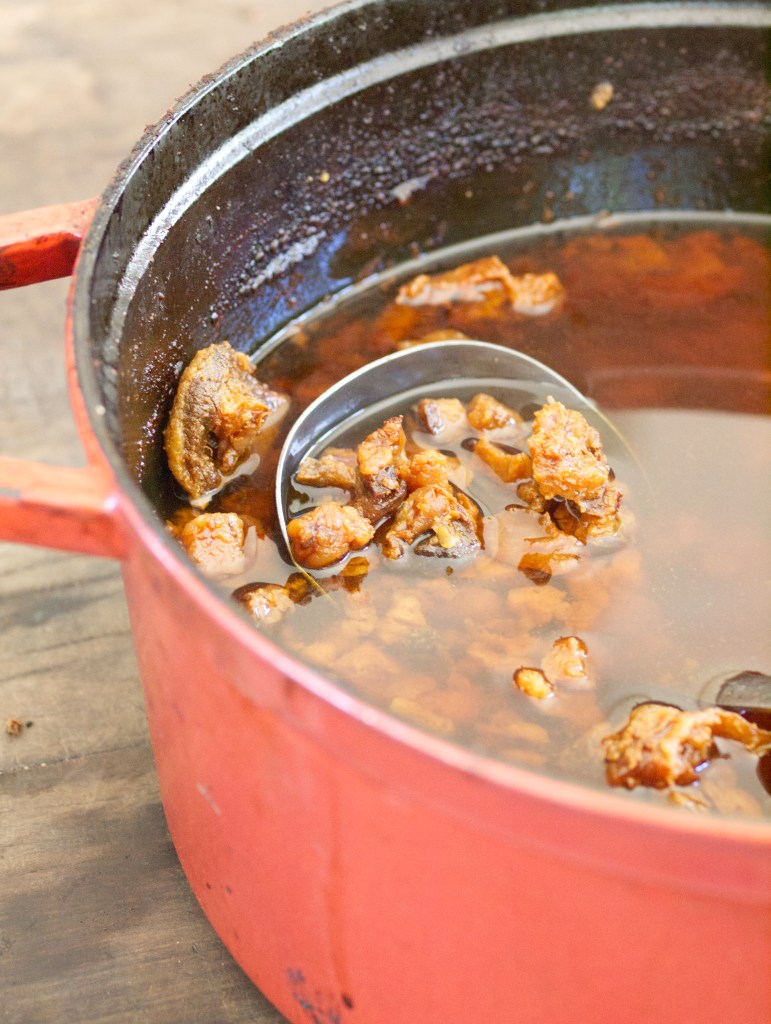
1. Offcut beef tallow in the early stages of rendering. The fat has started to come out of the solids, but the solids still feel heavy, with plenty more fat ready to render out. Fat can be skimmed off the top at this stage, as needed, or the whole batch can be rendered, strained, and put into jars in one go.
2. Rendering is complete. The solids are crisp and airy, with all fat rendered out into liquid. It’s now ready to be strained in jars. The leftover crispy bits can be fed to chickens.
The brown colour of the fat means that this batch got a little overcooked. When this happens, it’s still fine for use as a cooking fat, and has a nice toasted flavour, but it won’t be as good in a pie crust or anywhere else that needs a neutral-tasting fat.
To make the best possible purified tallow for the longest storage life at room temperature
Instead of straining the fat directly into jars, pour it into a large stainless steel bowl. Allow the fat to cool completely in the bowl until it is solid, then gently heat the bottom of the bowl, flip the solid mass of fat out into a new pot or bowl, so that the rounded side is now up, and scrape off any impurities that have gathered on the bottom. Melt the fat until hot again, and pour into warm jars, as you normally would. You can also do this refining process a second time.