
/
/

What makes this sourdough pizza crust magic is its flexibility. You can make this same dough, and depending on your schedule, there are three different timelines you can work with:
The flavour of this dough is also what makes it magic… If you rest it overnight in the fridge, it develops the most delicious sourdough flavour that goes so well with many kinds of pizza toppings. The overnight ferment also helps to break down phytic acid, making the dough more nutritious and easy to digest.
Because this is a straight sourdough dough, rather than a pre-ferment (levain) dough, please make sure that your starter is bubbly and ripe (but not over-fermented) for this recipe. If you don’t already have a sourdough starter, you can find my recipe for sourdough starter here.
• Use plain whole wheat flour, emmer, or khorasan without making any changes to the recipe.
• For 100% spelt pizza dough, reduce the amount of water in the dough by 38g (2 1/2 Tbsp).
• For 100% einkorn pizza dough, reduce the amount of water in the dough by 80g (5 1/3 Tbsp).
For best results, use wrist-warm water. This is especially important if you’re making this as an overnight dough, as you’ll need to get the dough rapidly fermenting during the first hour or so
I use fine Himalayan salt, but you can use any kind of finely-ground salt.

If you will be baking on cookie sheets rather than directly on pizza stones, mini pizzas, such as the ones in my pizza photos, can make a lot of sense.
Even if you are baking directly on a hot hearth, a smaller pizza is easier to shape and transfer than a larger one, which is why many home baking books will have instructions for 12” (30cm) pizzas rather than anything larger.
The mini pizzas I make are around 4 1⁄2” (11cm) in size. Mini pizzas are easier to shape, and they make a more efficient use of cookie sheets. Cutting baked mini pizzas is very simple with a normal kitchen knife. Mini pizza slices are easier to eat with one hand, and if you’ve put too many toppings on, there is less risk of the end of the slice sagging and dropping your toppings everywhere.
When making mini pizzas, there’s enough pizzas so that everyone can have one or two pizzas of their own, and can choose their own toppings.


Baking great whole grain sourdough pizza has more to do with working with the idiosyncrasies of an individual oven rather than following exact instructions.
Some ovens will bake hotter on one side and cooler on another. Some ovens will give heat from the top, or heat from the bottom. Others will be fan forced, with heat going all around.
Some ovens won’t get as hot as some pizza enthusiasts recommend, but you can still make great pizza in these if you give it a little more time.The key to finding out what works for your oven is to observe your oven, try different tricks, and see what works for you. The key things to remember for using a home oven are that you want to bake pizza as hot as possible, and that for the best crispy crusts, it’s best to have some kind of thermal mass in the oven such as a pizza stone and to cook your pizza (or your tray of pizza) on that surface.
Pizza was originally made in wood-fired ovens when the fire was still burning and the temperature was extremely hot, around 370ºC (700ºF). The pizzas were cooked directly on the hot hearth, relying mainly on conductive heat to cook the pizza from the base upwards, while also using some of the radiant heat coming down from the top of the oven to get the cheese bubbling.
To make pizza in a home oven, try to get the oven as hot as you possibly can without burning the house down. Preheat a pizza stone in the oven while it heats up, and allow as much time as possible to heat up – if you are using a very thick stone, then the oven air temperature will get hot before the stone is fully heated, and the thermostat is based on air temperature, not stone temperature, so allow the oven to stay hot for at least half an hour longer, to ensure that the stone is fully heated through.
Generally, it’s a lot easier to bake one pizza (or one tray of pizzas) at a time – to do this, just preheat your oven with a pizza stone on a rack roughly in the middle of the oven, put your pizza on the stone, and your pizza will probably cook well.
If you are finding that the base is cooked to perfection but the cheese isn’t getting lovely browned bits on top, if your oven has a ‘broil’ setting, you can put this on for the last couple of minutes of cooking, or you can move your pizza towards the top of the oven. If you don’t get great results from cooking in the middle of the oven, experiment and find which spot in the oven works best for you.
In general, I find that aiming to cook the crust really well (I like mine very crispy and almost burnt at the edges), the cheese and toppings end up getting well- cooked in the process. If you prefer a softer crust, you may need to experiment with getting more top-down heat to your pizza with the ‘broil’ setting or with the rack in the top third of the oven instead of in the middle.
To bake more than one tray of pizzas at a time, there are two different approaches: The first is, that if you have more than one oven rack and more than one pizza stone, you can bake on multiple stones at once. If you’re not baking directly on the stone surface, you can just use a cheap paving tile or any kind of stone that will stand up to high heat, rather than needing a food-safe pizza stone, so using multiple stones is not too far-fetched an idea in this case.
To bake several trays using just one stone, you will need to bake on cookie sheets, and move these cookie sheets around in the oven, so that each pan gets some time on the stone. In an oven heated to 220ºC to 250ºC (430ºF to 483ºF), I aim to get each pan on the stone for around 7 minutes, and this combined with the rest of the time that the pan gets in different parts of the oven gives the pizza a crispy crust and cooks it through completely.
If my oven is being slow and the temperature is a bit lower, I allow ten to fifteen minutes on the stone for each tray. This is what works for me on my woodstove oven, different timings and tricks will work with different ovens.
I start by baking 3 cookie sheet trays filled with pizza. One begins on the cast iron base of the oven (my equivalent of a pizza stone), one is in the centre of the oven, and the other is in between these two.
After around 7 minutes, I move the trays around, putting the bottom tray up the top, the top tray in the middle, and the middle tray on the bottom, while also turning the trays around as one side of my oven is hotter than the other.
After around 7 more minutes, I move the trays again, to give the third tray some time at the bottom of the woodstove. At this time, I add the fourth tray of pizza to the oven. The first three trays usually take another 7 minutes if the oven is very hot, or 15 minutes if the oven has dropped to 200ºC (390ºF). The last tray is ready by the time we’ve finished eating the first three trays of pizza.


Makes 8 mini pizzas, or 5 x 12” (30cm) pizzas
100g (6 Tbsp) ripe sourdough starter at 100% hydration
925g (7 cups + 2 Tbsp) whole wheat flour (or alternative, see above)
700g (scant 3 cups) warm water
15g (4.5 tsp) salt
Combine all the ingredients in a bowl and mix with your hands until no traces of flour remain. Set aside for ten to thirty minutes, then do a series of stretch and folds. Leave for a few more minutes, then do another series of stretch and folds. For best results, repeat this resting, stretching, and folding two more times, or simply rest the dough for 40-60 minutes at room temperature instead.
Leave to ferment until it has increased in size and feels puffy and airy when poked. This will take around six hours at 22ºC (72ºF), or longer if it’s colder. You can also ferment this overnight between 8ºC and 12ºC (46ºF and 54ºF), or you can ferment it at room temperature for two hours before moving it to a covered bowl in the fridge for up to two days.
Divide the dough into as many pizzas as you wish to make. Shape each piece as if you were shaping a boule, cover completely with flour, then return to the bowl to rest for at least half an hour. At this stage, you can also move the dough balls to a covered container in the fridge to cold proof for up to a couple of days.
If you’re short on time and want pizza sooner, you can just stretch the dough into shape without bothering with shaping it into balls, as discussed earlier.
Preheat the oven to as hot as it will go. If you are using a pizza stone, put it in the oven to preheat.
Dust flour over some cookie sheets or a pizza peel.
Prepare your toppings.
Once the oven is hot enough, take each ball of dough and gently stretch it evenly on all sides, turning the dough around in your hands and letting the weight of the dough do the stretching for you as much as possible. Stretch it as thinly as you like, being careful not to tear the dough (if it does tear, you can patch it up later). Place on the floured cookie sheet or pizza peel and repeat for the rest of the dough.
Cover with your favourite pizza toppings, then place the whole pan on a pizza stone or other source of thermal mass, or just put it on an oven shelf if you don’t mind a less-crispy pizza.
Allow to bake until everything is cooked through – this will depend on the oven temperature, how many trays you are baking, whether you used a pizza stone, whether you are baking directly on a pizza stone or on the cookie sheet itself, how much you’ve loaded up the base with toppings, and whether you have to rotate your pans around in the oven so that they each get a turn on the pizza stone.
For 3 trays at 220ºC (430ºF) to 250ºC (483ºF) I allow around 20 minutes in total, if I were baking just one pan, it would probably take around 10 minutes, or even less time if I were baking directly on a pizza stone.


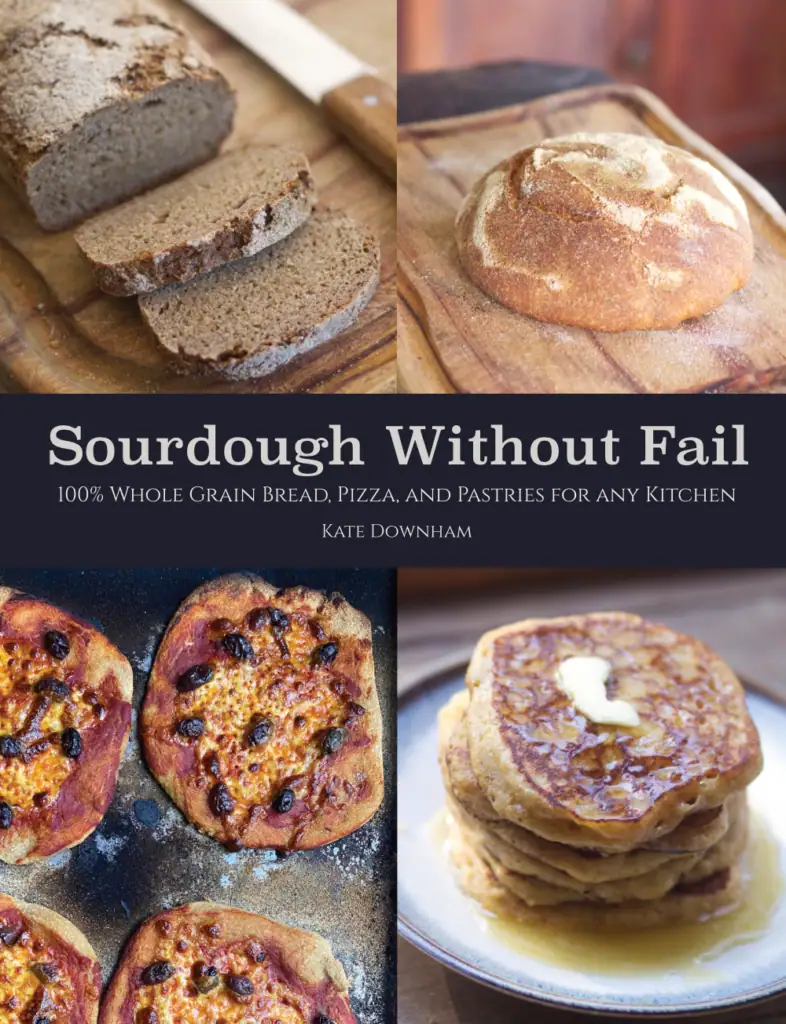
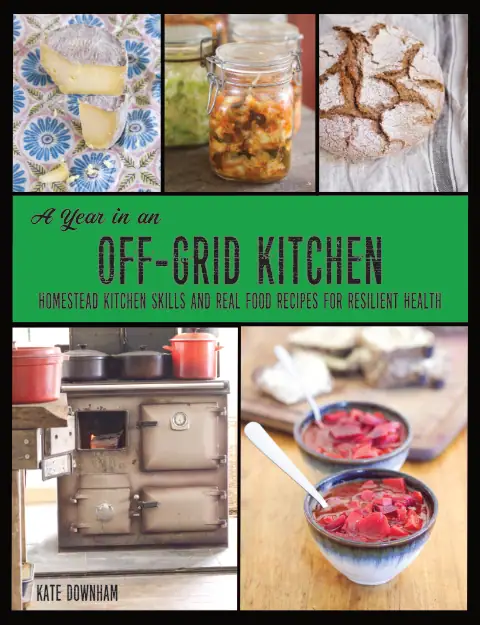
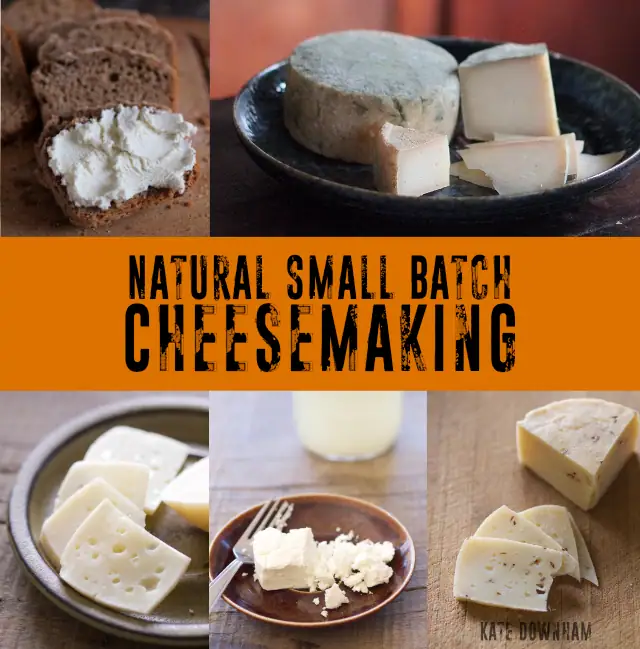
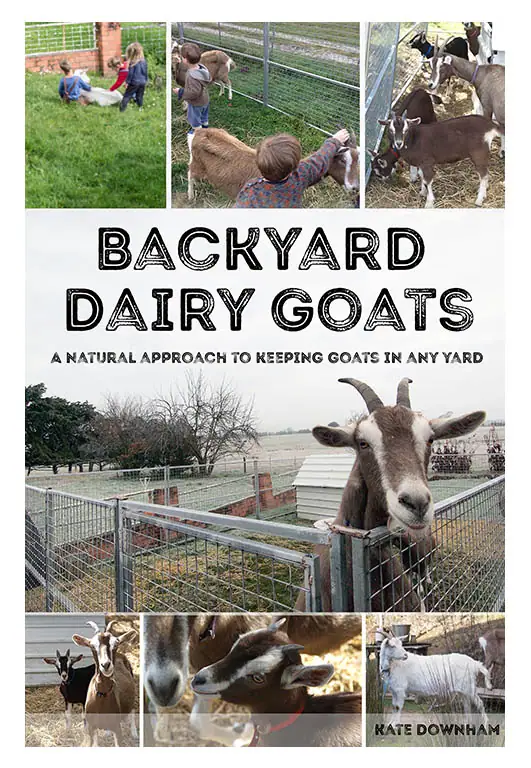
Kate Downham has been growing, preserving, and cooking real food since 2007. She is the author of four books on homestead skills: A Year in an Off-Grid Kitchen, Natural Small Batch Cheesemaking, Backyard Dairy Goats, and Sourdough Without Fail.
Off-grid with her family of nine in the Tasmanian forest, Kate milks her own goats, makes all their cheese, mills all her own grain, and bakes fresh sourdough bread daily.


The Nourishing Hearthfire is reader-supported and mostly ad-free
Leave a Reply