Skip to content
  • Home
  • Books
  • Blog
  • Recipes
  • Self Sufficiency
  • Sourdough
  • Cheesemaking
  • Free Resources

The Nourishing Hearthfire

/

How to Make the Best Bone Broth

Home » Homestead Recipes

katedownham

·

Feb 13, 2016

·

Homestead Recipes, All blog posts
bone broth

Here are my tips for making the most nutritious and tasty bone broth, plus some thoughts on whether to add salt or vinegar to your broth.

Table of Contents

  • How to make bone broth
    • For the best bone broth, you need bones from healthy animals.
    • 1. First roast the bones (if they were not roasted already)
      • Salt or no salt?
    • 2. Use a high ratio of bones to water.
    • 3. Add some vegetables if you like, but not all of them
      • Vinegar or no vinegar?
    • 4. Bring to the boil and skim
    • 5. Strain and store
    • How to freeze bone broth
    • How to pressure can bone broth

How to make bone broth

For the best bone broth, you need bones from healthy animals.

  • The leftovers from a pasture-raised roast chicken are a good start. Save your pork chop bones in the freezer and add some of these to the chicken bones when you’re making a broth, they will add more gelatin to the broth without changing the taste.
  • Pork stock is underrated and I encourage you to give it a try, it has a mild flavour that can easily replace chicken stock in recipes, and it has a higher amount of gelatin than chicken stock.
  • Lamb stock has a strong flavour and is great for lamb stews.
  • Beef stock is good in some meals, such as minestrone, curries, and other strongly flavoured soups and stews.

1. First roast the bones (if they were not roasted already)

Roasting helps to bring out the best flavours in the bones. When I am starting with raw bones, I always roast them in the oven for around 30 minutes, or until browned in places and smelling delicious, before continuing with the recipe

Salt or no salt?

I find that adding some salt to the bones before roasting helps the finished broth to keep for longer. I just sprinkle a small amount of salt onto the raw bones, as if I were roasting them for a meal. I add pepper at the same time, to help with flavour and keeping qualities.

2. Use a high ratio of bones to water.

Bone broth with too much water will be a disappointment. It will be better than adding plain water to cooking, but it won’t be tasty on its own, or as the base of a simple soup. Spread the bones evenly in your pot, to completely cover it, if you’re using chicken frames you’ll need to break them up so that there aren’t huge air gaps in the pot.  Put in just enough water to cover the bones, or up to an inch higher, not more

3. Add some vegetables if you like, but not all of them

Carrot and onion are good.  I don’t add herbs, as I prefer to add them to the dish I’m cooking, rather than the stock. Don’t just throw in any old veggie scraps (feed those to a friendly goat), some vegetables will put off flavours into your stock, it’s best to just stick with onion ends and carrot peelings if you want to use scraps. A bit of celery is good too, if you have some.

Vinegar or no vinegar?

Some people say to add vinegar to help draw more minerals out of the bones to create a superior stock, but others say this does not make a difference. I no longer add vinegar to my broth and find that it gels just as well as broth made with vinegar. If adding vinegar, you don’t need a huge amount, around 2 tablespoons for one chicken is fine.

4. Bring to the boil and skim

Put your bones in a pot with water, put over medium-high heat and bring to the boil with the lid on. Skim off the froth from the top, then put the lid back on and leave to simmer for several hours before straining.

Beef, pork, and lamb are best slowly simmered for 24 hours, to bring more nourishment out of the large bones. Chicken bone broth can be ready a little earlier, after around 8 hours of simmering.

5. Strain and store

When your stock has cooked for several hours, leave it to cool slightly (but not too much, it should still be very hot to the touch) then strain your stock through a colander, and put it into suitable jars to use in meals. Broth can be frozen or pressure canned.

How to freeze bone broth

I freeze broth in wide mouthed glass jars or storage containers in the freezer, leaving plenty of room at the top for expansion. Don’t ever use jars that taper at the top, they will break in the freezer.

How to pressure can bone broth

To pressure can bone broth, put the strained hot broth into suitable jars, leaving 1 inch headspace. Put the lids on and screw the bands on using only the strength in your fingers. Place into hot (but not boiling) water in the pressure canner, seal, and vent in the usual way, then allow it to can for 20 minutes at 10psi, adjusting for altitude if necessary.

Like this:

Like Loading…
  • Share using Native toolsShareCopied to clipboard
Kate Downham off grid homesteader

About Kate Downham

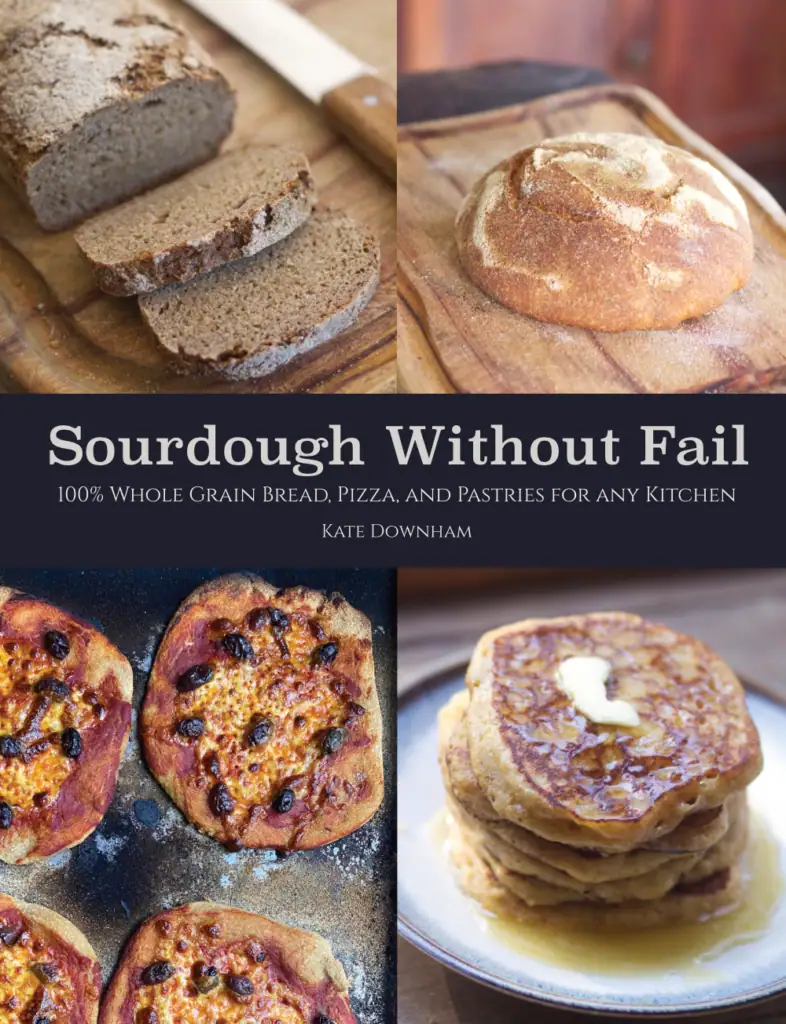
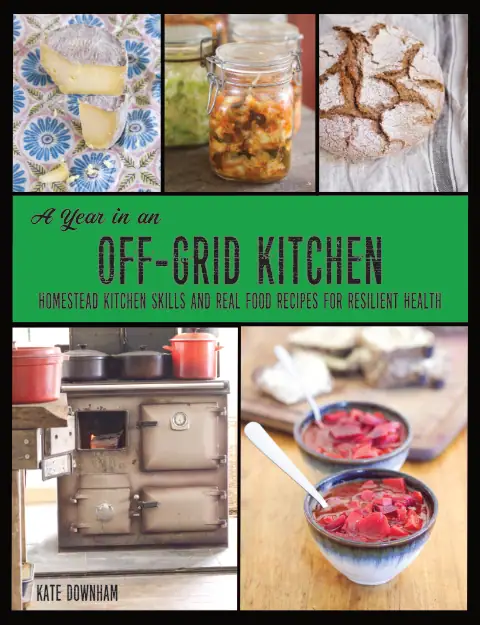
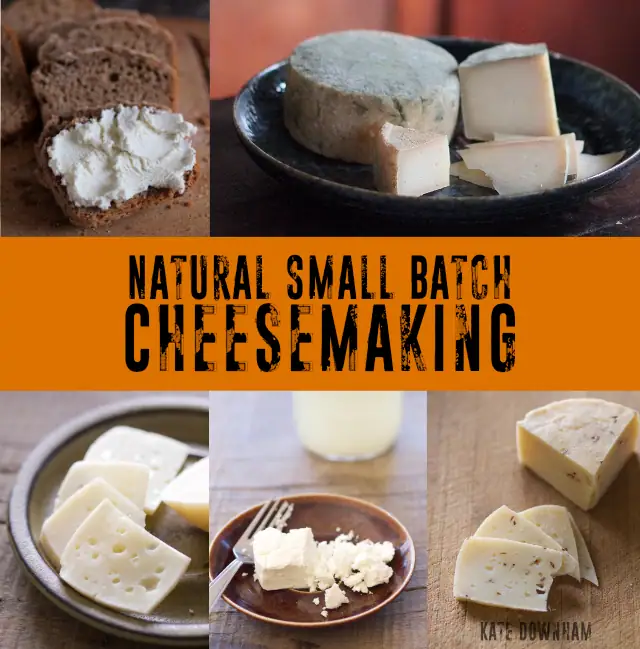
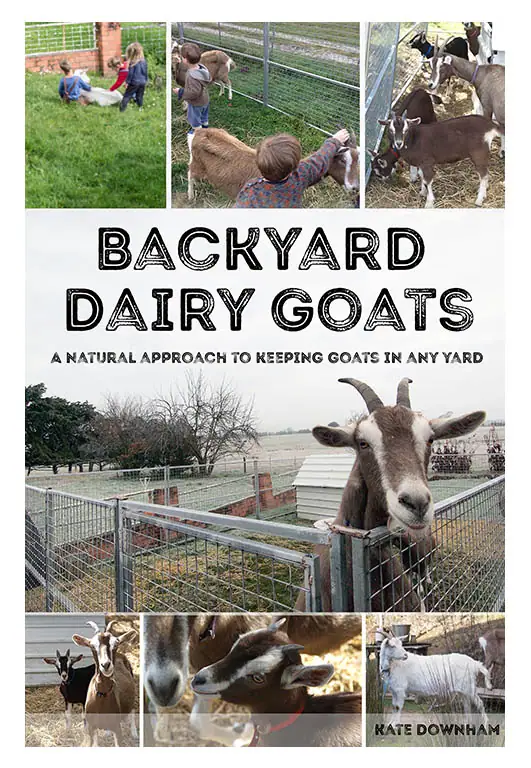
Kate Downham has been growing, preserving, and cooking real food since 2007. She is the author of four books on homestead skills: A Year in an Off-Grid Kitchen, Natural Small Batch Cheesemaking, Backyard Dairy Goats, and Sourdough Without Fail.

Off-grid with her family of nine in the Tasmanian forest, Kate milks her own goats, makes all their cheese, mills all her own grain, and bakes fresh sourdough bread daily.

Learn more about Kate’s books →

Related posts

  • Homemade French Onion Soupfrench onion soup made from bone broth
  • German one pot beef and vegetable stew
  • A BeginningOLYMPUS DIGITAL CAMERA

Leave a Reply Cancel reply

Your email address will not be published. Required fields are marked *

Recipe Rating


8 different homesteading ebook covers

My books

Sourdough without fail: 100% whole grain sourdough breads, pizza, and pastries for any kitchen fresh milled flour sourdough book cover
a year in an off grid kitchen by kate downham off grid homesteading book cover
natural small batch cheesemaking natural cheesemaking book cover
backyard dairy goats homesteading book cover

More Resources for Off-Grid Living

off grid solar dehydrator
garden master course
diy wood fired pizza oven
the $50 and up underground house
natural swimming pools

Categories

  • All blog posts
  • Homestead Recipes
  • Natural Cheesemaking
  • Self Sufficiency & Homesteading
  • Whole Grain Sourdough Baking

Recent Posts

  • Magic Overnight Sourdough Pizza Dough Recipe with Fresh Milled FlourMay 26, 2026
  • Cooking year-round on a wood cookstove: the dream, the reality, and the practicalities of relying on our own firewood and being off the gas gridMay 20, 2026
  • 100% Whole Grain Fresh Milled Flour Sourdough Bread for Beginners: A Step-by-Step GuideMay 4, 2026
  • Easy 100% Whole Grain Sourdough Cinnamon Raisin Bread (honey-sweetened, and works with fresh milled flour & ancient grains)May 4, 2026
  • Natural Cheesemaking: How to Make and Use Your Own Cheese CulturesMay 2, 2026

The Nourishing Hearthfire is reader-supported and mostly ad-free

Buy me a coffee

Search

  • Home
  • Books
  • Blog
  • Recipes
  • Self Sufficiency
  • Sourdough
  • Cheesemaking
  • Free Homestead Resources

© 2026 Kate Downham – The Nourishing Hearthfire. This blog is licensed under a Creative Commons Attribution-NonCommercial-ShareAlike 4.0 International License.

Join The Nourishing Hearthfire mailing list for thoughtful monthly emails and free ebooks
Find us on forums and social media

Permies: Permaculture and Homesteading Forums

Instagram

Facebook

X

Goodreads

About

Contact

Privacy Policy

Terms and Disclaimer

The Nourishing Hearthfire

%d