How to make black drawing salve

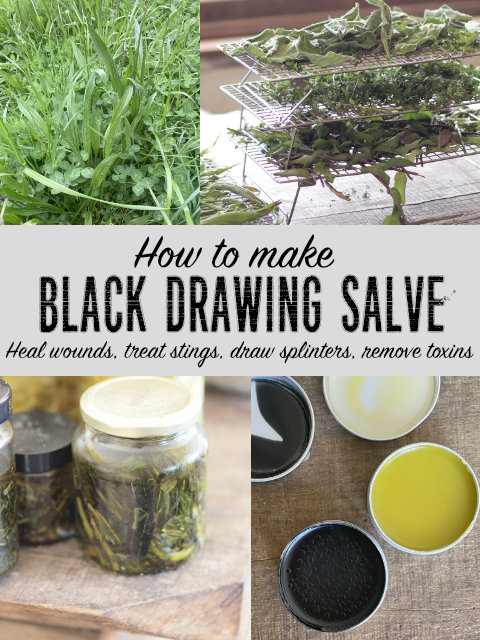
Here is how I make one of the most important natural remedies that I use.

We use black drawing salve on all kinds of bites and stings, as well as on splinters, puncture wounds, and anything that looks like it might need possible toxins or infections drawn out of it. I also find it a really helpful remedy around the homestead for wounds on animals – it’s so thick that it forms both a remedy and a bandaid in one – if you’ve ever tried to get a goat to keep a bandage on then you’ll understand what a relief it is to just have a remedy that will stick on and help to heal and protect the wound. When I use this on minor udder injuries, the wound is usually healed in 24 hours.

The bentonite clay and activated charcoal in this salve draw out toxins. The plantain and calendula help to heal, as well as drawing out infections and toxins. You also add a couple of drops of tea tree or kunzea oil to this salve to further help its healing properties, or a tablespoon of raw honey – if you’ll be adding these, then allow the salve to cool down slightly before adding them so that the honey doesn’t get cooked.

I use olive oil to make this salve, but you could use lard instead if you can keep it warm while it’s infusing.

Ingredients
1 cup (240ml) plantain infused olive oil (or a mix of plantain and calendula infused oil)
1 1/4 tablespoons beeswax
3 tablespoons bentonite clay
3 tablespoons activated charcoal

plantain ribwort weed in pasture with clover and grass

Plantain, also known as ribwort, is a common weed in pasture, lawn, and gardens. It is an excellent remedy for all kinds of bites and stings.

Calendula is easily grown from seed. The flowers are a tasty and colourful addition to salads as well as being an excellent herb for healing and preventing infection.

Method

  1. Make the infused oils:

    (a)Harvest and dry your herbs. Plantain is also known as “ribwort” and is a common weed on lawns and pastures, easily identified from its ribbed leaves. Calendula is very easy to grow. I harvest fresh herbs in dry weather and put them in thin layers on top of stainless steel cake cooling racks to air-dry.
Herbs drying on cake cooling rack

(b)Infuse the dried herbs
Pack dried herbs down into a jar, then fill with olive oil to just above the level of the herbs, and agitate sightly with a small wooden spoon or other implement to make sure the oil is getting to all the herbs. To make the most potent herbal remedies using this method it’s important to really pack the herbs down, and to use too many herbs and too little oil rather than the other way around.

Herbs infusing in oil

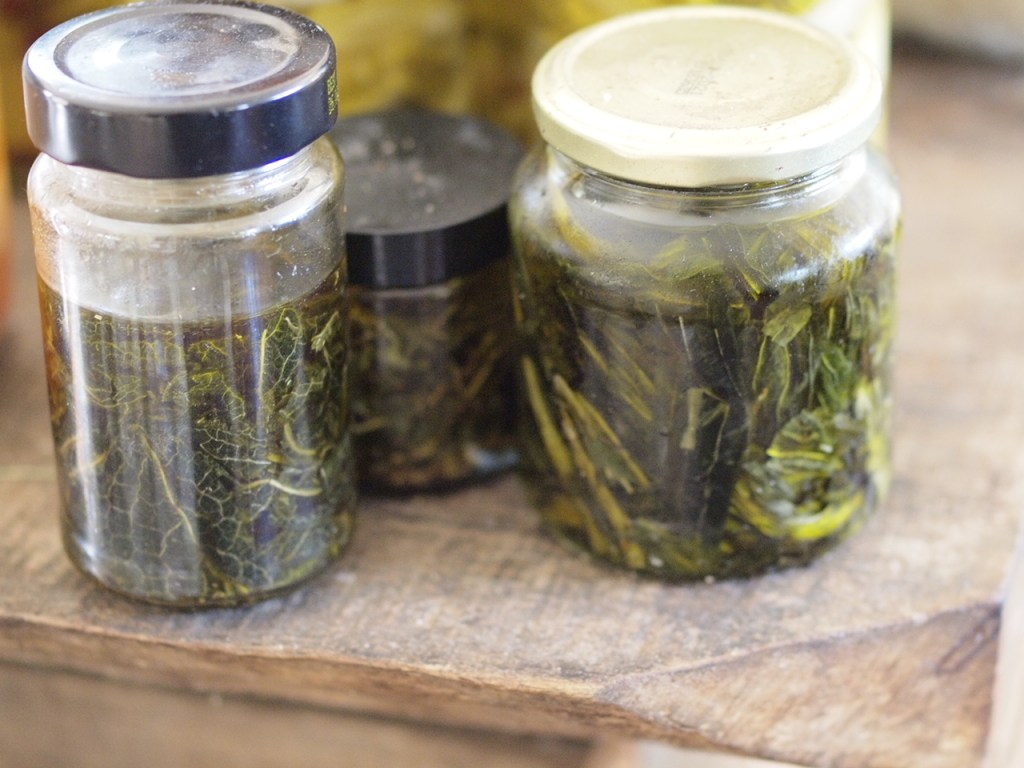
Once you have your herbs sitting in oil, you can either leave them to sit at room temperature for six weeks, or leave them in the ‘warm’ setting of a slow cooker for 8 hours. I do a mixture of these two methods, putting my herbs on the warm edge of the woodstove as much as possible, and infusing them for a full six weeks.

(c)Press the oil out from the herbs
Gently warm the oil and herbs, then pour the oil out through cheesecloth or a potato ricer into a bowl, make sure to then squeeze all of the oil out of the herbs. The infused oil can now be stored if you want to use it for salve at a later date, or you can make the salve now. The leftover oily herbs can be fed to the chickens or composted.

  1. Warm the oil and beeswax
    Take a glass liquid measuring cup and measure the infused oil. Add the beeswax (preferably in tiny pieces). Put the measuring cup into a saucepan filled with enough water to come up partly up the measuring cup, but not so full that you risk getting water into the cup. Put it on the stove over a low heat, and allow to heat until the beeswax has completely melted
  2. Mix in everything else.
    Add the bentonite and charcoal to the oil and beeswax mix. Mix until thoroughly combined, and then pour into small jars or salve containers.
homemade herbal salves

Black drawing salve next to comfrey salve.

Enter your email address here to get new recipes and blog posts from The Nourishing Hearthfire.

My cheese book is now live on Kickstarter!

https://www.kickstarter.com/projects/706848724/make-your-own-cheese-natural-small-batch-cheesemaking-book?ref=7ho2mj

Make your own cheese at home, using natural ingredients

Anyone can make their own cheese. Whether you’re in the middle of a city, or on a homestead, you can make delicious cheeses in your home kitchen.

Making your own home dairy products was an essential skill in the past, and a skill that continues to create resilience and reduce food costs in the face of supply disruptions and uncertainty.

Natural Small Batch Cheesemaking is the book I wish had existed when I started making cheese. Many cheesemaking books present recipes to be followed in exact ideal conditions which can be hard to achieve on a homestead. I’ve gone beyond this, making cheeses in less-than-ideal conditions, sharing the results, and explaining why each part of the cheesemaking process is done and how to make this work in home kitchen and homestead conditions.

I’ve included heaps of information on storing, handling, and working with the seasonal conditions of milk. Instructions for making your own rennet from animals and plants are included, along with information about how to prepare and use several different homemade cheese cultures.

There’s a section on cheesemaking equipment, and how to get started with the absolute basics, most of which can already be found in a typical home kitchen.

If you’re not sure where to begin, or how to fit cheesemaking into your life, there’s helpful information included about the best cheese recipes to get started with, and how to grow your cheese skills from there, along with figuring out which cheeses will work best with your lifestyle.

“Understanding the cheesemaking process” is a large part of the book where we look at every step of the cheesemaking process in depth, why each step is done, and what each step achieves, so that you can confidently come up with your own cheese varieties.

The ideal conditions for aging cheeses are discussed, along with various ways to achieve this at home. I also discuss many ways to work with rinds: working with natural moulds, encouraging (and discouraging) different types of mould, and natural options for making cheese without mould.

Many cheese styles are covered in the book, from the best kinds for beginners to start with, through to advanced cheesemaking.

Also included are recipes for other homemade dairy products: how to make the best thick and tasty yoghurt, kefir, cultured cream, butter, and ice cream.

Natural Small Batch Cheesemaking is the ideal cheese book for homesteaders. 8×8” in size and around 140 pages, designed for practical use with every cheese recipe on a single-page spread and clearly written instructions to help you make your own beautiful cheeses at home.

https://www.kickstarter.com/projects/706848724/make-your-own-cheese-natural-small-batch-cheesemaking-book?ref=7ho2mj

A Year in an Off-Grid Kitchen is now published!

I am pleased to announce that my cookbook is now available to buy online and in bookshops – if your favourite local bookshop does not have a copy, it can be ordered in by giving them the title and the ISBN:

Paperback ISBN  978 0 6484661 6 1

Hardcover ISBN  978 0 6484661 5 4

Paperback and hardcover copies can be ordered online through the usual places.

Amazon: https://www.amazon.com/Year-Off-Grid-Kitchen-Homestead-Resilient/dp/0648466167/?tag=pfa12-20

Book Depository (free shipping): https://www.bookdepository.com/Year-Off-Grid-Kitchen-Kate-Downham/9780648466161

The Paperback edition of A Year in an Off-Grid Kitchen

Ordering the eBook through Permies.com gives you access to both the PDF and the epub versions, or the Kindle version can be bought from Amazon.

Permies.com: https://permies.com/wiki/157756/Year-Grid-Kitchen-eBook

Amazon: https://www.amazon.com/Year-Off-Grid-Kitchen-Homestead-Resilient/dp/0648466167/?tag=pfa12-20