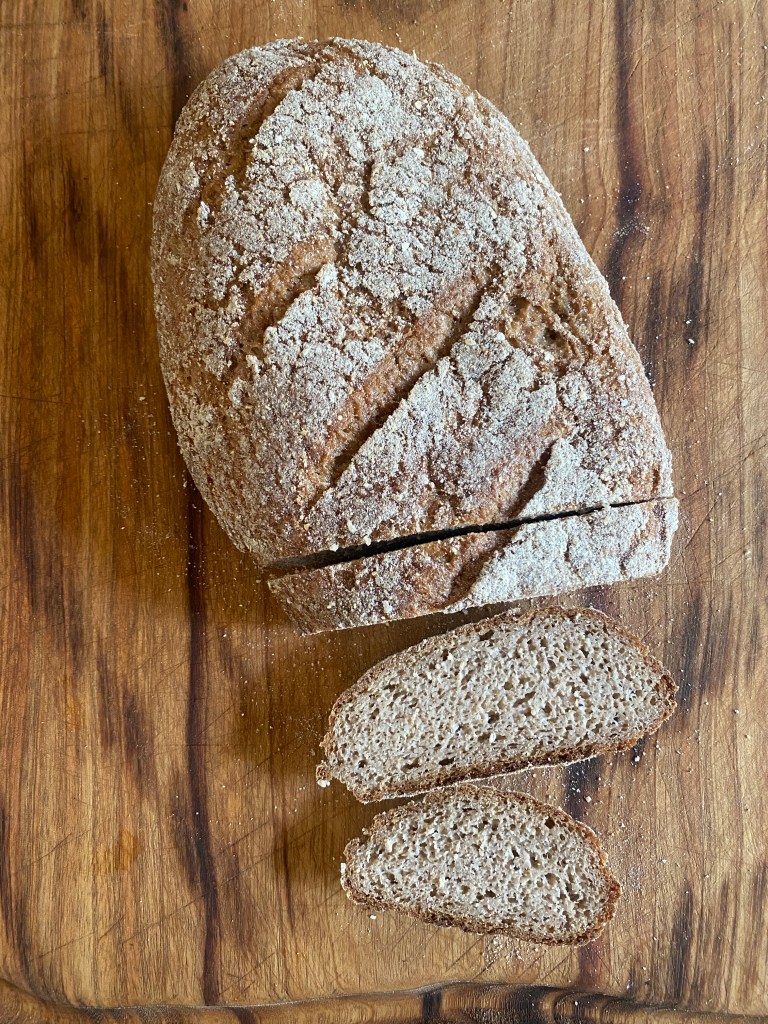
In some ways I’m grateful for the haphazard way I started with sourdough. I had previously been baking with yeast and had never found any recipes that really suited me, so I’d figured out my own. Switching over to sourdough, I took the same approach. I made some terrible loaves to begin with, but eventually figured out how to tinker with the starter amount, hydration, timing, temperature, and technique to produce breads with better flavour and texture.
If instead I’d followed finicky instructions from the internet or a book, maybe I would have been put off the whole idea.
I think a lot of books are written from a specialist perspective: someone that has focused on just one thing, written about it in isolation, without providing any guidance for those who do not have the same perfect conditions. I like to think of my book as being written by a generalist: Yes, I am making all my family’s bread, it’s an important part of how we eat and I love it, but I am also making cheese, fermenting, canning, preserving, gardening, caring for family and animals, building infrastructure, and all the other tasks that make for a diverse homestead.
Sourdough does not have to be difficult. You do not need to follow someone else’s schedule. By learning to understand why different techniques are done, you can decide for yourself whether it is really worthwhile to make a levain, autolyse, knead, stretch and fold, preshape, score, or any other aspect of sourdough.
By learning to really understand fermentation, and how the balancing act of timing, temperature, and prefermented flour percentage works, you can confidently adjust recipes to suit your lifestyle and your seasonal conditions.
Sourdough Without Fail has over 75 easy and adaptable sourdough recipes, along with detailed information to help the home baker really understand sourdough and learn how to tinker with recipes to get different results.
Not just bread
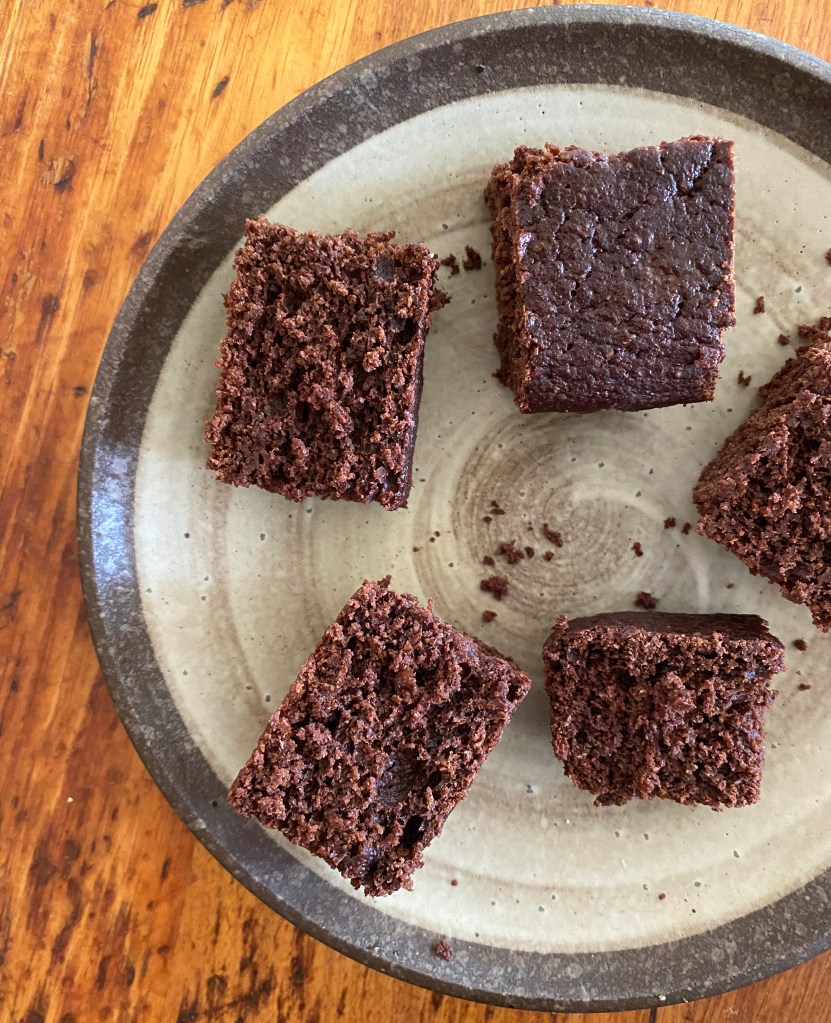
Sourdough chocolate cake
Sourdough is so much more than bread. Sourdough discard is a resource that I actually make on purpose, so that I can make the chocolate cake, apple pie, soda bread, pancakes, cookies, pie crust, and other discard recipes that I share in the book.
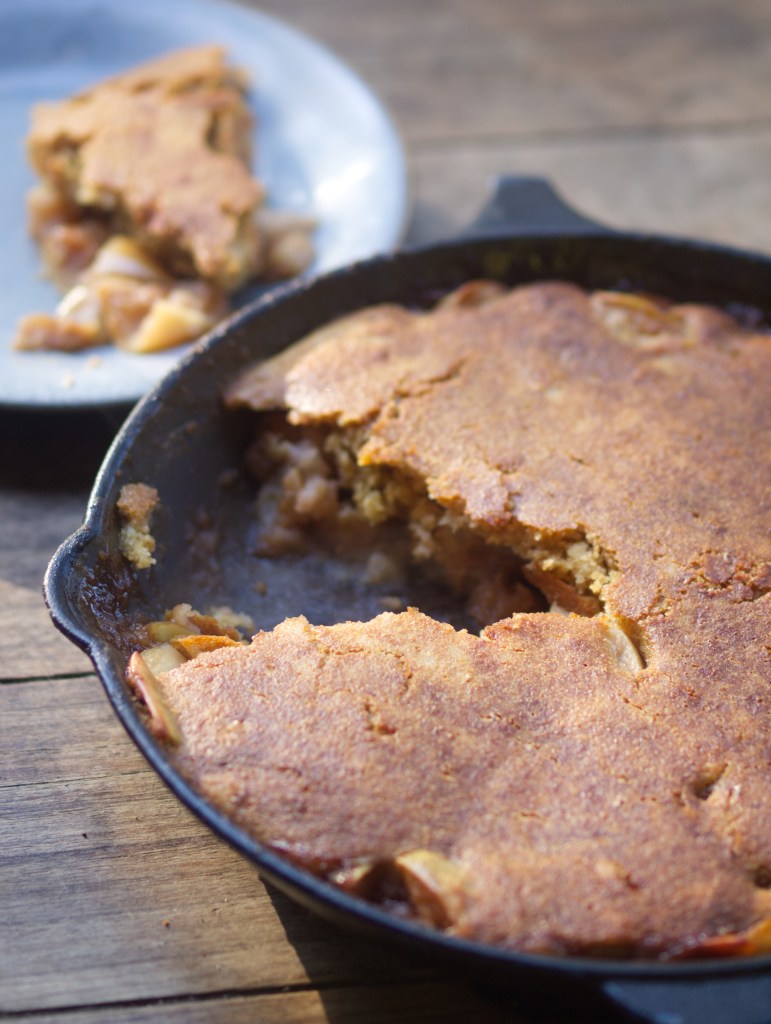
Sourdough skillet apple pie
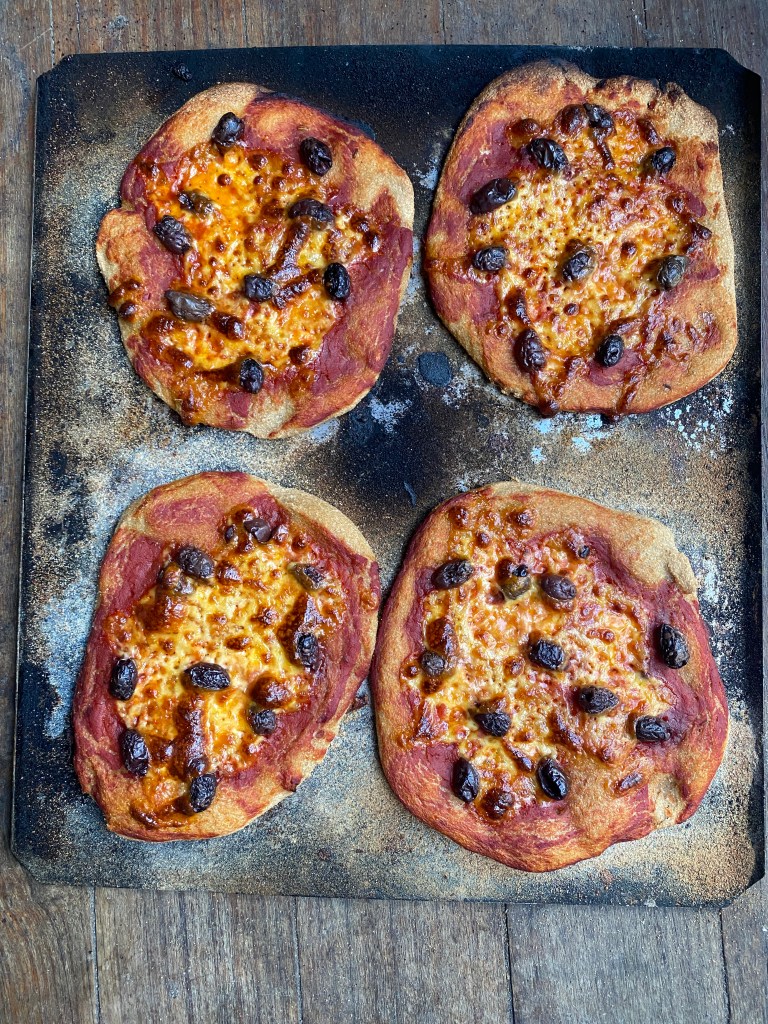
With sourdough you can make great pizza from wheat, spelt, einkorn, emmer, Khorasan, or gluten-free flours, and I will show you how.
Sourdough pizza with olives and mozzarella
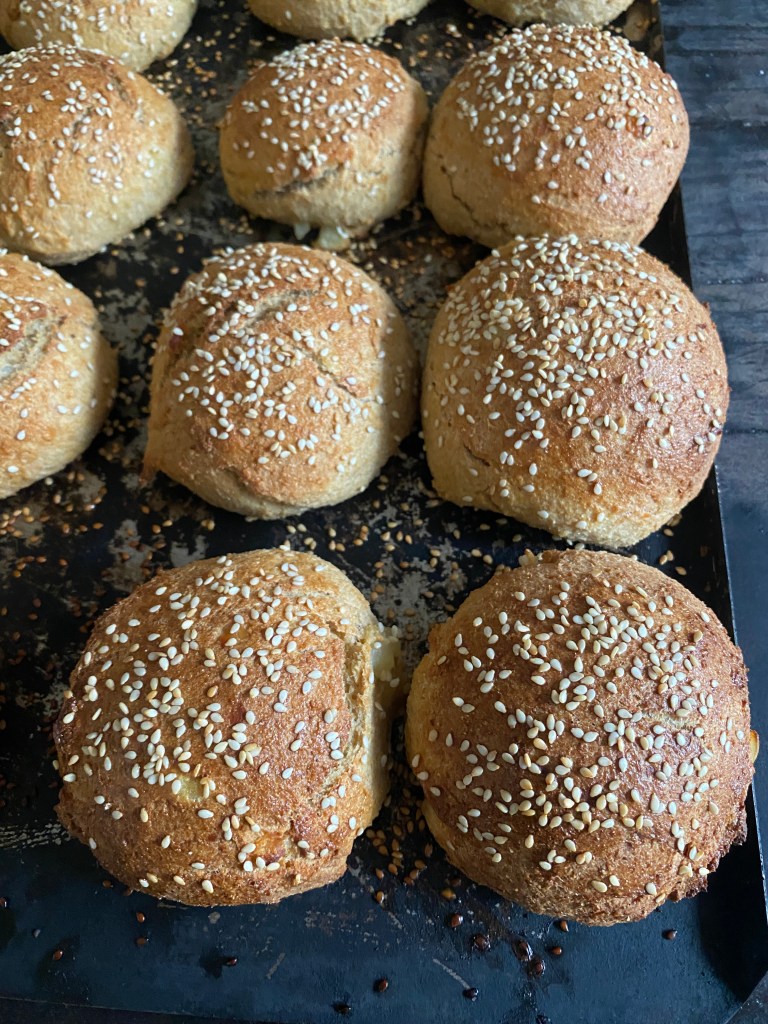
After years of making terrible burger buns, I’ve created two excellent roll recipes that will work for burgers, sandwiches, and more.
Best ever burger buns
Taking my fuss-free, busy homesteader’s approach to baking one step further, I’ve developed a recipe for Danish pastry that is more adaptable and down-to-earth than other Danish pastry recipes. I also share the most delicious doughnut recipe, and several recipes for different sweet buns, fruit breads, and more. All of these are 100% sourdough leavened, with 100% real food ingredients.
Sourdough jam doughuts with homemade cherry jam
I’ve created a chapter of gluten-free breads from 100% natural whole food ingredients, with something for everyone, and also tested gluten-free versions of the sourdough discard recipes, so that you can make gluten-free pancakes, cookies, cakes, pies, and more.
Gluten-free sourdough bread made from oats, rice, and buckwheat
Sourdough without fail!
If you’ve tried sourdough in the past (or if you’ve wanted to) and it hasn’t worked out, don’t despair. This book will help you to make your own sourdough bread, pizza, pastries, and more. Some of the best feedback I’ve had has been from recipe testers, including the quote from Gina that I’ll post below. If your past sourdough experiences have been like Gina’s, I hope you will also look forward to baking the recipes in my new book.
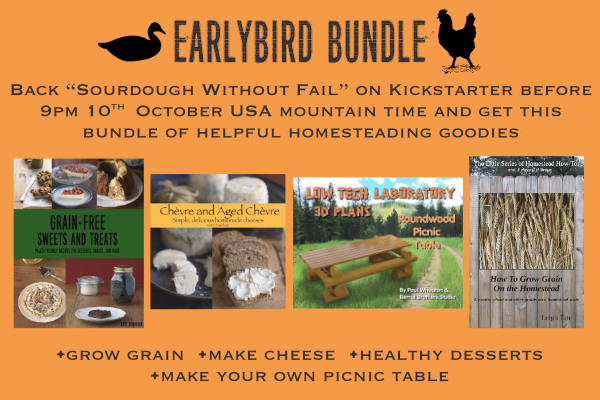
If you’re interested in learning more, please feel free to visit the Kickstarter page about my book. I’ve provided a discounted price and lot of bonuses that are only available while the Kickstarter is live for the next month. If you back the Kickstarter in the first couple of days you’ll also get access to this extra earlybird bundle of plans and ebooks.
Around two years ago I wrote a big update about what we were up to, and our homesteading plans for the next year or so. There have been so many changes and reflections since then, so here is an update some changes here, and on our progress with self reliance and growing food on old logging land.
Changes
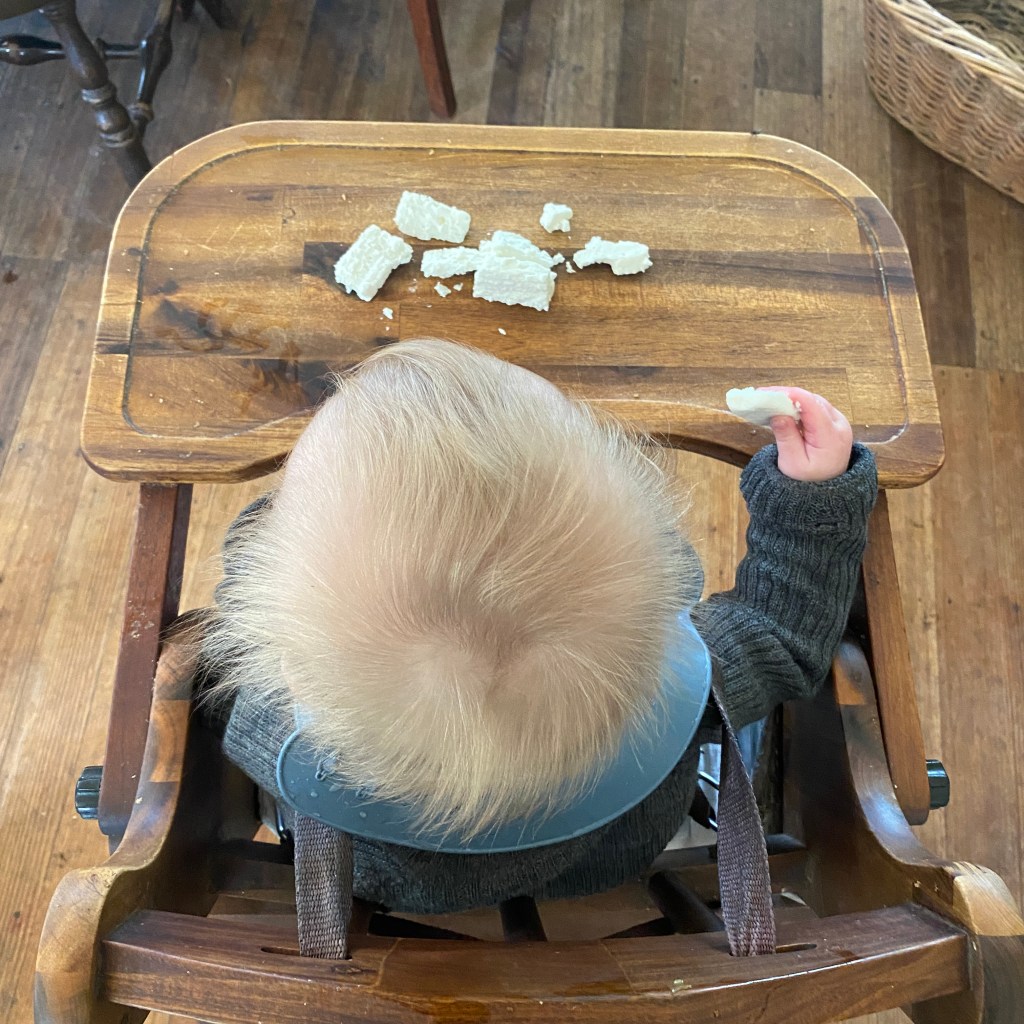
New baby Born in April 2024. She is beautiful and healthy and loves homemade cheese.
No hay, no cow Every year in my memory, hay has been easy to find, and relatively cheap, so I had figured we could rely on bought hay to feed a cow while we worked on transforming parts of our land into pasture. With dry weather in the springtime, and possibly also from the media constantly bombarding everyone talking about how dry it is going to be here for the next few years, hay was extremely scarce, and I’d never seen anything like this before. If hay could be found, $20 for a square bale was considered cheap, $30 being the usual price, and round bales were extremely hard to find. Even lucerne, which is irrigated and has never changed in price much in the past is was selling for $45 a square bale.
I am glad that we had the sense to attempt to secure a years’ supply of hay before we found a cow. Not getting a cow was a bit of a setback, but nowhere near as bad as it would have been if we had a cow and found that we couldn’t feed her.
The hay supply problems have really brought home the importance of being self reliant in animal feed. I was reading the “5 Acres and a Dream” book a while ago and admire that animal feed self sufficiency has always been one of their top priorities. Animal feed is often taken for granted, but in times like these, it reminds me to never take anything for granted. Animal feed self reliance has become a bigger priority for us.
I’ve stopped selling food at markets I liked the idea of helping to create a local food system and a cash-only business, but found it was interfering with actual self sufficiency, and it was annoying my family.
I can’t drive, so to get to the larger market, I would have to get all the children up, and my husband would drive all of us to the market, and they would sit in the van playing board games and reading while I had my stall. The market organisers started getting fussy about wanting all stallholders to stay until the official end of the market, even if my stall had sold out, or if the market was really slow, making it a much longer day that it could have been. In winter the goats were nowhere to be found before daylight and wouldn’t come when they were called, and sometimes I was also running late, so I was having to go to the market without milking, and then do the milking when we got back from the market at 2pm. The goat’s milk supply decreased.
My heart was not in it, and I started feeling happy whenever I had a reasonable excuse to not be at the market – one month I was sick, the next month there was a problem with one of our dogs, the month after something else, and the way I was feeling about going to that market was starting to feel like the way I felt when I used to have a 9-5 job. I enjoy baking, but I don’t enjoy standing around for 5 hours dealing with customers.
The smaller market closer to home I kept going to for a while longer, but felt frustrated a lot of the time because most of the people going to it were not going there to support a localised economy, but going to it as a social event while they continued relying on food from the supermarket. In the end I decided I’d rather be homesteading, so I decided to stop going to that market as well.
Producing enough sauerkraut and kimchi for the market also was making me less appreciative of the vegetables that we were growing ourselves: when I am making larger amounts of ferments, what we were producing in the garden seemed like a drop in the ocean compared to the amount of vegetables I needed to bring in for the fermenting business, and when there are bulk carrots and cabbages in the larder left over from the kimchi making, it’s sensible to eat those first, before they go bad, before we harvest the roots growing in the garden, so the roots in the garden kept getting left until later and not appreciated as much as they should have been.
The whole market experience reminded me of an episode of “The Good Life” when Tom discovers that he’s actually really good at pottery, and has a bunch of people wanting to buy his crafts, in the end, he decides his heart is in self sufficiency, and that the pottery business was sidetracking him from where he really wanted to be.
Changes of plans bringing inspiration
After experiencing the issues with the hay and the market stall, I began to see more where my heart really is. Sometimes it might be important to remind myself of what I don’t want to be doing, before I can understand once again where I really want to be. Self sufficiency has been what propelled me to start this life, and the thought of creating a self-sustaining system that feeds us, feeds our animals, and grows the soil is what sends shivers of excitement down my spine.
With the market stuff, I lost sight of this focus for a short time. Getting debt-free, and having a cash income that doesn’t rely on the internet are both good goals to have, and can help towards the goal of self sufficiency, but where my heart really is, is in not relying on money at all, and providing for our own needs, and that is how I want to live my life.
Self sufficiency priorities for the year ahead
Potatoes For many years here I grew all our own potatoes, and they were a big staple food for my family. In 2023, when my husband started getting inflammation reactions to potatoes, they became less of a priority, I focused on other crops, did not give the potatoes the attention they deserved, and for the first year in many we didn’t not grow all the potatoes that we needed. Last year, I started with new seed potatoes, and we’ve had all the potatoes we need, plus some to use for this year’s seed potatoes
I planted them a bit close together last time I think, with around 2 feet between rows it doesn’t give much space for hilling them up. This year I’ll either plant in rows spaced 3 feet apart, or put a double row down the middle of our 5 feet wide garden beds.
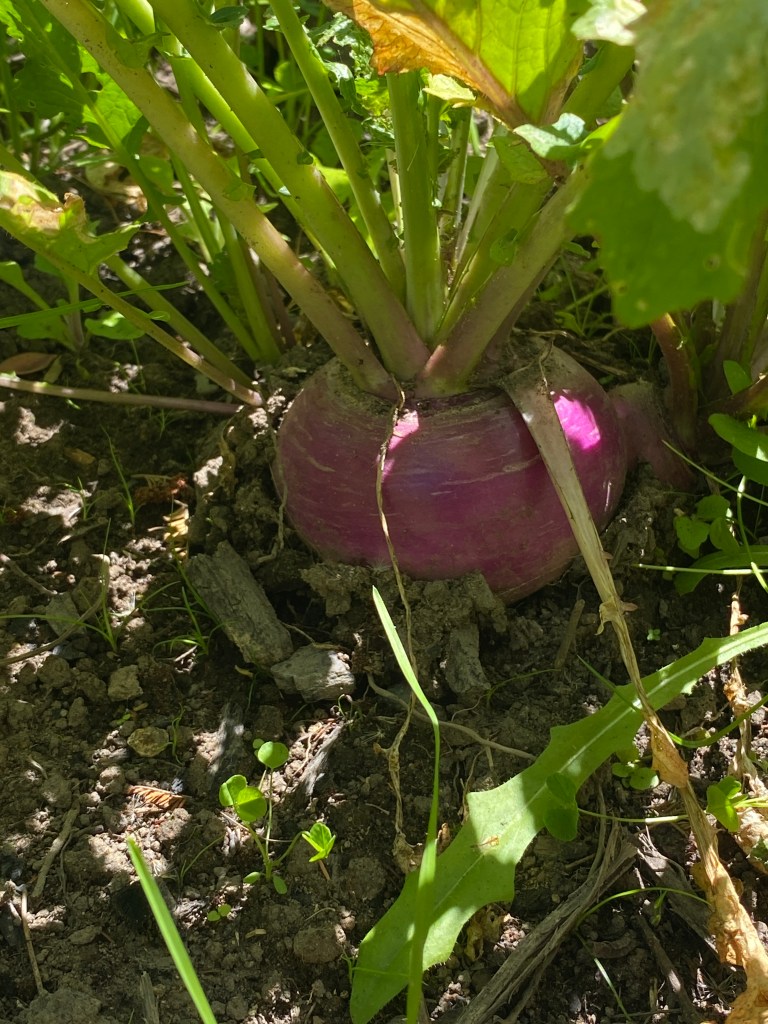
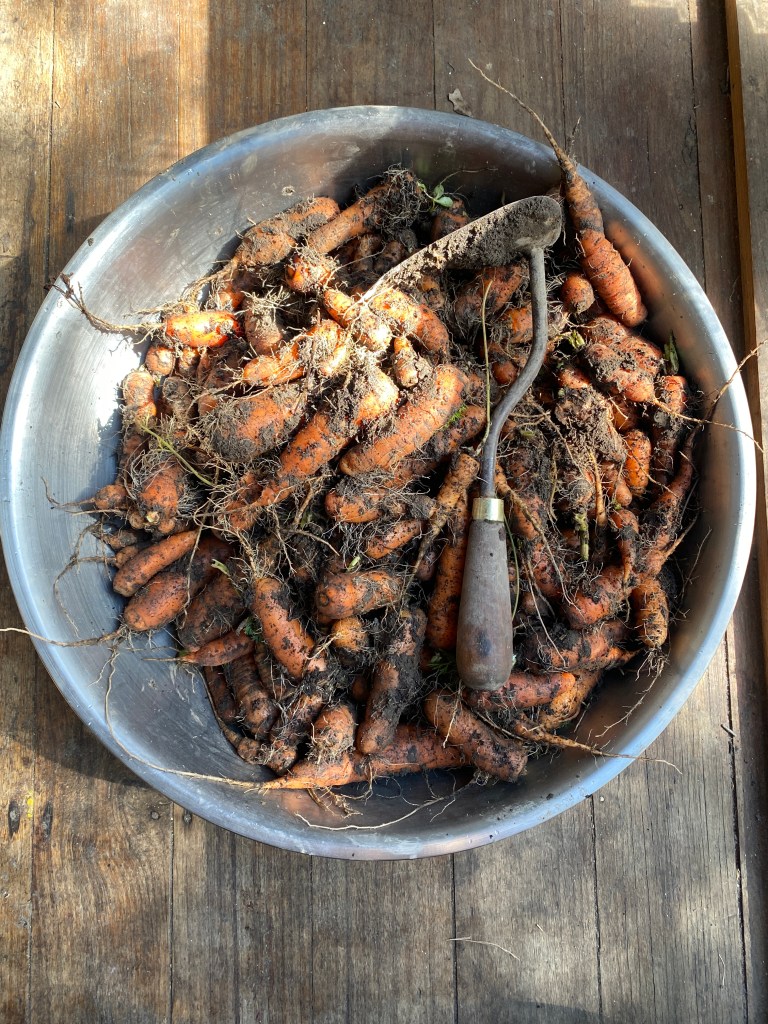
Fermenting vegetables Turnips and daikon radish are easily-grown fermenting crops, and we are growing lots of these. I am getting better at growing carrots every year too. Cabbages I am not going to bother with much this year. I’ve recently heard that zucchini put through a mandolin can be used for kimchi, so this is something I’m keen on trying too.
Vegetables in general Vegetables are a more efficient use of a small amount of land when compared to grains. I still grow grains in the garden, but mainly for the purpose creating organic matter to feed the soil.
Animals We’ve slowly been replacing our hybrid brown laying hens with Australorps and mongrels, with the hope of having more broody hens and chicks, and hens that thrive on homemade feed. Last year none of them went broody, so we are planning to get some sikie bantam hens to hatch the eggs.
We’ve started keeping pigs every year again. For a while we had a breeding sow and a young boar, but that didn’t work out, so for now we will rely on buying piglets from other homesteaders. Maybe we will have things better set up later on and will be able to keep some breeding pigs in future, but it’s not something I want to do again unless we’ve got a better rotational system set up and are growing more of their food.
Dairy self sufficiency was going really well last year but has recently suffered a big setback that I don’t want to go into detail about. This is always a big priority for us so we will find a way through it, and I’ll go more into detail about this when things are looking more settled than they are now.
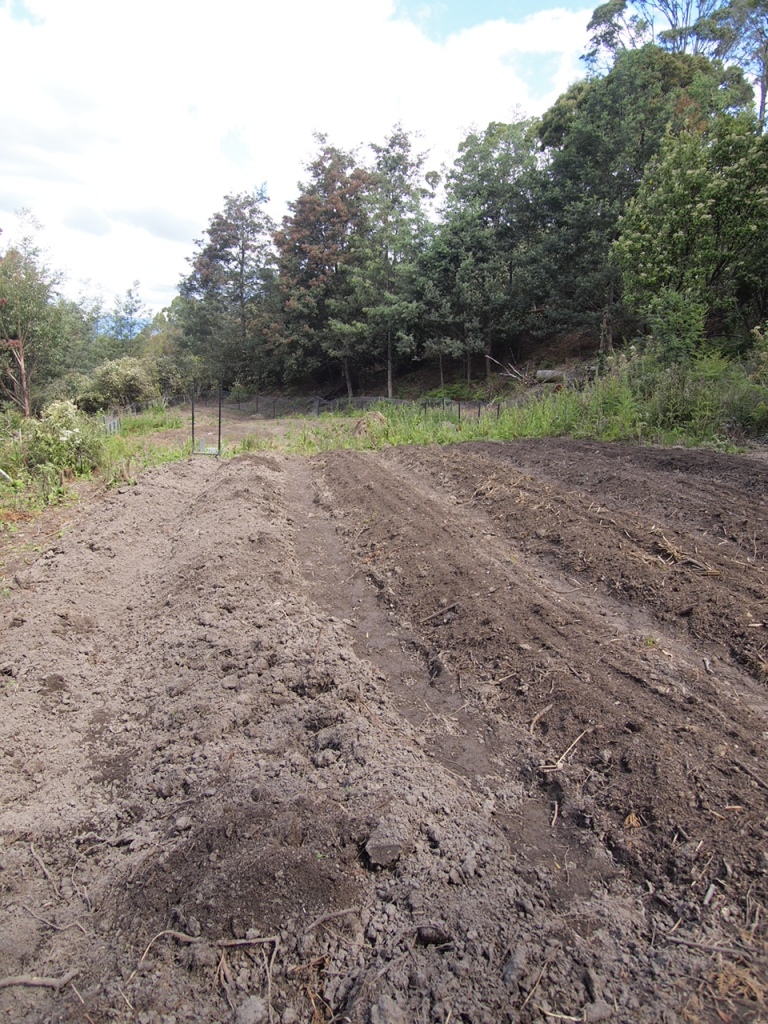
A new system in the top garden Two years ago I was working with 75cm (30”) beds, with each section of the garden containing eight of these beds, which were part of a four year rotation. While this was good for confusing pests and having more diversity in the garden, it was easy for weeds to creep in from the paths, harder to delegate garden work, harder to harvest, and harder to irrigate where it was needed.
Last year I observed the patterns of the irrigation sprinklers and divided the garden up into twelve ‘fields’ made up of 3 150cm (60”) by 5 to 6 metre (19’) long beds, with paths in between. Each of these fields can be irrigated by one sprinkler. The paths are sown to clover, which can be used to feed the garden beds, and provide living roots in the soil year-round for mycorrhizal fungi, while keeping weed pressure down.
If sheep sorrel and other weeds continue being a problem, the new field system can be scratched over by chickens, one field at a time, and we can also focus our weeding efforts on one area at a time.
Although not quite as diverse as the old system, this new system is still not a monoculture. It’s done on a tiny scale, I grow companion plants with my main crops, and I have perennials around the edges of the garden, along with the clover on the paths. It’s been a lot easier to manage than the old system.
Animal feed Hay and grain in large quantities continues to mostly be something that is more easily done on a larger scale than ours for now, but I am figuring out ways to produce more of it here, even if it takes a few years. This year we got an acre and a bit cleared, which we sowed to pasture and are in the process of fencing off from wallabies. I am also planting more tagasaste and other trees to use for animal feed.
Reflections on self sufficiency priorities
Reflecting on my post in mid-2023, I wonder if I was approaching things in the wrong way. I think we can achieve a lot more self sufficiency if we produce more of what we are already producing well, and rely more on that. It might sound simple to say this, but in practise it is easy to just eat what we are used to eating and to want to produce that, rather than focusing on being more self sufficient with our current situation, even if it’s not 100%. So far we’ve been replacing some butter by drinking more goats milk and eating more goats cheese. We had five does in milk last year. I made cheese every day or two, and I also made a lot of gjetost. Once we got out of the habit of having butter and gjetost together, the bread is fine with gjetost alone and a glass of milk, and we don’t go through as much butter this way.
It feels awesome to be more self sufficient and to be grateful for what we do have.
I still am dreaming of cows, pasture, workhorses, field crops, sheep, and more, and maybe we’ll get some of that (or all) in time. The way I am approaching this is to be a bit slower about it, to be more observant of the land, to keep our true goals in mind, and to use the land we have wisely, dedicating more space to staples like turnips, carrots, and potatoes, and less to experimental crops.
Successes and failures last season
Over the years I’ve been encouraging the dandelions with the biggest tastiest leaves to flower and spread. This success turned one failure into not as much of a failure.
With the 2024 busy spring planting season taken up by focusing on larger crops that needed to be planted on time and tending garden areas further away, I didn’t stay on top of succession planting of greens. Once the overwintered mustard greens and kale all bolted to seed, and the earliest plantings of salad and stir fry greens were finished, we didn’t have much left in the garden to eat.
While some of the chicken tractor beds sat idle, the dandelions thrived, providing us with lots of nutritious greens. There are so many dandelions now that if I can get over the outrage of ripping perfectly good dandelion plants out of the ground I’ll be able to harvest the roots to cut up finely, roast, and make into roasted dandelion tea.
Our root crops went a lot better than the previous year because I’ve stayed on top of weeding and thinning, and not felt bad every time I cull perfectly good carrot seedlings to let the other ones have more space to grow.
The garden is feeding us I felt anxious here and there over last spring. There was so much overgrown, so much to plant, urgent fence repairs needed to stop naughty goats, clearing took longer than expected, and some things got delayed. After our failures the year before with not producing much in the way of potatoes or roots, it brought a lot of joy to be harvesting turnips, broad beans, snow peas, new potatoes, followed by garlic, beans, tomatoes, zucchini, carrots, pumpkins, mustard greens, salads, swedes, and lots more potatoes and turnips.
It’s hard to find balance between not pushing myself enough, and feeling stressed and worried that there’s not enough being done. It’s something I need to work on, and I’m getting better with it over time.
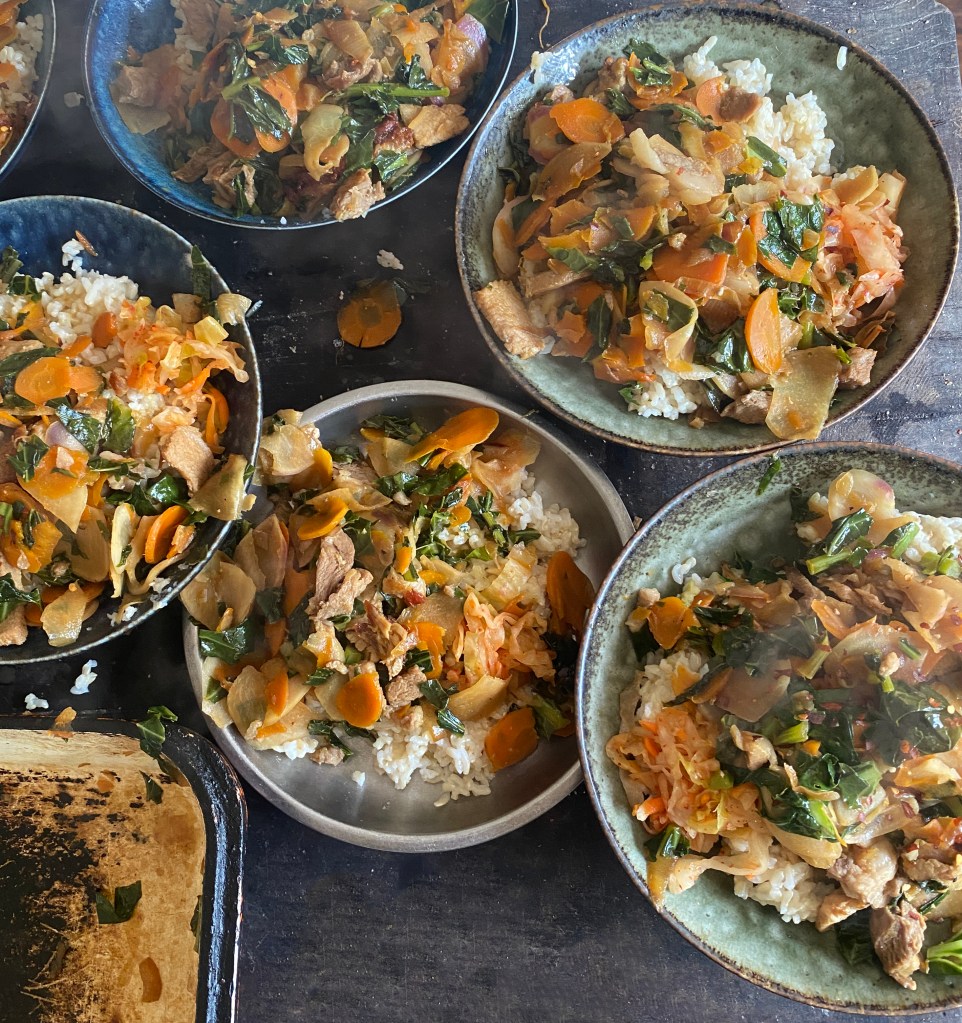
Stir fry is one of those basic meals that is often overlooked. My way of making it is a bit different to most, and I don’t think I’ve posted a recipe for how I make one anywhere, so I’ll share it here.
Ingredients
My formula is usually something like:
1 part onions or leeks
1 part carrots
2 parts turnip or cabbage
1 to 2 parts dark leafy greens
A bit of garlic and maybe some ginger
However much meat we’d normally eat in a meal
Some lard or tallow, for cooking
Maybe some coconut aminos, and maybe some cider vinegar and honey
Method
1. Cook rice
If you’re serving this with rice, first get the rice fully cooked. Keep it warm while you cook the stir fry.
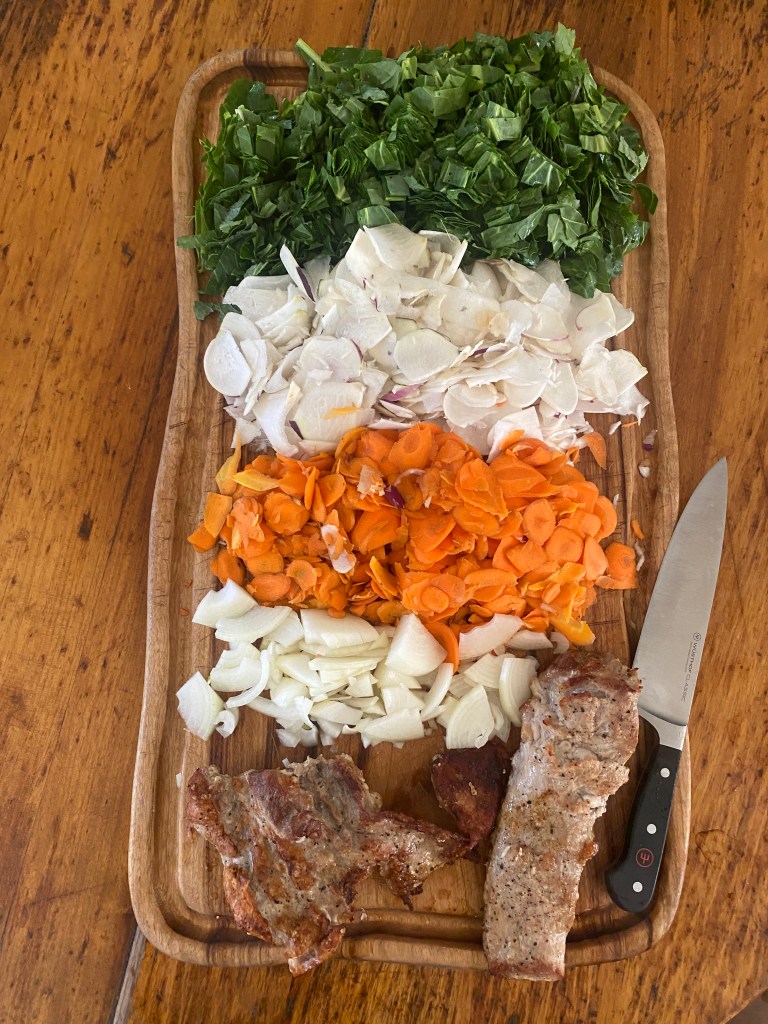
2. Chop vegetables
Next, get all your vegetables chopped and ready. For most meals I don’t do this, I just chop stuff up as other things get cooked, but stir fry cooks very quickly and needs a lot of hands-on attention, so it’s easiest to just get everything chopped up and ready to throw in the pan before you begin cooking.
3. Cook meat
After that, cook your meat. This is where I probably do things a lot differently to most people, but I really like the results from doing it this way – there’s no doubt about whether the meat is cooked through or not, no overcooking the vegetables, the meat gets browned and not boiled, and cooked meat is easier to chop up than raw meat. You can either use steaks such as round, rump, or topside, of some sort or mince (ground beef). Boneless skinless pork goes well in this stir fry too.
To cook the meat, heat your pan over medium-high heat and add enough lard to coat the base of it. When a drop of water jumps up in a lively, noisy way when dropped onto the hot fat, it’s ready to cook. Put whole steaks on the fat (or meatball-sized chunks, if using mince) and sprinkle with salt and pepper Cook on one side without moving them until juices start to run off the steak and into the pan. Flip over and cook the other side until juices rise to the top for beef, allow slightly longer than this if you’re cooking pork or chicken.
Put the meat in a bowl and allow it to rest for a couple of minutes, then cut it across the grain into thin slices or bite-sized pieces, return to the bowl so that any meat juices stay with the meat.
For the stir fry in the photos, I used misshapen bits of pork loin that I’d messily butchered, they were thicker in some places than a steak, so I just roasted it instead of frying it. You can also just use leftover bits of roast meat.
4. Cook vegetables, then add cooked meat
Next, add a bit more fat to the pan and throw in the onions. Stir them around a bit until they start to soften and smell nice. Next throw in the carrots, stir them around until they are hot all the way through. Next add turnips or cabbage, and garlic, if using, stir around until this is hot all the way through, then throw in the greens and a dash of salt. Stir everything around until it is cooked through, then add in the meat and the meat juices. Taste, and add any other flavourings – for this pork stir fry I used a big chunk of honey, about half that amount in coconut aminos, and then a dash of cider vinegar.
Serve on its own, or on top of rice, with a scoop of fermented vegetables on the side. Sprinkle with chilli flakes (red pepper flakes) if you want to make it a bit spicier.
Making pasta at home is easier and cheaper than you may think. In this post I’ll share my method and thoughts on homemade pasta.
Why make pasta at home?
Dry pasta is pretty much empty calories, wrapped up in plastic. Homemade egg pasta is a really tasty way to eat eggs that even picky eaters enjoy, and because it’s so rich in nutrition from the eggs, sauces can be really simple to make a nourishing and filling meal.
Every week when we have enough eggs from our hens, we make pasta every Monday. This helps me with meal planning because it means there’s less days when I have to figure out completely what I’m making, but there’s still enough variety in pasta that we never get sick of it – sometimes it’s carbonara, other times pesto, sometimes a creamy cheesy sauce, sometimes garlic butter and greens, sometimes it’s oriental noodles with bacon and vegetables, sometimes just lots of butter and grated homemade cheese, if you think of any possible pasta or noodle dish, it can be made with homemade pasta, and that gives a huge amount of variety.
How to make pasta
1. Start with eggs.
Crack eggs into a small bowl, sniff each one to make sure it’s not off, fish out any bits of shell, and put them in a mixing bowl. Use around 2 eggs per hungry person.
2. Mix in flour and salt.
Use around half a teaspoon of salt for every five eggs. For flour, the amount you’ll need will depend on the kind of flour you’re using. I don’t measure. I just beat the eggs with a wooden spoon, mix in as much flour as I can mix with the spoon, and then keep adding flour, mixing with my hands. If the dough still seems sticky, keep adding more flour, kneading it in with your knuckles. Break the dough apart, and if it’s still sticky inside, sprinkle the sticky sides with more flour and knead that in with your knuckles. The trick to adding flour is to just add a small amount at a time, and keep adding until the dough is very stiff. I use 100% wholemeal wheat flour from my grain mill, but other kinds of wheat and spelt flour will work too.
3. Rest
Allow the dough to rest for at least half an hour, covered with a tea towel or plate. A longer rest is fine too.
4. Roll out and cut
Divide the dough into manageable pieces. Use a rolling pin or a clean glass bottle to roll each piece as thin as it will go, or as thin as you have patience for, dusting the dough with flour to prevent it from sticking. Use a butter knife to cut into strips, or your choice of pasta shapes. When you’ve cut some pasta shapes, spread them out on a tea towel (dish towel) to dry out. Keep in a single layer if possible, as they can get stuck together if you stack them too high.
5. Cook
This next bit happens really quickly once the water is boiling, so make sure you have the sauce ready, along with all the bowls, cutlery, drinks, telling everyone it’s nearly ready, and so on. Bring a large pot of salted water to a rolling boil over high heat. Add the pasta, and bring it back to the boil. Once it’s boiling, cook for three minutes. Drain in a colander. You can either mix the pasta into the sauce, or put the pasta in bowls and top with the sauce, whichever you prefer.
Many events in recent years have caused me reflect on the expectations of the industrial food system and modern lifestyles, and how rewarding it is to return to simpler ways. Olive oil is in short supply this year, and this offers another opportunity to create better alternatives for cooking that can be produced on a homestead or by local farmers.
Most of the olive oil in supermarkets is adulterated with seed oils, so is not the healthy fat that many people imagine it to be. Real olive oil also should not be heated above 180ºC (350ºF), so it is not an ideal all-purpose cooking fat, even if it can be found.
Animal fats, such as lard and tallow, are usually local and small-scale by nature – so local that most of the time you will need to render it in your own kitchen (a simple process, see my method below). The saturated fats and cholesterol found in tallow are needed for hormone function, memory, neurological health, kidney, liver, and lung health. The healthiest fats are those from animals that are raised naturally outdoors – animals raised in this way are often raised by small farmers, so it’s possible to directly ask questions and make sure the animals aren’t being fed any weird additives and other stuff.
Most recipes I see use liquid oils such as olive oil or seed oils as the main cooking fat. I can understand the temptation for food writers to use ingredients that people are familiar with and can find in a supermarket, and to not clutter ingredients lists with a bunch of alternatives, but animal fats have so many benefits and can be used for all kinds of cooking. To create a resilient local foods system for real food sovereignty I think it’s essential to choose local animal fats as a staple cooking fat, which is why in my cookbook the recipes use lard and tallow.
Most people are used to cooking with liquid oils these days, but it can be just as easy to cook using tallow, lard, and other animal fats.
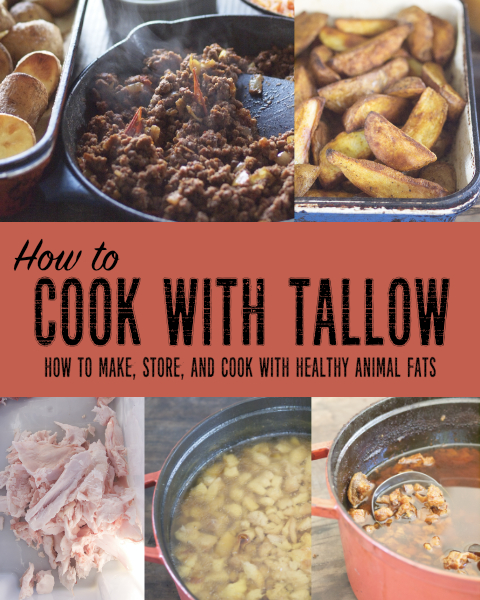
How to cook anything in tallow and lard
To cook anything in solid fats, we first need to turn it into a liquid fat by melting. This is easily done by heating it directly in the roasting dish if it’s made from cast iron, enamelled cast iron, enamelled steel, or stainless steel. Simply put your roasting dish in the hot oven or on a hot stovetop, with as much tallow as you think you’ll be using, and allow it to melt until it’s a hot liquid. This doesn’t take long. Add your vegetables, toss them around in the hot fat with a wooden spatula to coat them, sprinkle with salt, and bake. For meat, just place it on the hot fat and cook it – I get beautiful steaks and burgers every time by making sure my pan and fat are extra hot (a drop of water should violently jump up when splashed on it) – allow the meat to fully sear on one side before turning it.
If you use glass or ceramic pans for roasting, to avoid cracking them with sudden temperature changes, don’t preheat the pan, just melt the fat in a saucepan, mix the vegetables in the fat, and then add it to your pan.
Sautéing, stir frying, and deep frying are even easier – just heat your tallow in the pan and cook in it.
How to make your tallow or lard
Finding ready-made tallow and lard from healthy sources is not often possible, but making your own is really simple and affordable. If you buy beef by the quarter, half, or whole, you can probably get tallow for free just by asking the farmer or butcher in advance.
Lard and tallow either come as leaf lard or suet, or as offcut fat. Leaf lard and suet are pure fats from around the organ meats, these have a very mild flavour and can even be used in pastries. Offcut fat usually contains small amounts of meat, so can have a stronger flavour and may benefit from a bit of trimming, but is still good for most uses in the kitchen.
Leaf lard from homegrown pigs
To render fats, first chop it into small pieces and place in a heavy pot with a lid or in a slow cooker, Add just enough water to cover the base of the pot, then stir to coat the fat in the water. Bring the pot to the boil with the lid on, stir, and the reduce the heat to a simmer. Allow the fat to slowly render in the pot for as long as it takes, sometimes just a couple of hours, other times for a larger batch it can sometimes take a day or two. Stir the fat every now and then as it renders.
If you’re concerned with water remaining in the tallow and impacting its storage life, allow the pot to render with the lid off over a gentle heat for some of the rendering time.
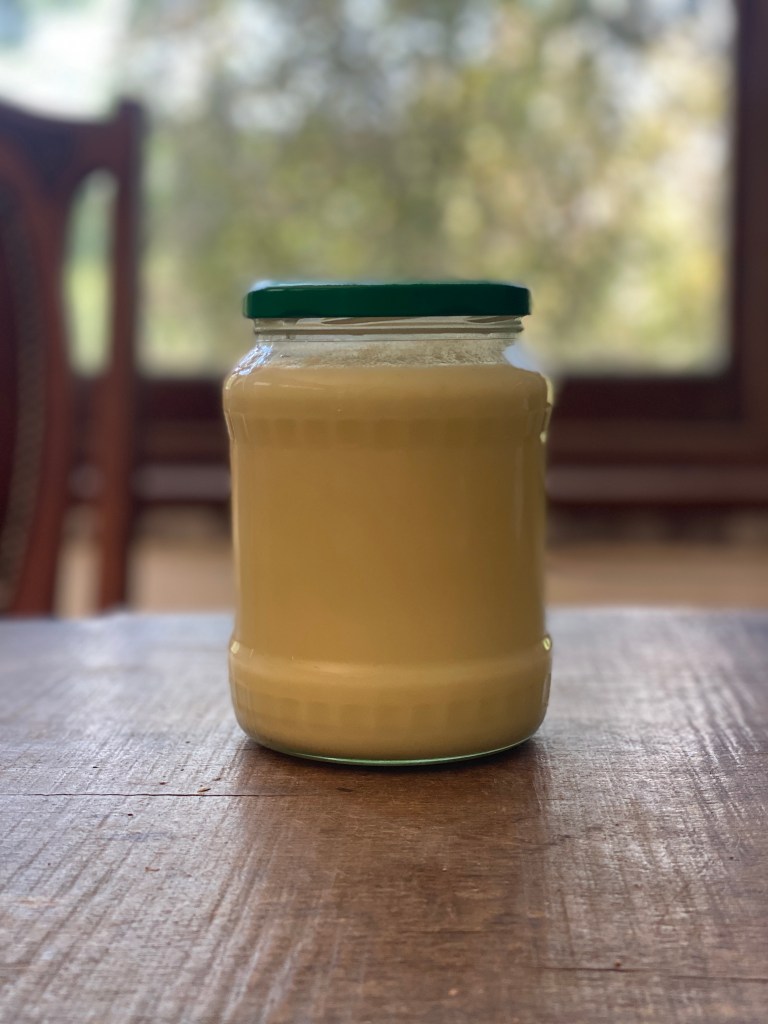
As the fat renders, there will be more and more liquid fat, and the pieces of solids will shrink, and sometimes go crispy. Once all the solids are crispy (or at least empty-looking and light in weight), allow the bubbling fat to cool slightly, before carefully straining through cheesecloth or a mesh sieve into warm heat-sterilised jars. Put the lids on tightly, and for the best keeping qualities, flip the jar over onto the lid as you would for old-fashioned jam, and then flip back onto the upright side and allow to cool before storing.
The storage life of lard and tallow depends on how well it was strained, if all the water evaporated as it cooked, and how clean the jars are. The temperature you store the lard in will also impact the storage life – the ideal situation is larder or root cellar temperatures of around 10ºC (50ºF) or lower, but room temperature is also often fine. Lard and tallow can also be stored in a fridge or freezer.
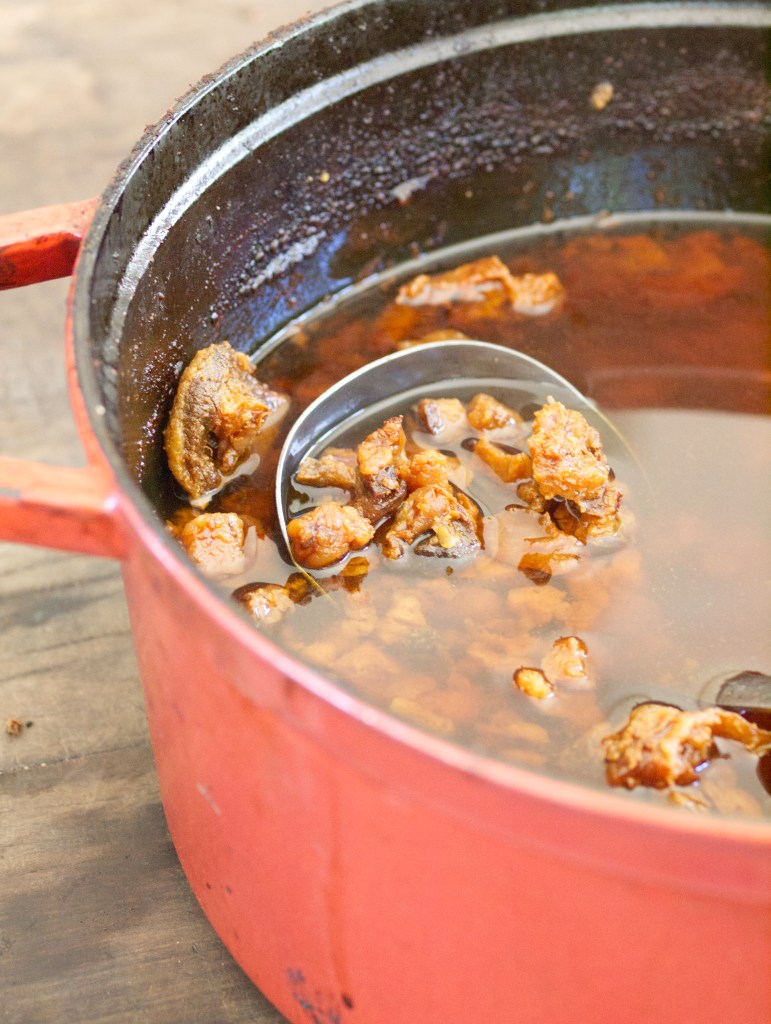
1. Offcut beef tallow in the early stages of rendering. The fat has started to come out of the solids, but the solids still feel heavy, with plenty more fat ready to render out. Fat can be skimmed off the top at this stage, as needed, or the whole batch can be rendered, strained, and put into jars in one go.
2. Rendering is complete. The solids are crisp and airy, with all fat rendered out into liquid. It’s now ready to be strained in jars. The leftover crispy bits can be fed to chickens.
The brown colour of the fat means that this batch got a little overcooked. When this happens, it’s still fine for use as a cooking fat, and has a nice toasted flavour, but it won’t be as good in a pie crust or anywhere else that needs a neutral-tasting fat.
To make the best possible purified tallow for the longest storage life at room temperature
Instead of straining the fat directly into jars, pour it into a large stainless steel bowl. Allow the fat to cool completely in the bowl until it is solid, then gently heat the bottom of the bowl, flip the solid mass of fat out into a new pot or bowl, so that the rounded side is now up, and scrape off any impurities that have gathered on the bottom. Melt the fat until hot again, and pour into warm jars, as you normally would. You can also do this refining process a second time.
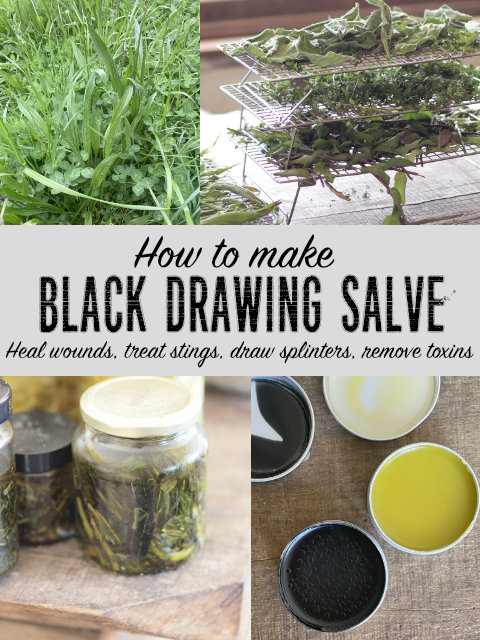
Here is how I make one of the most important natural remedies that I use.
We use black drawing salve on all kinds of bites and stings, as well as on splinters, puncture wounds, and anything that looks like it might need possible toxins or infections drawn out of it. I also find it a really helpful remedy around the homestead for wounds on animals – it’s so thick that it forms both a remedy and a bandaid in one – if you’ve ever tried to get a goat to keep a bandage on then you’ll understand what a relief it is to just have a remedy that will stick on and help to heal and protect the wound. When I use this on minor udder injuries, the wound is usually healed in 24 hours.
The bentonite clay and activated charcoal in this salve draw out toxins. The plantain and calendula help to heal, as well as drawing out infections and toxins. You also add a couple of drops of tea tree or kunzea oil to this salve to further help its healing properties, or a tablespoon of raw honey – if you’ll be adding these, then allow the salve to cool down slightly before adding them so that the honey doesn’t get cooked.
I use olive oil to make this salve, but you could use lard instead if you can keep it warm while it’s infusing.
Ingredients 1 cup (240ml) plantain infused olive oil (or a mix of plantain and calendula infused oil) 1 1/4 tablespoons beeswax 3 tablespoons bentonite clay 3 tablespoons activated charcoal
Plantain, also known as ribwort, is a common weed in pasture, lawn, and gardens. It is an excellent remedy for all kinds of bites and stings.
Calendula is easily grown from seed. The flowers are a tasty and colourful addition to salads as well as being an excellent herb for healing and preventing infection.
Method
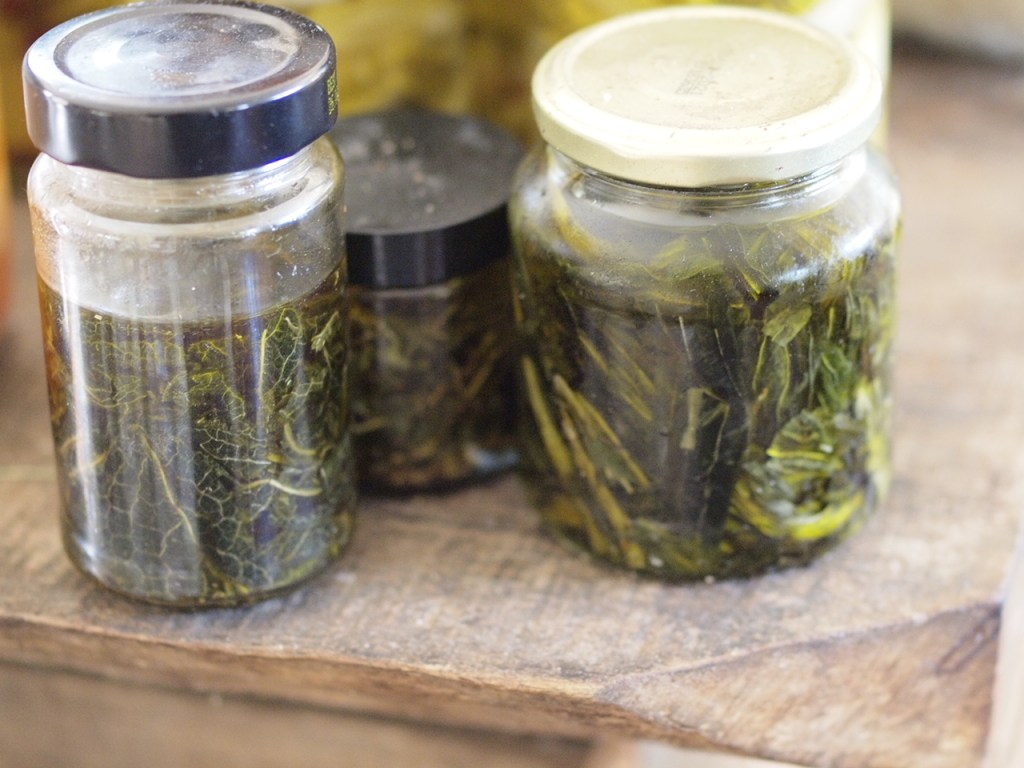
Make the infused oils:
(a)Harvest and dry your herbs. Plantain is also known as “ribwort” and is a common weed on lawns and pastures, easily identified from its ribbed leaves. Calendula is very easy to grow. I harvest fresh herbs in dry weather and put them in thin layers on top of stainless steel cake cooling racks to air-dry.
(b)Infuse the dried herbs Pack dried herbs down into a jar, then fill with olive oil to just above the level of the herbs, and agitate sightly with a small wooden spoon or other implement to make sure the oil is getting to all the herbs. To make the most potent herbal remedies using this method it’s important to really pack the herbs down, and to use too many herbs and too little oil rather than the other way around.
Once you have your herbs sitting in oil, you can either leave them to sit at room temperature for six weeks, or leave them in the ‘warm’ setting of a slow cooker for 8 hours. I do a mixture of these two methods, putting my herbs on the warm edge of the woodstove as much as possible, and infusing them for a full six weeks.
(c)Press the oil out from the herbs Gently warm the oil and herbs, then pour the oil out through cheesecloth or a potato ricer into a bowl, make sure to then squeeze all of the oil out of the herbs. The infused oil can now be stored if you want to use it for salve at a later date, or you can make the salve now. The leftover oily herbs can be fed to the chickens or composted.
Warm the oil and beeswax Take a glass liquid measuring cup and measure the infused oil. Add the beeswax (preferably in tiny pieces). Put the measuring cup into a saucepan filled with enough water to come up partly up the measuring cup, but not so full that you risk getting water into the cup. Put it on the stove over a low heat, and allow to heat until the beeswax has completely melted
Mix in everything else. Add the bentonite and charcoal to the oil and beeswax mix. Mix until thoroughly combined, and then pour into small jars or salve containers.
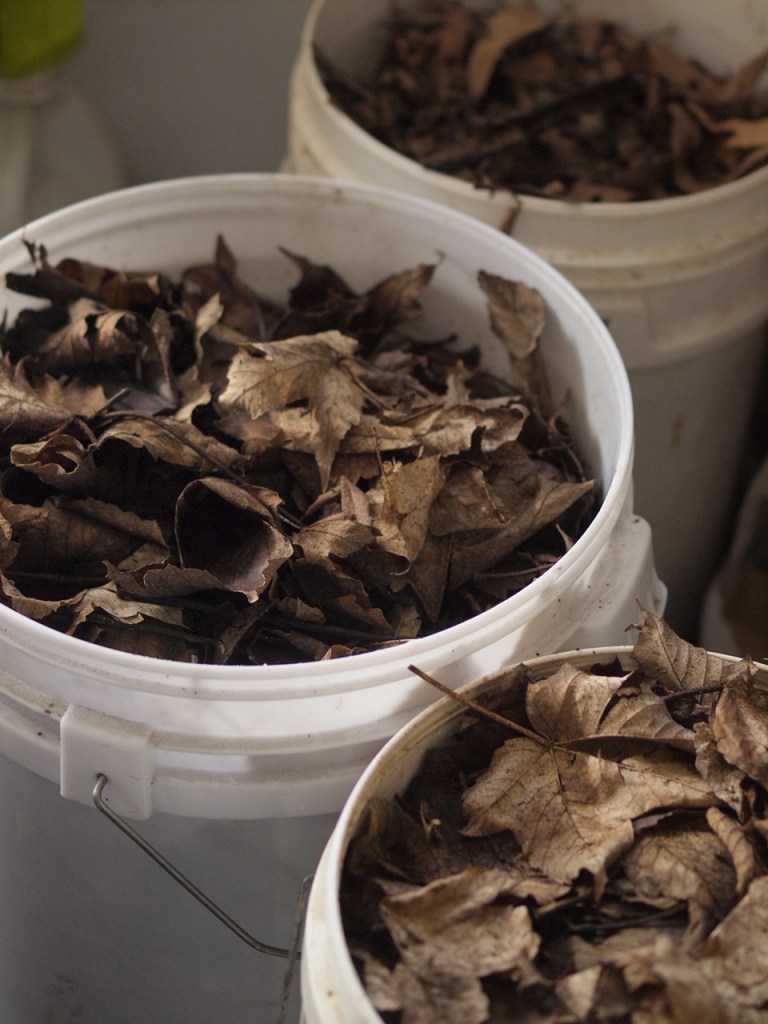
You may be wondering why I have three buckets of leaves in my laundry…
This is how I store root cellar vegetables through the winter:
1. Gather dry leaves in autumn
It can be a bit tricky here some years finding the right time when the leaves have fallen but have not become a sodden mess from autumn rains. I’ve used both maple leaves and blackwood leaves, and both work well, as long as they are dry. Any kind of fallen dry leaves will probably work. Leaves can be stored in old feedsacks in a dry place until needed.
2. Select the right vegetables in perfect condition.
Don’t store any that have cracks or bruises, or any that are missing their crowns. Suitable vegetables include beetroot, carrot, parsnip, turnip, swede/rutabaga, and other roots.
3. Pack a layer of leaves at least 1” thick in the bottom of a bucket or 55 gallon drum.
Top with a layer of roots, making sure they don’t touch. Cover with enough leaves so that you can no longer see the roots, then top with another layer of roots, repeat until you get to the top of the bucket. It’s best not to put the lid on the bucket, as this can cause condensation to drip down, but if you need to store your roots somewhere where mice might get to them then you may have to use the lid – just make sure you have an extra thick layer of leaves on the top and on the bottom if this is the case.
4. Store in a cool place.
I use an unheated room in my house that is easily closed off from the rest of the house and does not get sunlight during the winter. The ideal temperature for root cellaring is between 0ºC and 10ºC (32ºF to 50ºF), but up to 15ºC (60ºF) and even a little higher will still work – it just won’t store for quite as long as it would at lower temperatures.
The benefits of root cellaring, even if you don’t grow all your own vegetables:
Food security
By storing vegetables for weeks or months, it means we have more food in the house, for longer, so we are not affected by supply disruptions and other issues that seem to be happening frequently these days. It also means we don’t have to go food shopping as often.
Saving money
When we don’t grow enough vegetables of our own, I buy vegetables in bulk directly from the farm and it works out less than half the price of buying in the shops.
Extending the season of local vegetables
There is a “hungry gap” in many places when the local farms run out of many storage vegetables before the new season vegetables are ready. For growing our own vegetables, root cellaring means I can get the vegetables out of the ground and use the space for a green manure crop or other crop earlier than I could otherwise, or I can pull them out before they bolt to seed in the springtime and still have root vegetables on the table for a few more weeks. By root cellaring, I can keep storage vegetables around for just that little bit longer. Beetroots seem to keep the best out of everything I have tried, but all root vegetables will keep in this way for some time.
Other vegetables, and how to store them without electricity
• Potatoes don’t need to be packed in leaves – just store them in hessian bags, paper sacks, or cardboard boxes and keep them in a very dark, fairly cool place. In climates with mild winters, potatoes can be stored outdoors in a “clamp” – just put straw or hay on the ground, heap with dry, undamaged potatoes, cover with a thick layer of straw or hay, and then cover with dirt.
• Onions and garlic also don’t need leaves – just keep them loose in an airy, dry, fairly cool place. They like to be hung up high if possible. For our homegrown garlic, I plait it and hang it up when I can, or store it loose in a single layer in a box. For the onions that I buy, I keep them in netted bags, hung up from the edges of shelves.
• Fermenting is an excellent way to store vegetables while increasing the nutritional value – either grate or shred vegetables such as cabbage and turnip and mix with salt for them to make their own brine, these vegetables, along with most other vegetables can be preserved whole or in slices in a salty brine. Make sure you use enough salt to ensure that they keep well – between 2% and 3% of the vegetable weight is usually a good amount. Keep in a cool place. Many fermented vegetables will keep for a year or more. See my instructions for fermenting vegetables here: https://thenourishinghearthfire.com/2016/04/18/7-secrets-to-making-successful-sauerkraut-every-time/
• As well as being fermented, cabbages will keep for a month or two loose on a slatted shelf (the outside layer of leaves might start to go bad, but the insides will be fine), for longer storage, the stems can be planted in soil or damp sand.
• Pumpkin/winter squash likes to be kept fairly dry and a little bit warmer than root cellar vegetables, at around 10ºC to 13ºC (50ºF to 55ºF). I am still learning and experimenting with how to best grow and store this tasty vegetable, so feel free to comment with any tips that you have for storing it well, or growing and storing any vegetables well for that matter.
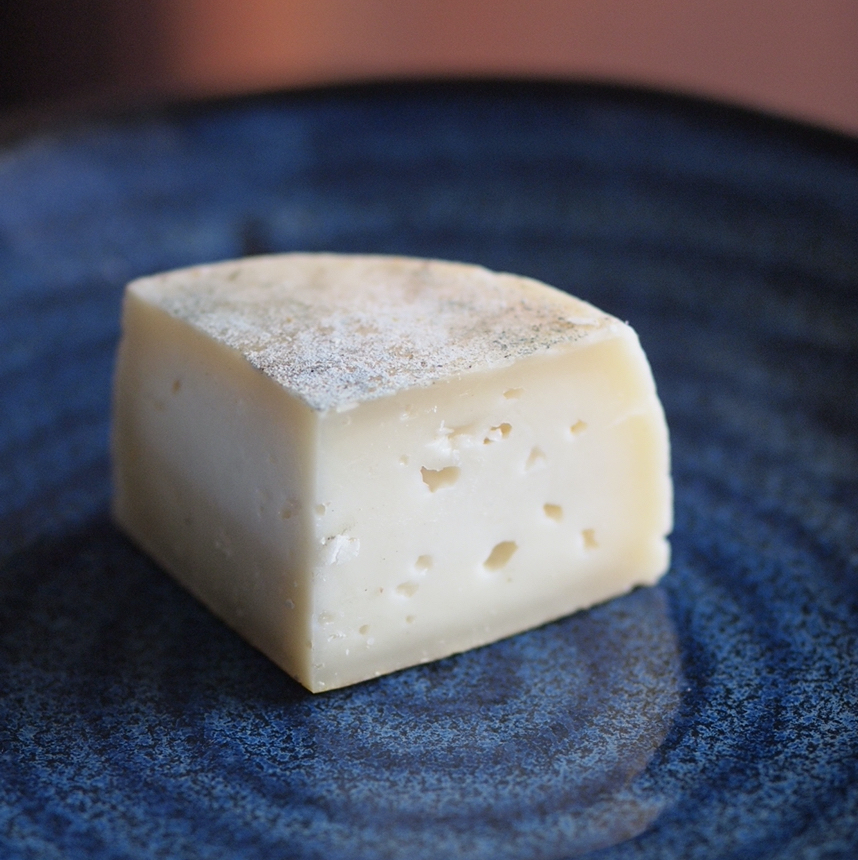
When I first started making cheese I thought I was failing at it. The recipes said to stir constantly for a full 45 minutes or so, and in my busy kitchen I just could not do that.
The more I perfected my own style of making cheese, the more I began to think back about how things were done in the past: was the busy peasant really stirring for that whole time? Or did she, like me, also have many responsibilities in the kitchen and on the homestead.
Early on I also began to question the use of all these tiny expensive packets of ingredients. Why did the mozzarella recipe tell me to dilute citric acid with water? Couldn’t vinegar be used in the same way? I experimented, and it worked, and paved the way to more experimentation, and learning how things used to be done.
I think a lot of books are written from a specialist perspective: someone that has focused on just one thing, written about it in isolation, without providing any guidance for those who do not have the same perfect conditions. I like to think of my book as being written by a generalist: Yes, I am making all my family’s cheese, it’s an important part of my homestead and I love it, but I am also fermenting, baking, canning, preserving, gardening, butchering, caring for animals, building infrastructure, and all the other tasks that make for a diverse homestead.
I don’t ask you to stand there stirring for 45 minutes, because I know that it’s not possible for many people. I don’t ask for weird little packets of stuff grown in labs, because I know it’s possible to create great cheese without these. I’ve read between the lines of many cheese traditions and figured out a way to do this that’s perfect for the busy homesteader, and also suitable for the complete beginner. I’ve created a book that anyone can pick up and learn from, and once you’ve learned the basics, you’ll still be referring to it again and again as I’ve provided a lot of depth, and presented it in a way that isn’t overwhelming.
You can learn to make cheese even if you don’t have your own dairy animals, and my small batch recipes are perfect for learning – there’s less time to wait before you get to taste them, and they’re naturally made from smaller amounts of milk. Most cheese books are using between eight and twenty litres (two to five gallons) of milk and this can be a very expensive experiment for anyone that is learning. Most of my recipes can be made from four litres of milk or less. These recipes are perfect for anyone, whether you have a small herd of goats or a single house cow, or if you’re buying your milk.
The Kickstarter launches on the 15th August at 5pm USA mountain time (16th, 9am Australian eastern time), I’ll send out another quick post once it is live.
I’ve priced the book really affordably and provided a lot of bonuses that are only available while the Kickstarter is live. Also, if you back it in the first couple of days you’ll also get access to this extra earlybird bundle of ebooks and magazines.
This has ended up being quite a long post, as there has been a lot happening on our homestead in the past year. I’d like to try and share updates more frequently for this coming year if I am not too busy. We are in really exciting times on our homestead and I’d like to share a little about what we’ve learned and achieved.
Growing our homestead
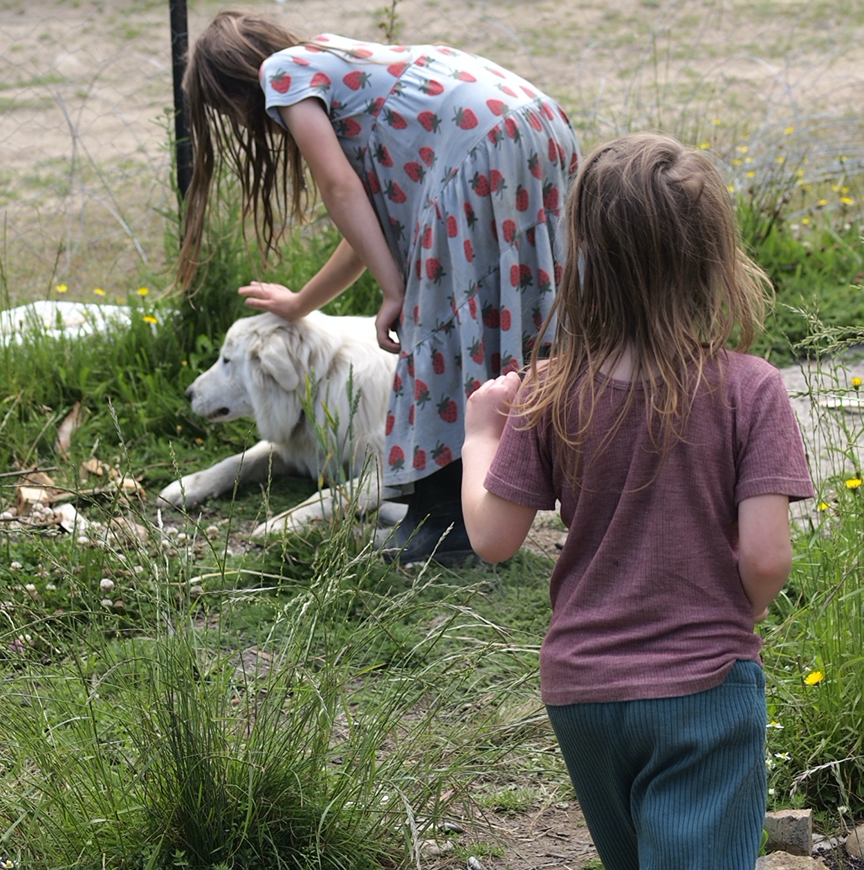
Maremma livestock guardian dogs
This has been a long story with some sad moments, too long to share in this post (but maybe in a future post).
Some of the things we’ve struggled with on our homestead have been wildlife getting into our gardens and eating everything, and predators eating our poultry. These dogs want to protect us, our animals, and our garden from the wildlife, and we have been so happy to have them here.
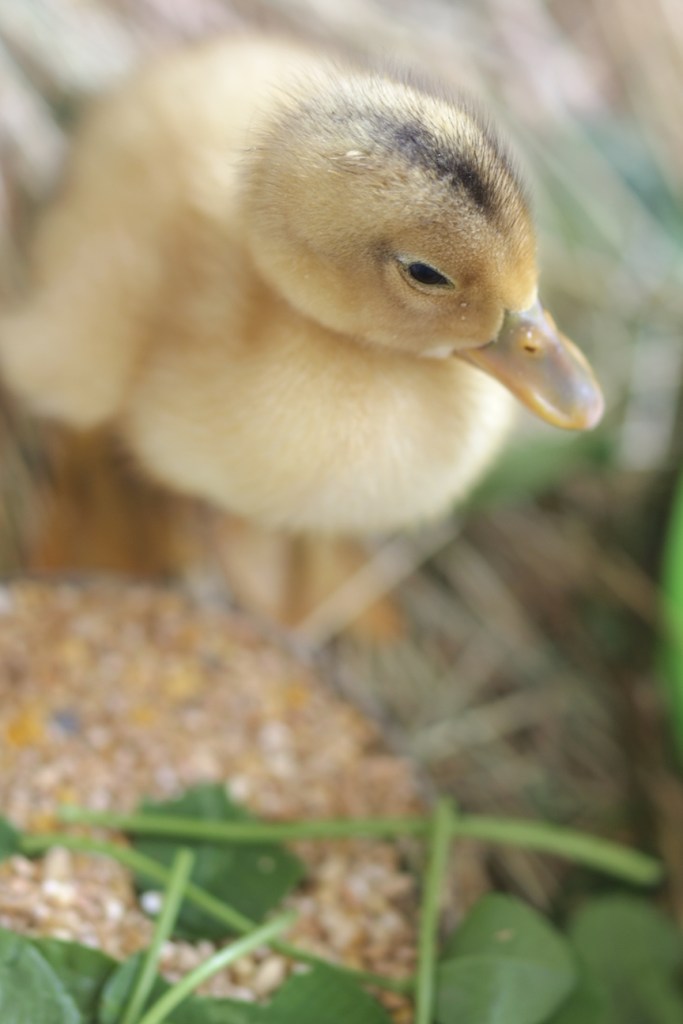
Ducks
Ducks have always been one of my favourite two animals (along with goats). As I mentioned above, we have tried to keep them a couple of times, but the wildlife has always eaten them. Once we had our first Maremma dog, I asked my friends nearby who have an incubator if they would be willing to hatch some eggs for me, I found some fertile silver appleyard duck eggs and pilgrim geese eggs online – the goose eggs were damaged in the post and would not hatch sadly, but most of the duck eggs hatched and we were greeted by beautiful little peeping ducklings.
We raised these ducklings in a makeshift electric-free brooder next to the woodstove, putting them outside when they were old enough, and they are just lovely. It’s so nice to hear their duck noises, look forward to hopefully some naturally-hatched ducklings, duck eggs, and duck meat in future. The excess drakes that we ate were really tasty.
I read a lot about duck breeds, and narrowed down my choice for backyard ducks to Saxony, Ancona, or Silver Appleyard – all three are fairly large breeds that lay plenty of eggs, forage well, and are good mothers. The Silver Appleyards are easier to find here, so that is what I went with. For ducks further afield (perhaps on an island in a future pond, to protect them from quolls), I might try Muscovy ducks again.
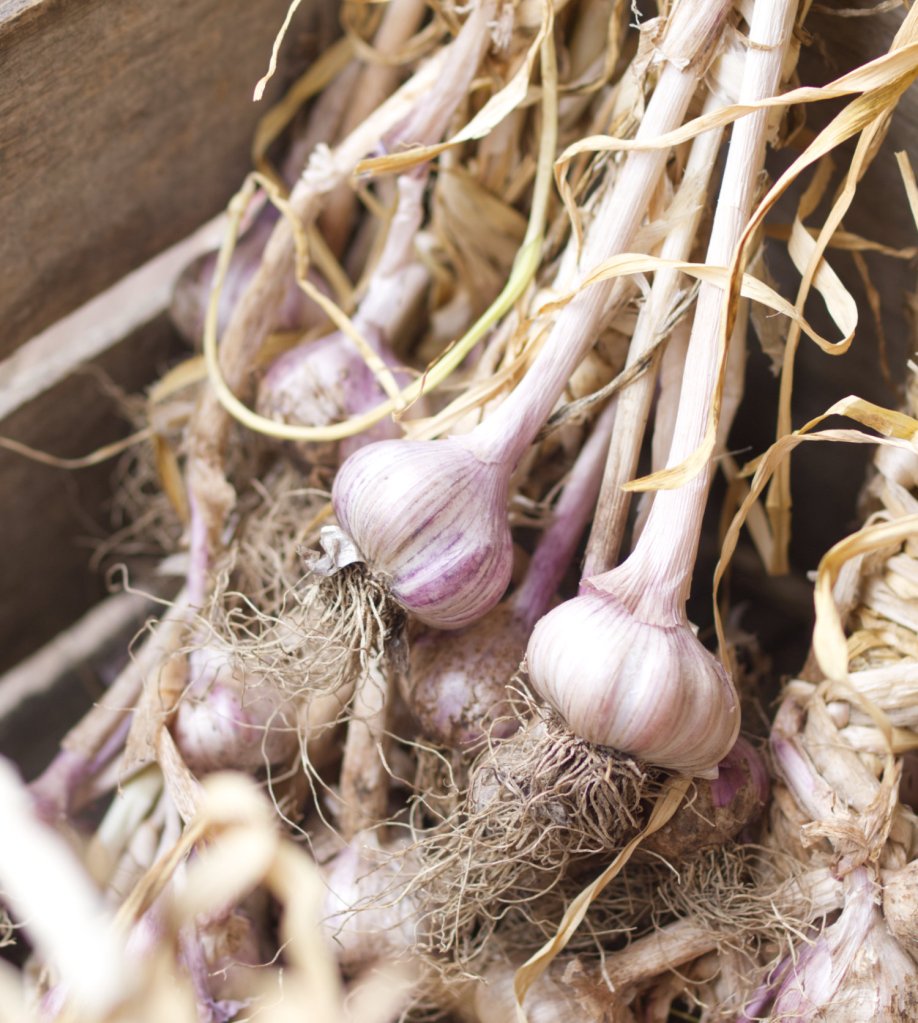
Garlic
Winter is the most desperate time for the wildlife, and in past years the fence has had holes or other problems with it, and wallabies have gotten in and eaten anything we’ve had growing through the winter, including the garlic. This past year, even before we got the dogs, my husband had repaired the fence around our house garden, and wallabies could not get in. We grew enough garlic for ourselves, some to sell, and plenty to replant, so it has been a huge success that I am so happy about after all these difficult years.
More garden space
A couple of years ago we started clearing and fencing around 600m2 (1/8 acre) more garden space. This new space is sunnier than the garden around our house, and reasonably flat. The fencing was not ideal at first, as we did not cover the ‘foot’ of it properly, and there was a hole in one place that we took a while to discover, so wallabies were getting in. Possums were also a problem until we solved this with dogs. For most of the growing season this past year, most of the things I planted all got eaten, but once we solved these problems I managed to grow some food late in the season, as well as plenty of potatoes from earlier, which were mostly left alone, giving me confidence that we can grow a lot of food in this new area during the next year.
Lots of cheese
I’ve been more organised about cheesemaking this year. Rather than harvesting the milk, leaving it until late in the day, and finding I don’t quite have enough for cheese, I’ve been setting aside milk early in the day for cheese, using it very fresh, and making cheese in small batches. I’ve been making really lovely cheese, and plenty of it, as the cheese yields are higher if the milk is very fresh and by making cheese a priority and being organised to make it on time, I am just making more of it in general.
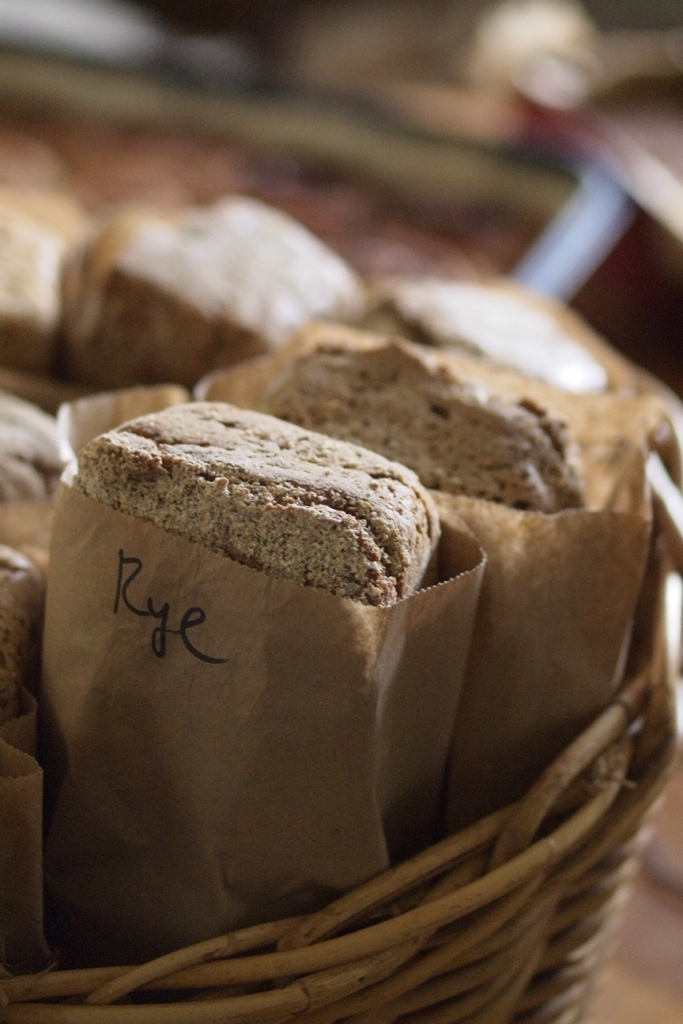
I wanted to diversify our homestead income by trying out selling homemade food at local farmers markets. I sell organic sourdough bread, ferments, sauces, and jams. Having a regular stall also means that if we end up growing extra vegetables or fruit later on, I can sell them at the stall.
Home brewing
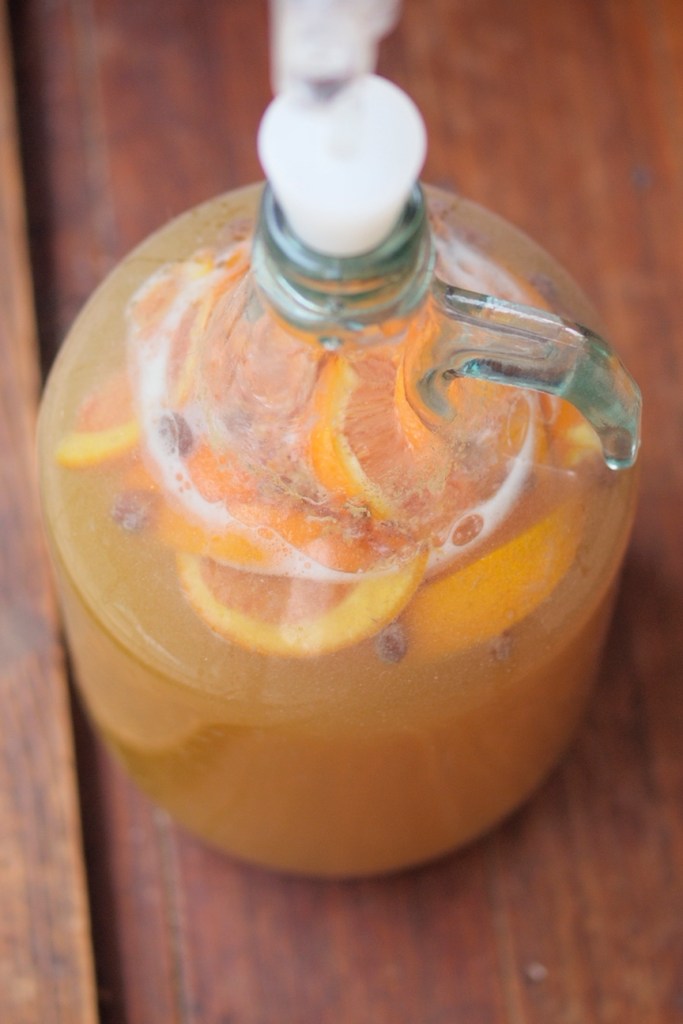
We had a celebration coming up, and my husband asked if I wanted any alcohol from the bottle shop. It was really lovely to say “no, I’ve brewed enough”. Home brewing is an aspect of self reliance that can be done anywhere, whether you have a homestead or not. I’ve really been enjoying making mead, and recently have tried my hand at making an ale without hops, starting from raw organic barley, malting it myself, and then going through a standard all-grain brewing process. I’ll share details of this process on the blog later on.
Goals for the year ahead
House cow
We don’t have enough pasture to keep a cow at the moment, but with all the strange stuff going on in the world these days, and butter being an important part of our diet, it would make sense to keep a cow. I am finding that even buying in hay it would be worthwhile, as we get the benefit of the cow manure for the garden as well as all the lovely dairy.
Maybe some pigs
Making lots of butter, we will have skim milk, which can combine this with root vegetables and/or grain for a simple and healthy way to feed pigs.
More perennials and homegrown animal food
We got some terraces dug last year on around 1/4 of an acre, but did not fence them off in time to plant them properly. Looking at Sepp Holzer’s permaculture book for inspiration, these can become productive polycultures of fruit trees, animal feed, and perpetual fertility. My husband is currently working on the fence so I will be planting fruit trees, grain, and perennials such as sunroot and comfrey there.
Meat rabbits
We need to build something for them to live in first, but hopefully this is not too far off.
Better crop rotation and being more organised in the garden
The chook dome garden has been going here for many years now, and some of the beds I had potatoes on early on have now rested long enough for more potatoes. I’m coming up with a rotation system for these beds that works for this climate, producing food, fertility, and chook fodder.
For the top garden, we have 7 or 8 sections (the 7th and 8th not being cleared yet) of beds roughly 75cm (2.5’) by 4m (13’), with 8 or so beds in each section. We chose the width because I can reach the whole bed from one side and easily step over it, so jobs like planting and weeding a whole bed are more manageable, this is the standard width for many market garden tools, if we want to use these later on, and less cross-paths are needed. The length of the beds was decided based on the terrain – we have them roughly on contour, slightly raised above the paths
Our crop rotation is based on these beds being used in pairs, so we have 4 different crops or guilds growing in each section. There are two different rotations, so that we get a bit of everything, but in both sections are potatoes and the brassica family, which are on different beds each year, giving a four year rest. In both rotations there are plenty of grains and green manures to grow our own fertility.
Something I’ve learned over this past year is to be more organised and seize the moment – sometimes there are very short windows for getting certain crops planted, and other times, if I harvest some crops early enough, there can be a window to plant a second quick-growing crop or a green manure.
More blueberries
The blueberries we have here are thriving and the local possums aren’t interested in them. They are so tasty and healthy and can’t eat enough of them, and they also would make a good crop to take to the market, so I am considering making a larger planting of them this spring.
Lots more food in general
This past year we had hopes of vegetable self sufficiency and didn’t make it, mainly because of the wildlife issues. This year, we’ve solved those problems and are coming up with crop rotations and planting calendars to make sure we get things planted on time. The more I live this life, the more I see self sufficiency as a journey in itself rather than a destination, it is a beautiful life and I try to take the time to appreciate things and be filled with a sense of gratitude. I don’t want to end up like Andersen’s fir tree, thinking that the best in life is just around the corner and not appreciating the present – I want to appreciate what we do have now.
What I would like to do is to focus on things that grow very well here, and grow enough of these to feed ourselves even if the more experimental crops don’t go well: turnips and daikon to meet our fermented vegetable needs, leeks, multiplier onions, and garlic to meet our onion needs, and lots of potatoes and leafy greens for calories and nutrition. I am getting better at growing carrots each these so these are becoming more of a staple food now, and each year as we increase the fertility of our soil and experiment with different seeds and growing techniques, perhaps we’ll find that more and more foods can be reliable staple crops for us.
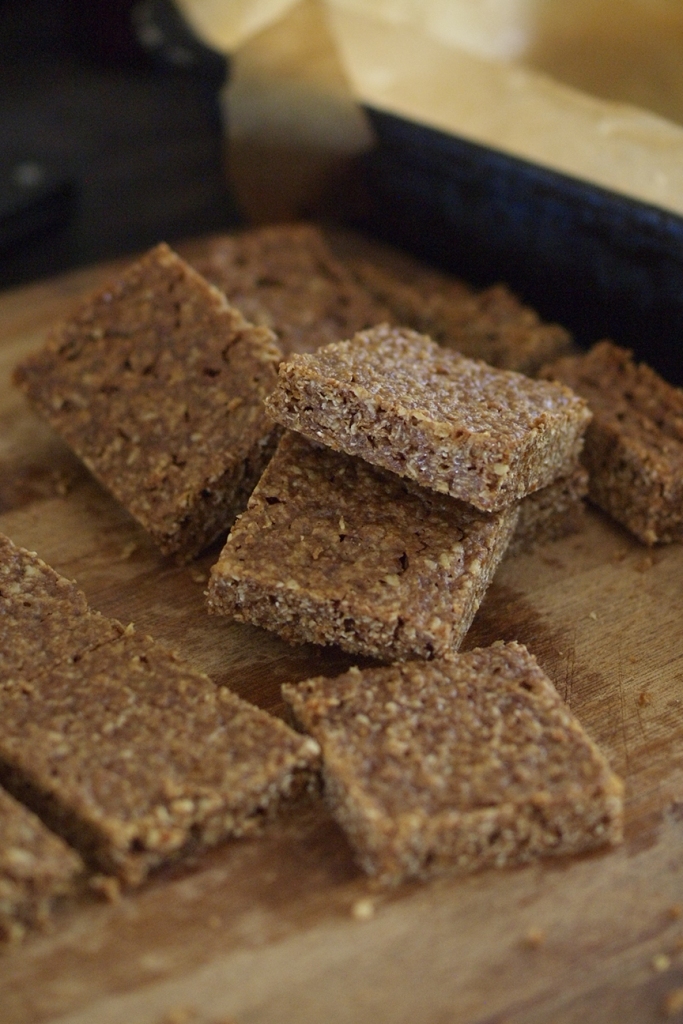
Flapjacks is a bit of a confusing name for this delicious slice. Some people use that word for pancakes, and other people know all about this delicious crunchy oaty buttery treat.
Flapjacks
This has been a favourite recipe for many years. At picnics it disappears very quickly, at my market stall I get complaints if I do not bring it along. When I want to make something really quick and simple for a treat, this is often what I turn to. Just three ingredients and some very easy steps.
Ingredients
450g (16oz) oats (either rolled oats, quick oats, or oats milled on the medium setting of a grain mill)
350g (12oz) salted butter
250g (9oz) coconut sugar or rapadura
Method
Melt butter. Thoroughly mix all ingredients together in a large bowl.
Press mixture into a lined pan around 10”x15” (26x40cm) in size.
Bake for around half an hour at around 180ºC, until bubbling and caramelised.
Allow to fully cool, then cut into slices. Can be stored in a tin for a couple of weeks if needed.