My favourite tools for self sufficient gardening on rough land

Here are my favourite tools for serious self reliant food gardening, with some notes about what I use them for and what to look for. These garden tools are suited to tall people and people with bad backs, and are tough enough to work on compacted soil and clearing scrubland.

My four favourite tools
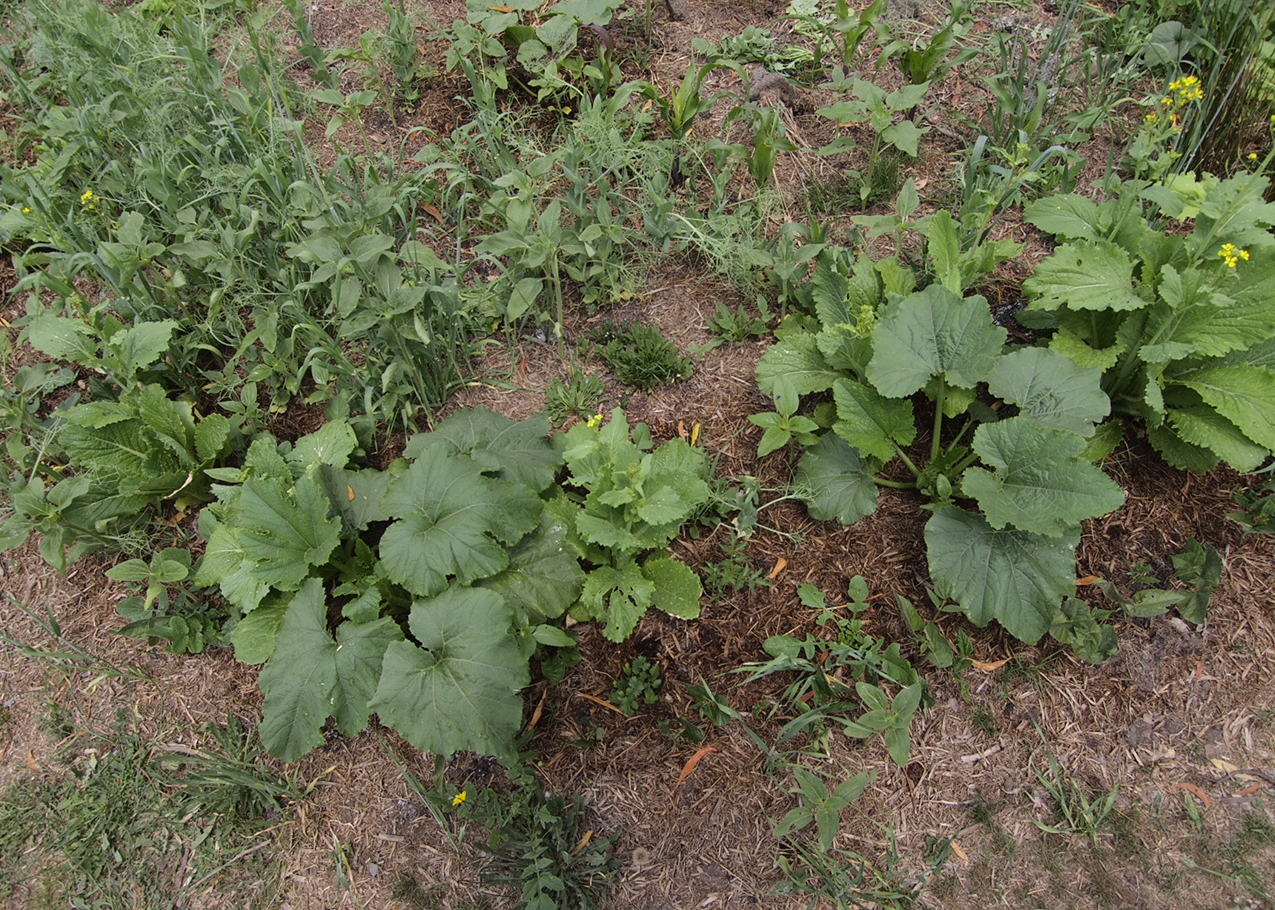
5 tine metal broadfork in the forest
Our metal broadfork pioneering in the forest

Metal broadfork

A broadfork gently aerates soil without inverting it, giving some oxygen (but not too much) to the soil life to help it thrive. A broadfork can be used without bending your back – just place it on the soil, put your full weight on it and jump or stomp on it, wiggle it around, and then lift it up with your arms. Broadforks can be quite heavy, so having some arm strength is recommended. If you use animal tractor systems on your garden or if your soil is compacted from anything else I’d consider a broadfork to be a high priority for self sufficient gardening, it lets the right amount of air into the soil and provides channels for roots to go deeper. I use my broadfork for new plantings of annuals and perennials, and it can also be used to aerate pastureland for optimum soil health and grass growth.

I use the 5 tine broad fork from F D Ryan in Australia, in the USA it looks like the Meadow Creature is similar. Some broadforks have wooden handles, and on compacted soil I can imagine a lot of stress being placed on where the wood joins the metal, so they may not last long, so I’d recommend choosing an all-metal fork that is built to last.

Australian link: https://www.fdryan.com/store/p69/broadfork.html

US link: https://meadowcreature.com

peasant hoe
Peasant hoe

Long handled peasant hoe

This is used for chopping up weeds and green manures before and during the growing season and roughly preparing garden beds for planting. 

The peasant hoe looks like the picture below. Mine is 10cm (4”) wide.

For anyone with a bad back, or who is taller than average, it is definitely worth seeking out a hoe with a long handle, at least 150cm (5 feet) long. I’d recommend getting one that is strong, but lightweight enough to handle long gardening sessions without fatigue. If possible, have a look at your hoe at the garden centre to see how the weight feels to you – if it feels awkwardly balanced in your arms, it’s not worth getting, if you can’t hold it with a straight back, look for one with a longer handle.

This is the one that I use: https://www.fdryan.com/store/p80/Chipping_Hoe_Heavy_Duty.html
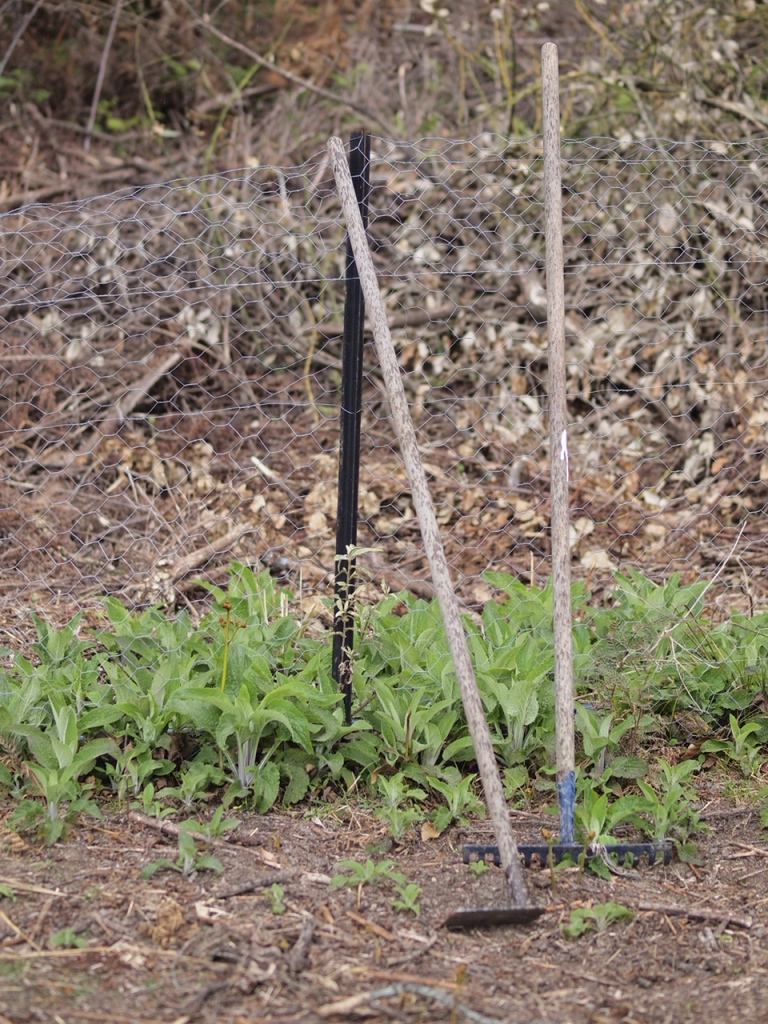
long handled peasant hoe and rake
Long handled peasant hoe and rake

Rake

I use a generic rake that the previous owners left on our property, it has a wooden handle and metal head and does the job. This is used for preparing bed surfaces, making small trenches in rough ground and mulch for adding compost and direct seeding, making and covering small furrows for direct seeding, and for giving slight compaction to bed surfaces when needed by tapping the surface of the bed. For people growing on standard 75cm market garden beds, a 75cm bed preparation rake would save some time.

Long-handled pointy-ended spade

A long handled spade allows you to work without bending your back. I use one for creating trenches for potatoes, planting trees and shrubs, shaping garden beds, shovelling compost, and basically anything you’d normally use a spade or shovel for.

The one I use is called the “plumbers shovel” from Cyclone. The handle is around 150cm (5 feet) long. Similar shovels can be found from other tool places. If you are tall, have a bad back, or want to do a lot of gardening without aches and pains, look for one with a long handle.

The one that I use: https://www.cyclone.com.au/product/gardening-tools/digging-tools/shovels/plumbers-shovel/

Other garden tools I use

Cart or wheelbarrow

We use both of these on our homestead for moving compost, mulch, and other bits and pieces around. The wheelbarrow is easier to manoeuvre around thin, winding pathways and bringing stuff downhill. The cart is easier to use on wide pathways, and for bringing stuff uphill.

I went without one of these for the first few years gardening here, using large flexible tubs to drag stuff around instead, so this is not an essential gardening tool, it just makes moving stuff around slightly easier.

Precision seeder

I do a lot of direct seeding and not much transplanting, and using a precision seeder has helped me to plant things evenly and get better germination rates and less thinning. In rough ground and in mulch, I make a small trench in the soil and fill the trench with a small amount of compost to help the seeder get through – I used to do this for getting small seeds to come up before I had the seeder. I use the Earthway, which allows me to seed many different types of seeds, one row at a time. For sowing lots of carrots and salad greens, market gardeners often use a 6 row seeder, which is more expensive than the single row seeder, but saves time. The single row seeder is still a lot faster than seeding by hand – I can just quickly walk over a row in a matter of seconds, and it’s all buried at the right depth, spaced somewhat evenly, and covered over with just the right amount of compaction by the seeder.

A precision seeder is one of those tools I wouldn’t recommend getting right away. I gardened for many years without one, and have tried gardening with mostly transplants, gardening with mostly direct seedling, broadcast-seeding, carefully sprinkling seed in rows, and many variations. Many people garden with mostly transplants/plant starts and would not get much use out of this tool, but if you have been gardening for many years, grow a lot of annual food crops, prefer not to grow from transplants, and have trouble getting seeds to come up evenly, this might be a tool to look into.

Precision seeders like the ground to be flat and even, so some preparation is needed. On rough ground and in chicken tractored mulch, I make small trenches, and then fill the trenches in with a couple of spadefuls of compost, using the rake or hoe to flatten out the compost and compact it slightly. I used to do this for direct seeding small seeds without the seeder, instead making furrows with the rake, sprinkling the seed in, and using the rake to cover it.

Strong hand trowel

For transplanting vegetable seedlings, small perennials, harvesting roots, and working with pot plants, it’s worth having a strong hand trowel – weak and flimsy ones can bend or break on anything but the softest soil.

Rice knife

A rice knife or Japanese rice sickle is a serrated blade that can be useful for ‘chop and drop’ of non-woody plants, and for harvesting grain.

Going beyond organic gardening

If you’d like to learn more about growing all your food garden fertility on your own land with no inputs, and lots more information to help you become a better organic gardener, I’d recommend checking out this 30 hour master gardener video course with an organic permaculture focus, currently on Kickstarter here.

Click here to go to the garden master course

Enter your email address here to get new blog posts from The Nourishing Hearthfire.

My favourite leafy greens to grow for survival, self reliance, and taste

Some of my friends and readers are ordering seeds at the moment, so I thought I’d share some of my favourite varieties of greens to grow. The varieties below are all fairly easy to find at the moment from online seed sellers, and all are open pollinated, so if you end up liking them as much as I do, you can save seeds from them too.

Tokyo bekana in early stages of growth. This is an all-purpose green that’s great used raw, fermented, or cooked.

Tokyo bekana in early stages of growth. This is an all-purpose green that’s great used raw, fermented, or cooked.

Why grow greens?

Greens yield a lot of nutrition in a small amount of space, and take a short time to yield.

Greens can be a good staple food in a survival diet – just have some calories from stored grains or homegrown potatoes, a source of fat and protein such as bacon or goats milk, and you basically have all that you need.

To make it on to my list, all of these greens have to be easy to grow, produce some food even on poor soil, not bolt to seed right away, and be easy to prepare and cook.

All of these greens will produce in soil that is not that great, but for larger, tastier leaves I try to add some organic matter in the form of compost or manure, along with minerals to adjust the soil pH when needed. Keeping them watered in dry weather will also help.

My favourite greens

Green wave mustard greens – the earliest green

These are the earliest cooking green to be ready. I direct sow mustard greens as early as possible, and they start growing in the earliest days of spring, with small leaves ready to pick in a few weeks. As the season progresses, they have larger leaves that are easier to harvest and just as tasty as the small leaves. If you want your greens ready even earlier, you could probably start the seeds in soil blocks or trays indoors and then transplant them.

Mustard greens bolt towards the end of spring, but not before producing many tasty and nutritious meals. The flowerheads can be cooked like tiny broccoli.

My main focus for these greens is as an early spring crop, but they can also be sowed towards the end of summer, to grow quickly and provide a crop in autumn, as they are ready around 6 weeks after sowing in warm weather.

For the spring crop, I usually sow at least 25 metres (80 feet) of row to feed our family of eight.

Mustard greens have a strong bite to them when raw, and almost all wildlife ignore them. As a cooking green, just leave them whole, or chop up, there’s no need to remove the stems. Either, boil, steam, or stir fry. My favourite use for these is to first fry up bacon, stir fry the greens in the bacon fat, and then stir the crispy bacon back in. They are also good in many soups, stews, and stir fries, or just cooked like spinach as a side vegetable to any meal.

Red Russian kale – all-round staple

I start this any time from the earliest days of spring through to the middle of summer. The smallest leaves are good to add to springtime salads, and by the later days of spring the leaves are getting large and ready to use in all kinds of cooked dishes.

Kale can either be direct sown, or started in trays or soil blocks. Kale self seeded really well for me last year, so that this year I had many tiny seedlings popping up around the garden, ready to be grown to full size or transplanted.

The standard advice where I live (Tasmania, cold zone 8b) is to start kale off after the summer solstice, and to use it as an autumn/winter crop, but I find that the weather in spring grows these much better than the dry days of summer, so I sow most of mine in spring, and it just keeps growing through the summer, into autumn and winter.

If you don’t have much irrigation water, Red Russian kale is perfect to grow if planted when rains are naturally falling in spring – the roots sink right down, and it survives through the summer, looking a little sad in the driest times, but then picking up again in autumn when the rains come.

I am trying to put kale pretty much everywhere in the garden – in the garden beds, as well as under fruit trees and in far-off corners. It is such a great staple green for us. As a minimum, I’d probably want to grow around 40 metres (130 feet) of row for our family, and I even feel as though this is not enough… I don’t think it’s possible to have too much kale growing!

Kale stands through the frost right through the winter here, it will bolt to seed the following spring. The flowerheads can be used like broccoli, and the tiny leaves on the towering plants can be used in salads or cooked. The yellow flowers can be eaten in salad, or let them develop into seed for planting.

Red Russian kale is tender enough to use in salads if the stems are removed. My main use for it is as a cooking green, where the stems can be left on, or taken off. The leaves can be cooked whole, or chopped up. I serve it in the same ways as I would for mustard greens, above, but it also can be made into crispy kale ‘chips’ by coating it in some fat and salt, and then baking it at around 180ºC (350ºF) in a single layer until crisp (around 10-15 minutes) – my easy way of doing this is to add it to the vegetables towards the end of a roast, stir it through to coat in the fat and salt from the vegetables, then move to the top of the roast pan to crisp up.

Tokyo Bekana – another adaptable staple green

Tokyo Bekana is a kind of loose-leaf Chinese cabbage. This can be planted any time from spring through to early autumn. Early spring plantings tend to bolt fairly quickly once it’s ready to eat, so it’s best to plant this in succession, with several plantings over the season.

I’d usually plant around 12 metres (40 feet) of row for every succession planting, so maybe around 36 to 48 metres (120-160 feet) or more over the whole season. It’s a fast-growing green in the summer (ready in around 6 weeks after sowing) and can be snuck in as a ‘catch crop’ every time there’s a bit of space in the garden.

The leaves of Tokyo Bekana are mild enough to use as a lettuce substitute in salads, and they can also be fermented, or cooked in any of the ways I cook mustard greens. Just keep the leaves whole, or chop them up, no need to remove stems.

Freckles – the lazy gardener’s lettuce

After trying many different lettuce varieties over the years, if I had to choose from only one to plant from now onwards, I would choose freckles, also known as “flashy trouts back” after it’s beautiful spotted leaves.

Freckles grows beautifully either direct sown or started in trays. I’ve even transplanted trays that have been left unplanted much longer than ideal, and it’s still grown well.

In summers when I haven’t had much irrigation water, once established, freckles has handled the lack of water better than other lettuces, and hasn’t bolted or gone bitter in the heat. Areas that have afternoon shade are the best for growing lettuce in summer.

Freckles grows quickly and doesn’t seem to be bothered much by slugs and snails.

The taste of freckles is a mixture of red and green lettuce taste – like having a good mixed salad but with only one kind of lettuce to harvest.

Like any lettuce, freckles is best grown in succession, as lettuces do bolt to seed eventually (freckles seems a bit slower to bolt than others though), so make a new planting of it every month in between early spring and early autumn and you’ll never run out of lettuce.

I use lettuce a lot in polycultures and in between larger plants such as cabbage, zucchini, and kale, where it seems to thrive below the taller plants while not harming anything.

Dandelion and other edible weeds

I like to encourage my favourite edible weeds at the edges of my garden, under fruit trees, and pretty much everywhere. For dandelions, I taste the leaves in spring and choose the ones with the biggest, tastiest leaves, I don’t overharvest from these ones, I keep an eye on them, and once they go to seed I take their wishing flower/fairy clock seedhead and blow or sprinkle the seeds in areas where they are most wanted.

Dandelions have a deep taproot which brings up nutrients from deep in the soil, not competing with common garden vegetables, and excellent to have around fruit trees and pastures.

I prefer dandelions as a cooked green, but the mild-tasting ones also go well raw in salads or pesto in spring.

Mallow is a good cooking green, the leaves can be a bit annoying to harvest compared to giant kale leaves, but it’s worth having around.

Sow thistle is a bit like spinach. My children love it. The leaves are a reasonable size, and it can be used either raw or cooked.

Wild rocket seems to pop up every year once established, the leaves are quite small but it has a lovely taste and is so easy to grow.

For more recipes and ideas for cooking with homegrown greens, see my book A Year in an Off-Grid Kitchen

Enter your email address here to get new blog posts from The Nourishing Hearthfire.

The joy of gardening in circles with chickens

Chook dome and circular garden bed

Recently planted circular garden bed, and homemade geodesic chook dome

I first found out about this way of mandala gardening from Linda Woodrow’s “The Permaculture Home Garden”. She provides a design for a complete system that involves fruit trees, wild animal habitat, annual vegetable beds, and chook fodder plantings, with chickens being rotated around in a homemade chook dome. It all fits together so beautifully, with each element benefiting another, and it inspires me to grow food in this way.

I am in a colder climate (zone 8b/9a) with less sun in winter, with limited flat land, and am working on my own way of doing this that’s suited to my land and climate. Linda Woodrow doesn’t provide much information about which chook fodder perennials to grow in colder climates so I’ve just been using the entire circular bed to grow annual vegetables at this stage, usually for pumpkin, sunflower, grains, or potatoes. I would like to try out growing some chicken fodder plants but am not sure how the ones most suited to my climate (siberian pea tree, tagasaste) would go with being kept as a small shrub rather than tree. The chook fodder perennials fix nitrogen, produce mulch, feed the soil, and provide habitat for insect predators and pollinators.

One thing I like a lot about this system is if life gets busy and things get unharvested or weeds get out of hand, I just move the chickens on to that bed, and the the bolted and weedy plants turn into chook food and mulch. After two weeks the chickens have left me with a mulched, fertilised, weed-free bed, with also some tasty eggs to eat – it is almost too easy, and I’m thinking of terracing some of my land to fit in more chook dome spots for this reason.

Circular polyculture garden bed

A polyculture garden bed, with zucchini, beans, Asian greens, tomatoes, cucumber, and more around the edges, and pumpkin, corn, and sunflower in the middle

The soil has improved a lot in the spots where the chook domes have been. It’s been really inspiring to see it turn from a boring compacted lawn into a thriving garden that is feeding us and the chickens.

Every time the chook dome is moved, it gives a doable piece of garden to get planted. The mulch is often moved to one side of the bed by the chickens, so I first rake that out over the whole bed, and then I broadfork it. On a new bed over compacted soil I will usually broadfork it in two or four separate sessions, but once the soil underneath is getting a nicer structure, I can easily broadfork the entire bed at once.

Once the bed is broadforked, I use a hoe to create small pockets and lines in the mulch for planting. I fill these small pockets up with compost and plant them with seedlings or seeds. The spacing between the pockets will depend on each individual plant, I try to mix the plants up so that I don’t have blocks of a single plant, and this means the spacing can be very close because different plants are sending roots to different places. I can also plant with succession in mind, so that I can grow fast-growing Asian greens and lettuces right next to small seedlings of zucchini and tomatoes, and once the zucchini and tomatoes are starting to take over, the greens are ready to harvest, and I’ve made use of space that is often wasted.

One challenge I have experienced has been with my climate – it’s best if the chooks are moved every two weeks, but in winter there’s not much that can be planted once they have been moved, and in late spring there is so much to plant that it doesn’t feel like they can be moved quickly enough sometimes. One thing that’s happened a couple of times has been when I’ve moved the dome, not gotten around to planting the previous bed, and then moved the chooks back on to the previous bed for a day to get rid of the weeds before moving them on to a third bed – this way I end up with two beds ready to plant at the same time. A winter solution is to move the chickens into a greenhouse over the winter, or in mild climates to keep them in one spot with lots of mulch added.

The kind of tarp I use on top of the dome helps a lot with chicken comfort in extremes of weather – one side is silver and reflects heat, and the other side absorbs heat, so I have the silver side outside in summer, and inside in winter. In colder climates than mine this wouldn’t work, but I’ve tried it here and the chickens are happy.

The chickens can also help to make compost – just throw in way more mulch than you need, and anything else you want composted, and the chickens will scratch it up, and mix it with their manure, and once the chook dome is moved, you just need to shovel that out onto a spot in between the beds, water it, and it turns into compost.

With lots of mulch around there are usually slugs and snails – the chickens help to keep the population down, and the pond and rocks in Linda Woodrow’s design attract lizards that eat the snail eggs.

I am working on producing more of my own mulch for the chickens, from grains grown in the beds, as well as perennials grown around the edges of the garden. I’m also still figuring out the best plants and combinations of plants that thrive in this system in my climate.

Zucchini, tomato, chinese cabbage, sunflower, and more

Zucchini, tomato, chinese cabbage, and more

Enter your email address here to get new blog posts from The Nourishing Hearthfire.

Strategies to move away from cities: Market gardening in small spaces

8426173326_da8d6b0976_z

Photo credit: here

One of the things many folks struggle with when wanting to move to rural areas is income. Since the increased mechanisation of farming less people are needed to work in mainstream farming operations, and there aren’t many jobs available in these areas. People in cities often feel trapped in them, under the assumption that they need a typical ‘job’ in the country in order to move there.

For most people, a move to the country will involve needing to find a local source of income. Market gardening offers us the opportunity to create our own secure jobs in rural areas.
Continue reading