I’ve been getting some questions about the phytic acid in whole grains and sourdough, and thought it would be a good idea to go into detail about how this works, and why you don’t need to be alarmed about it.
Along with a bunch of good stuff that is not in refined flours, phytic acid is present in whole grains. If phytic acid is not broken down by the phytase enzyme by soaking, sprouting, or fermenting, it can bind to the iron, zinc, magnesium, and calcium in the grain, making it so these nutrients in the grain are not absorbed by your body when you eat the grain.
During sourdough fermentation, the enzyme phytase is activated. Phytase breaks down phytic acid. As sourdough ferments and gets more acidic, phytase is more active. Phytase converts phytic acid into phosphorus, making it beneficial for bone health.
Phytic acid also has anti-inflammatory properties, and helps to stabilise blood sugar.
A longer sourdough fermentation will reduce the phytic acid by up to 90%, compared to less than 30% for yeast breads, and less than 50% for soaking whole grains. Sprouting will reduce phytic acid in similar amounts to sourdough fermentation.
In A Year in an Off-Grid Kitchen I wrote about my approach to this issue: if you are relying on a lot of grains and not eating much in the way of mineral-rich foods such as bone broth, red meat, and dairy, it’s probably best to always soak, sprout, or ferment your grains and legumes. If you are eating plenty of nutrient-dense animal foods, then you can get away with baking unsoaked whole grain cookies, muffins, and other treats every now and then.
I have not bought flour for over seven years. I also don’t have the setup to reliably dehydrate sprouted grains, so if we want to make a favourite recipe that isn’t soaked or fermented, we just make it from the home-milled flour, enjoy it, and that is that.
For our bread, which we eat every day, we make 100% whole grain sourdough.
How to reduce phytic acid as much as possible:
• Slow down your fermentation. Reduce the temperature or the amount of starter in a recipe, to make fermentation take longer.
• Cold proofing (also called retarding) is probably the most reliable way to reduce phytic acid, because the phytase enzyme is more active in the acidic environment of fermented dough. To cold proof, simply follow your recipe up until it’s time to proof the dough, then move it to a place below 8ºC (46ºF) for up to 24 hours. Make sure to cover it with something airtight if you’re proofing it in a fridge.
• You can also retard the dough during bulk fermentation. This may not be quite as effective as cold proofing, but it will still make a big difference, and can be a great way to make bread if you want to mix the dough at night and then have dough that’s ready to bake any time the next day.
• Using larger amounts of sourdough pre-ferment will start the dough off more acidic, so although the bulk fermentation time is faster than it is for a loaf with only a tiny amount of starter, the increased acidity at the start of fermentation means that phytase is more active from the very start.
• Add some rye flour. Rye is high in phytase.
• Just bake sourdough! I use pre-ferments, cold proofing, and cold fermentation at different times of the year, in order to make recipe timings that work with my schedule in seasonal conditions.
Why not just eat white flour instead?
The phytic acid in the whole grains is binding to the minerals in the whole grains. These minerals aren’t present in white flour, so you’re not getting any nutritional benefit by using white flour instead of whole grains.
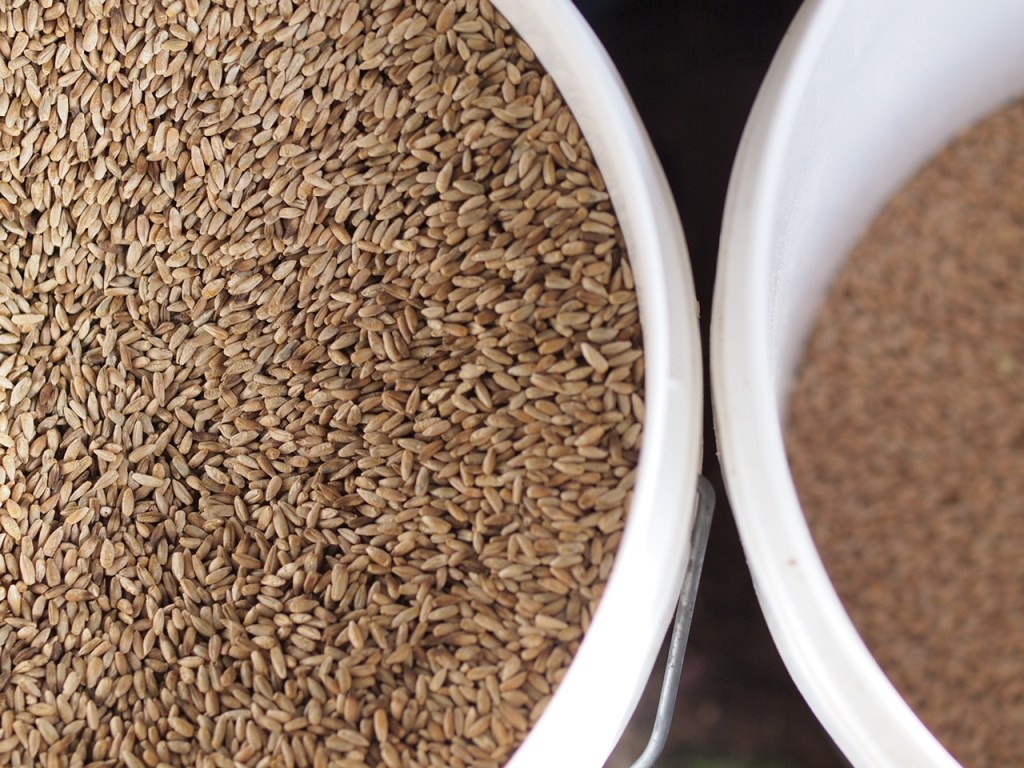
Whole grains can be stored for many years, whereas flour of any sort will not keep long. If you want to grow your own grains in the future, the grains are not going to transform into white flour on their own, so it’s good to get used to baking with 100% whole grain flours now.
Many events in recent years have caused me reflect on the expectations of the industrial food system and modern lifestyles, and how rewarding it is to return to simpler ways. Olive oil is in short supply this year, and this offers another opportunity to create better alternatives for cooking that can be produced on a homestead or by local farmers.
Most of the olive oil in supermarkets is adulterated with seed oils, so is not the healthy fat that many people imagine it to be. Real olive oil also should not be heated above 180ºC (350ºF), so it is not an ideal all-purpose cooking fat, even if it can be found.
Animal fats, such as lard and tallow, are usually local and small-scale by nature – so local that most of the time you will need to render it in your own kitchen (a simple process, see my method below). The saturated fats and cholesterol found in tallow are needed for hormone function, memory, neurological health, kidney, liver, and lung health. The healthiest fats are those from animals that are raised naturally outdoors – animals raised in this way are often raised by small farmers, so it’s possible to directly ask questions and make sure the animals aren’t being fed any weird additives and other stuff.
Most recipes I see use liquid oils such as olive oil or seed oils as the main cooking fat. I can understand the temptation for food writers to use ingredients that people are familiar with and can find in a supermarket, and to not clutter ingredients lists with a bunch of alternatives, but animal fats have so many benefits and can be used for all kinds of cooking. To create a resilient local foods system for real food sovereignty I think it’s essential to choose local animal fats as a staple cooking fat, which is why in my cookbook the recipes use lard and tallow.
Most people are used to cooking with liquid oils these days, but it can be just as easy to cook using tallow, lard, and other animal fats.
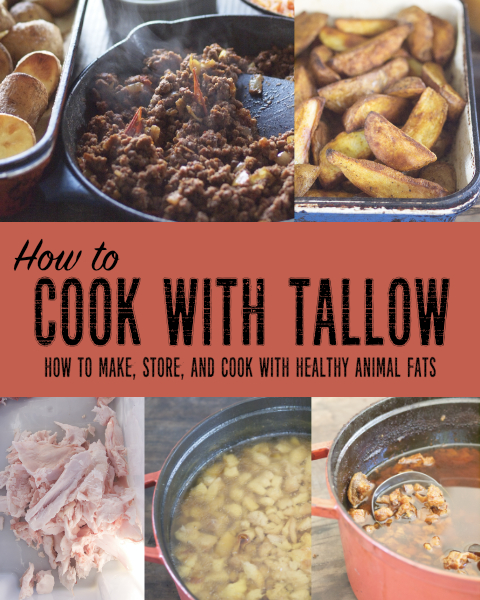
How to cook anything in tallow and lard
To cook anything in solid fats, we first need to turn it into a liquid fat by melting. This is easily done by heating it directly in the roasting dish if it’s made from cast iron, enamelled cast iron, enamelled steel, or stainless steel. Simply put your roasting dish in the hot oven or on a hot stovetop, with as much tallow as you think you’ll be using, and allow it to melt until it’s a hot liquid. This doesn’t take long. Add your vegetables, toss them around in the hot fat with a wooden spatula to coat them, sprinkle with salt, and bake. For meat, just place it on the hot fat and cook it – I get beautiful steaks and burgers every time by making sure my pan and fat are extra hot (a drop of water should violently jump up when splashed on it) – allow the meat to fully sear on one side before turning it.
If you use glass or ceramic pans for roasting, to avoid cracking them with sudden temperature changes, don’t preheat the pan, just melt the fat in a saucepan, mix the vegetables in the fat, and then add it to your pan.
Sautéing, stir frying, and deep frying are even easier – just heat your tallow in the pan and cook in it.
How to make your tallow or lard
Finding ready-made tallow and lard from healthy sources is not often possible, but making your own is really simple and affordable. If you buy beef by the quarter, half, or whole, you can probably get tallow for free just by asking the farmer or butcher in advance.
Lard and tallow either come as leaf lard or suet, or as offcut fat. Leaf lard and suet are pure fats from around the organ meats, these have a very mild flavour and can even be used in pastries. Offcut fat usually contains small amounts of meat, so can have a stronger flavour and may benefit from a bit of trimming, but is still good for most uses in the kitchen.
Leaf lard from homegrown pigs
To render fats, first chop it into small pieces and place in a heavy pot with a lid or in a slow cooker, Add just enough water to cover the base of the pot, then stir to coat the fat in the water. Bring the pot to the boil with the lid on, stir, and the reduce the heat to a simmer. Allow the fat to slowly render in the pot for as long as it takes, sometimes just a couple of hours, other times for a larger batch it can sometimes take a day or two. Stir the fat every now and then as it renders.
If you’re concerned with water remaining in the tallow and impacting its storage life, allow the pot to render with the lid off over a gentle heat for some of the rendering time.
As the fat renders, there will be more and more liquid fat, and the pieces of solids will shrink, and sometimes go crispy. Once all the solids are crispy (or at least empty-looking and light in weight), allow the bubbling fat to cool slightly, before carefully straining through cheesecloth or a mesh sieve into warm heat-sterilised jars. Put the lids on tightly, and for the best keeping qualities, flip the jar over onto the lid as you would for old-fashioned jam, and then flip back onto the upright side and allow to cool before storing.
The storage life of lard and tallow depends on how well it was strained, if all the water evaporated as it cooked, and how clean the jars are. The temperature you store the lard in will also impact the storage life – the ideal situation is larder or root cellar temperatures of around 10ºC (50ºF) or lower, but room temperature is also often fine. Lard and tallow can also be stored in a fridge or freezer.
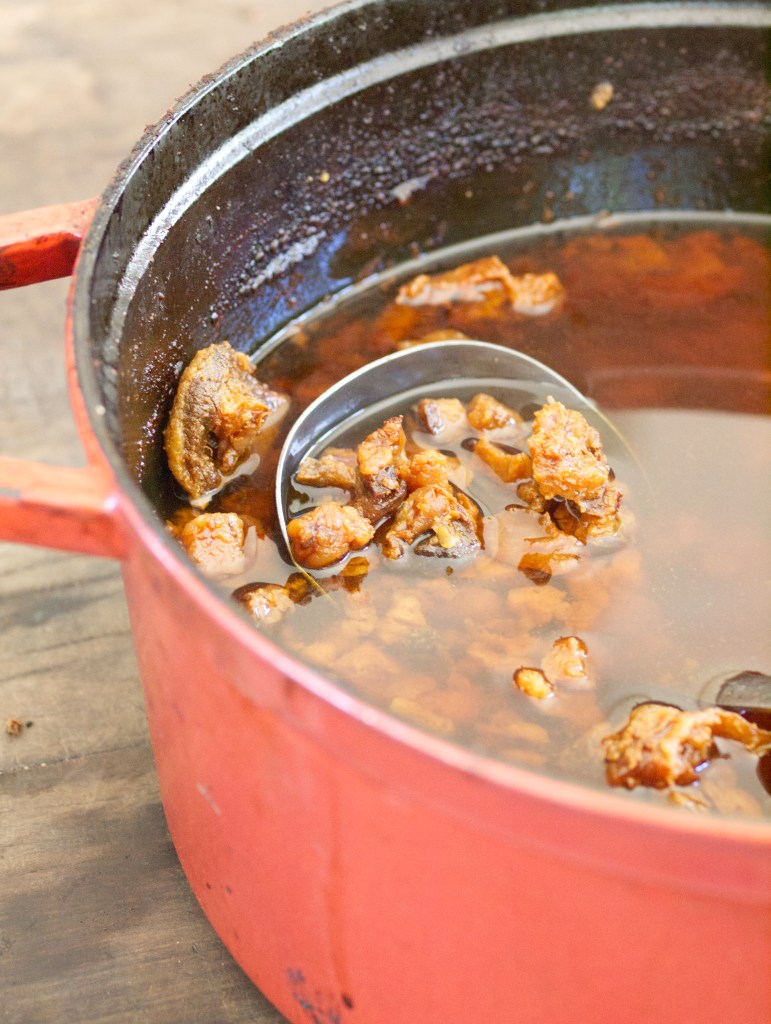
1. Offcut beef tallow in the early stages of rendering. The fat has started to come out of the solids, but the solids still feel heavy, with plenty more fat ready to render out. Fat can be skimmed off the top at this stage, as needed, or the whole batch can be rendered, strained, and put into jars in one go.
2. Rendering is complete. The solids are crisp and airy, with all fat rendered out into liquid. It’s now ready to be strained in jars. The leftover crispy bits can be fed to chickens.
The brown colour of the fat means that this batch got a little overcooked. When this happens, it’s still fine for use as a cooking fat, and has a nice toasted flavour, but it won’t be as good in a pie crust or anywhere else that needs a neutral-tasting fat.
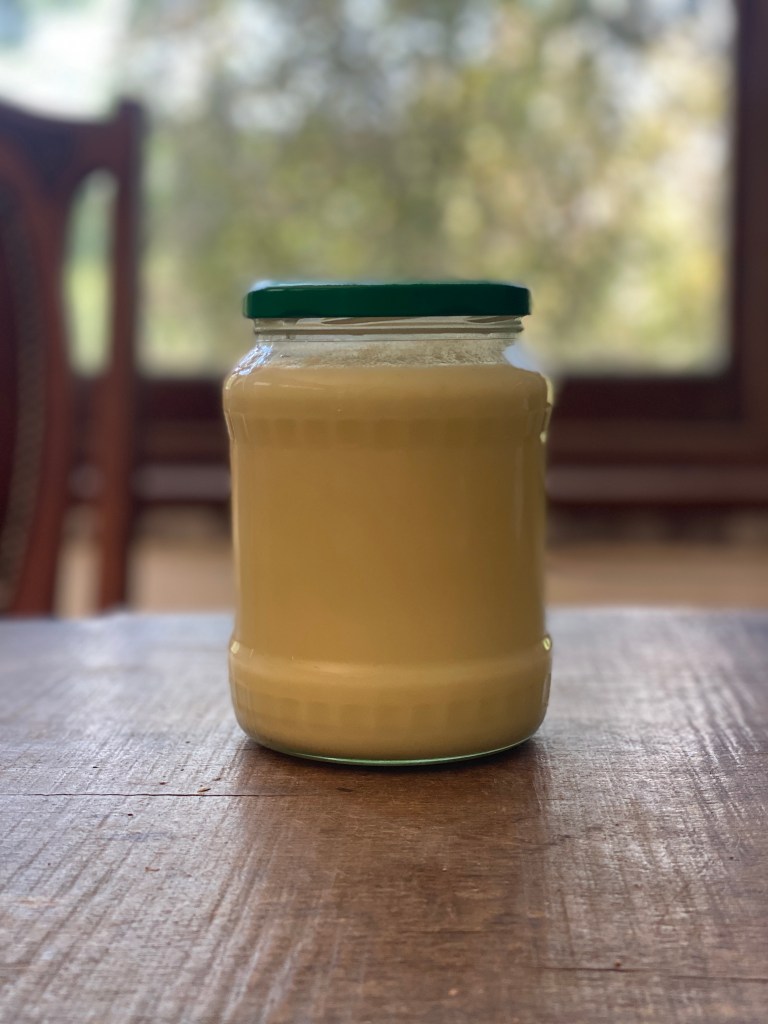
To make the best possible purified tallow for the longest storage life at room temperature
Instead of straining the fat directly into jars, pour it into a large stainless steel bowl. Allow the fat to cool completely in the bowl until it is solid, then gently heat the bottom of the bowl, flip the solid mass of fat out into a new pot or bowl, so that the rounded side is now up, and scrape off any impurities that have gathered on the bottom. Melt the fat until hot again, and pour into warm jars, as you normally would. You can also do this refining process a second time.
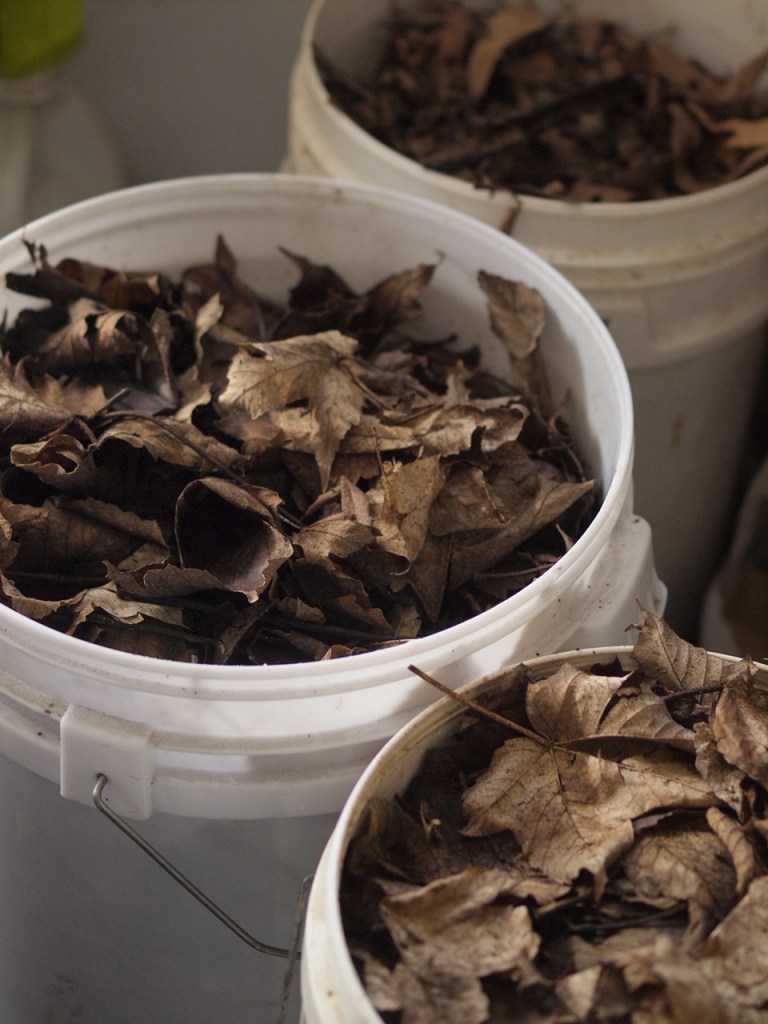
You may be wondering why I have three buckets of leaves in my laundry…
This is how I store root cellar vegetables through the winter:
1. Gather dry leaves in autumn
It can be a bit tricky here some years finding the right time when the leaves have fallen but have not become a sodden mess from autumn rains. I’ve used both maple leaves and blackwood leaves, and both work well, as long as they are dry. Any kind of fallen dry leaves will probably work. Leaves can be stored in old feedsacks in a dry place until needed.
2. Select the right vegetables in perfect condition.
Don’t store any that have cracks or bruises, or any that are missing their crowns. Suitable vegetables include beetroot, carrot, parsnip, turnip, swede/rutabaga, and other roots.
3. Pack a layer of leaves at least 1” thick in the bottom of a bucket or 55 gallon drum.
Top with a layer of roots, making sure they don’t touch. Cover with enough leaves so that you can no longer see the roots, then top with another layer of roots, repeat until you get to the top of the bucket. It’s best not to put the lid on the bucket, as this can cause condensation to drip down, but if you need to store your roots somewhere where mice might get to them then you may have to use the lid – just make sure you have an extra thick layer of leaves on the top and on the bottom if this is the case.
4. Store in a cool place.
I use an unheated room in my house that is easily closed off from the rest of the house and does not get sunlight during the winter. The ideal temperature for root cellaring is between 0ºC and 10ºC (32ºF to 50ºF), but up to 15ºC (60ºF) and even a little higher will still work – it just won’t store for quite as long as it would at lower temperatures.
The benefits of root cellaring, even if you don’t grow all your own vegetables:
Food security
By storing vegetables for weeks or months, it means we have more food in the house, for longer, so we are not affected by supply disruptions and other issues that seem to be happening frequently these days. It also means we don’t have to go food shopping as often.
Saving money
When we don’t grow enough vegetables of our own, I buy vegetables in bulk directly from the farm and it works out less than half the price of buying in the shops.
Extending the season of local vegetables
There is a “hungry gap” in many places when the local farms run out of many storage vegetables before the new season vegetables are ready. For growing our own vegetables, root cellaring means I can get the vegetables out of the ground and use the space for a green manure crop or other crop earlier than I could otherwise, or I can pull them out before they bolt to seed in the springtime and still have root vegetables on the table for a few more weeks. By root cellaring, I can keep storage vegetables around for just that little bit longer. Beetroots seem to keep the best out of everything I have tried, but all root vegetables will keep in this way for some time.
Other vegetables, and how to store them without electricity
• Potatoes don’t need to be packed in leaves – just store them in hessian bags, paper sacks, or cardboard boxes and keep them in a very dark, fairly cool place. In climates with mild winters, potatoes can be stored outdoors in a “clamp” – just put straw or hay on the ground, heap with dry, undamaged potatoes, cover with a thick layer of straw or hay, and then cover with dirt.
• Onions and garlic also don’t need leaves – just keep them loose in an airy, dry, fairly cool place. They like to be hung up high if possible. For our homegrown garlic, I plait it and hang it up when I can, or store it loose in a single layer in a box. For the onions that I buy, I keep them in netted bags, hung up from the edges of shelves.
• Fermenting is an excellent way to store vegetables while increasing the nutritional value – either grate or shred vegetables such as cabbage and turnip and mix with salt for them to make their own brine, these vegetables, along with most other vegetables can be preserved whole or in slices in a salty brine. Make sure you use enough salt to ensure that they keep well – between 2% and 3% of the vegetable weight is usually a good amount. Keep in a cool place. Many fermented vegetables will keep for a year or more. See my instructions for fermenting vegetables here: https://thenourishinghearthfire.com/2016/04/18/7-secrets-to-making-successful-sauerkraut-every-time/
• As well as being fermented, cabbages will keep for a month or two loose on a slatted shelf (the outside layer of leaves might start to go bad, but the insides will be fine), for longer storage, the stems can be planted in soil or damp sand.
• Pumpkin/winter squash likes to be kept fairly dry and a little bit warmer than root cellar vegetables, at around 10ºC to 13ºC (50ºF to 55ºF). I am still learning and experimenting with how to best grow and store this tasty vegetable, so feel free to comment with any tips that you have for storing it well, or growing and storing any vegetables well for that matter.
I sometimes get asked “how do you live without a fridge”, or “how do you get by without having to go grocery shopping all the time” and my answer every time is the same thing: We raise dairy animals and make the most of the milk they produce. When we have dairy, we have the key to self reliance.
When you have milk coming into the kitchen fresh every day, there is no need for refrigeration. Milk is often the most common item people will regularly rush out to the grocery store for, and home-produced dairy, especially when combined with cooking from scratch, gardening, chickens, and bulk good storage gives us much more resilience in the face of any crazy stuff that might happen.
Frugality
Keeping to a budget and noting down everything we spend, I can clearly see that the months with fewer shopping trips are the months when it’s been easiest to stay within budget. Going out frequently for milk, yoghurt, cheese, and other dairy products not only means we’re exposed to a bunch of tempting foods on the shelves at the same time, but also means more fuel costs for the car, more of a sense of our food coming from the grocery store rather than our own land, and more time away from our home, when we could have been working in the garden or doing something else productive.
If you have a taste for high quality cheeses, these can drain the food budget very quickly. When you make your own cheese, even if its not from your own dairy animals, you can create fantastic cheeses that will make you ignore the expensive gourmet cheeses on store shelves.
Homemade yoghurt and other cultured milks are even more affordable to make at home – yoghurt is often around four times more expensive than milk, but can be made very easily at home with nothing more than milk and some leftover yoghurt to use as culture.
Focus
Dairy animals need care every day, and once you’re outside caring for them, it’s easy to fit in other homestead chores, feel more like “real” homesteading, and have a more productive homestead overall. There is nothing like the feeling of bringing in fresh milk every day, and I like the rhythm and stability that dairy animals give to our lives: No matter what is happening around us, I know that every morning begins with milking.
Food and health
Dairy foods are simply delicious. The cheeses I make are tastier and healthier than any cheeses that I can buy, and we can eat as much of them as we like. There is not much that gives a feeling of abundance than having shelves full of many varieties of delicious homemade cheeses at varying stages of aging – some are food for now, others are food for later, all are absolutely delicious and truly make a meal. Cheese is a staple food in my house and can easily become a staple food in your home too.
Next on the blog I’ll be sharing some helpful information about making great yoghurt every time: this is something that I had trouble with for many years and I’m excited to be sharing my tips with you all soon.
The best time to have started a homestead was ten years ago, the next best time is now. This is what I would do if I were starting out homesteading now.
Animals for food and fertility
Goats can be an excellent choice of dairy animal on forested land and in small spaces.
Look at what resources are around you and find the right animal to make the most of what is growing where you live. If you’re starting with lots of pasture, cows and sheep are good choices. If you’re in a small backyard, meat rabbits are a good option. If you have access to trees and scrub, goats make sense. Chickens and ducks are great for eating wasted food and scavenging for insects and seeds around the garden and can fit in anywhere. Even if you have to buy in food for your animals at first, in my experience it is always worth it, because not only do they give you better meat, dairy, and eggs than anything from a shop (and a reliable supply of it in these times), they also give manure to fertilise the garden.
Perennial food
Blueberries are a tasty and nutritious perennial crop that grows well on acid soils
I wish I had put more effort into this earlier. Even if you intend to have a big berry patch or orchard one day but it’s not a priority for now, it’s worth having some plants, as you can propagate new plants from these later on and get experience with growing them. In these uncertain times it’s hard to say whether fruit trees and berry plants will be easy to find in the future so it’s worth having some to begin with. Some of these plants can take several years to start bearing (although berries are very fast), so if you plant these early on your homestead, you will be harvesting them earlier and will thank yourself later on.
Grow and eat what grows well for you
Find an online gardening calendar for your local area and plant your crops at the right times. Experiment with growing a bit of everything, and then observe what grows best at different times of the year. I am pretty hopeless at growing cabbages (but every year I still try), but turnips and daikon radish grow easily here, so I plant lots of those and use these as I would use cabbages in cooking and fermenting.
Focus on staple foods
Potatoes and turnips, excellent staple crops for many cold climate homesteads
Find a combination of calorie-dense and nutrient dense foods that grow well for you. Calorie dense foods are those that contain lots of energy for their weight – potatoes, pumpkin/winter squash, swede/rutabaga, carrots, parsnips, beetroots, and other root vegetables.
Nutrient-dense foods are those that contain lots of vitamins and minerals for their weight, animal fats and leafy greens are good examples of this. These nutrient dense foods complement the calorie dense foods to form a complete diet – many meals are combinations of these two foods – baked potatoes with sour cream, root vegetables roasted in tallow, bread with butter, rice with bacon, and many more examples.
On my homestead, our staple calorie dense staple crops are potatoes, swede/rutabaga, turnip, parsnips, and carrots. Our nutrient dense staple crops are goats milk, goats cheese, eggs, and kale. I grow many more foods than these, but no matter what happens, we can survive on these foods alone, so I grow them in abundance.
Meeting water and energy needs
Ideally, a homestead should be able to meet its own needs for water, electricity, and cooking fuel. Finding a homestead with established firewood trees, or planting your own can be a big priority in cold climates. If you need to irrigate in summer, set up systems to catch water when there is rain, such as ponds and rainwater tanks. For electricity, it can first make sense to reduce the need for it as much as possible, and then to design a system to meet those reduced needs.
Here are my favourite tools for serious self reliant food gardening, with some notes about what I use them for and what to look for. These garden tools are suited to tall people and people with bad backs, and are tough enough to work on compacted soil and clearing scrubland.
My four favourite tools
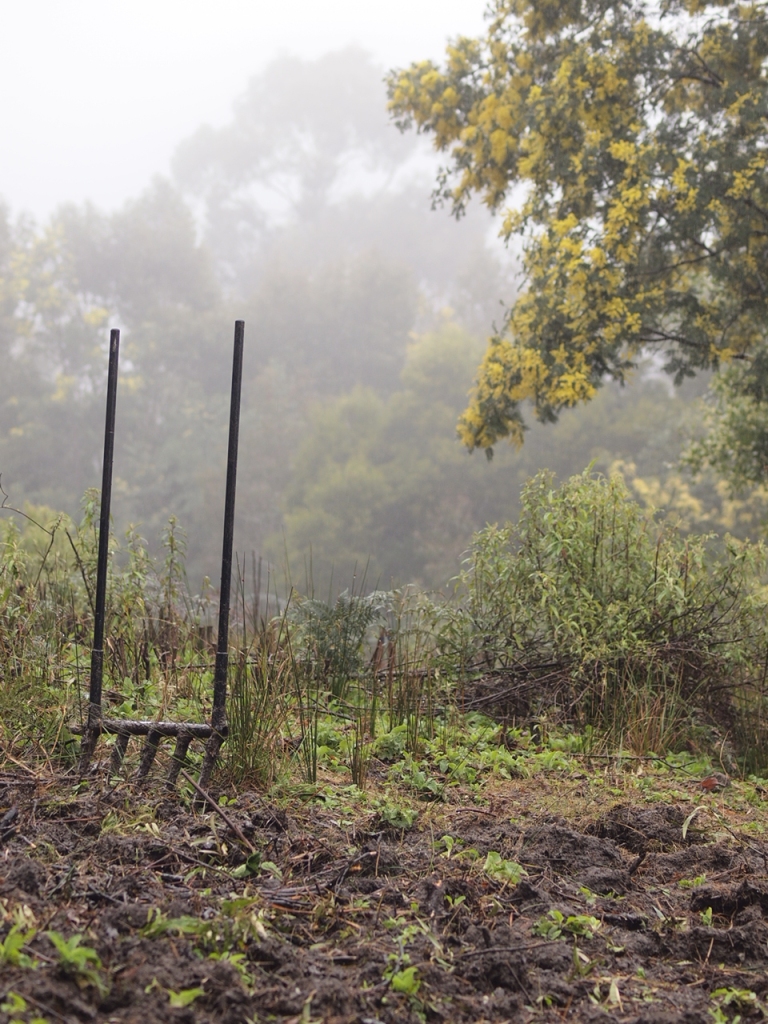
Our metal broadfork pioneering in the forest
Metal broadfork
A broadfork gently aerates soil without inverting it, giving some oxygen (but not too much) to the soil life to help it thrive. A broadfork can be used without bending your back – just place it on the soil, put your full weight on it and jump or stomp on it, wiggle it around, and then lift it up with your arms. Broadforks can be quite heavy, so having some arm strength is recommended. If you use animal tractor systems on your garden or if your soil is compacted from anything else I’d consider a broadfork to be a high priority for self sufficient gardening, it lets the right amount of air into the soil and provides channels for roots to go deeper. I use my broadfork for new plantings of annuals and perennials, and it can also be used to aerate pastureland for optimum soil health and grass growth.
I use the 5 tine broad fork from F D Ryan in Australia, in the USA it looks like the Meadow Creature is similar. Some broadforks have wooden handles, and on compacted soil I can imagine a lot of stress being placed on where the wood joins the metal, so they may not last long, so I’d recommend choosing an all-metal fork that is built to last.
This is used for chopping up weeds and green manures before and during the growing season and roughly preparing garden beds for planting.
The peasant hoe looks like the picture below. Mine is 10cm (4”) wide.
For anyone with a bad back, or who is taller than average, it is definitely worth seeking out a hoe with a long handle, at least 150cm (5 feet) long. I’d recommend getting one that is strong, but lightweight enough to handle long gardening sessions without fatigue. If possible, have a look at your hoe at the garden centre to see how the weight feels to you – if it feels awkwardly balanced in your arms, it’s not worth getting, if you can’t hold it with a straight back, look for one with a longer handle.
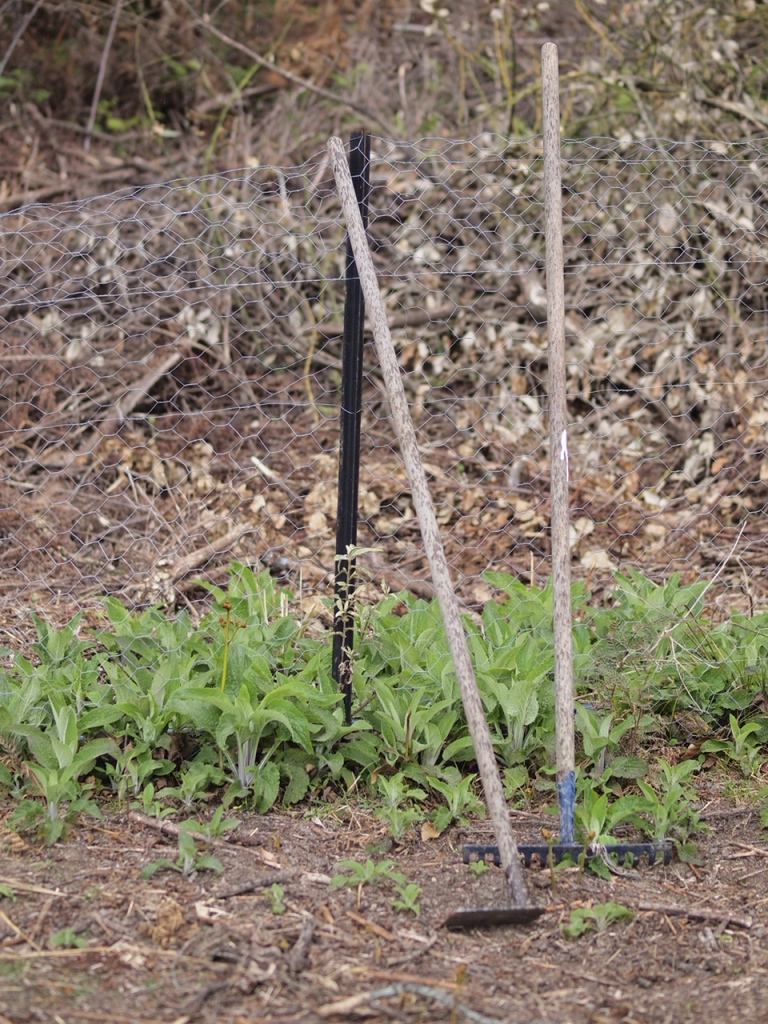
I use a generic rake that the previous owners left on our property, it has a wooden handle and metal head and does the job. This is used for preparing bed surfaces, making small trenches in rough ground and mulch for adding compost and direct seeding, making and covering small furrows for direct seeding, and for giving slight compaction to bed surfaces when needed by tapping the surface of the bed. For people growing on standard 75cm market garden beds, a 75cm bed preparation rake would save some time.
Long-handled pointy-ended spade
A long handled spade allows you to work without bending your back. I use one for creating trenches for potatoes, planting trees and shrubs, shaping garden beds, shovelling compost, and basically anything you’d normally use a spade or shovel for.
The one I use is called the “plumbers shovel” from Cyclone. The handle is around 150cm (5 feet) long. Similar shovels can be found from other tool places. If you are tall, have a bad back, or want to do a lot of gardening without aches and pains, look for one with a long handle.
We use both of these on our homestead for moving compost, mulch, and other bits and pieces around. The wheelbarrow is easier to manoeuvre around thin, winding pathways and bringing stuff downhill. The cart is easier to use on wide pathways, and for bringing stuff uphill.
I went without one of these for the first few years gardening here, using large flexible tubs to drag stuff around instead, so this is not an essential gardening tool, it just makes moving stuff around slightly easier.
Precision seeder
I do a lot of direct seeding and not much transplanting, and using a precision seeder has helped me to plant things evenly and get better germination rates and less thinning. In rough ground and in mulch, I make a small trench in the soil and fill the trench with a small amount of compost to help the seeder get through – I used to do this for getting small seeds to come up before I had the seeder. I use the Earthway, which allows me to seed many different types of seeds, one row at a time. For sowing lots of carrots and salad greens, market gardeners often use a 6 row seeder, which is more expensive than the single row seeder, but saves time. The single row seeder is still a lot faster than seeding by hand – I can just quickly walk over a row in a matter of seconds, and it’s all buried at the right depth, spaced somewhat evenly, and covered over with just the right amount of compaction by the seeder.
A precision seeder is one of those tools I wouldn’t recommend getting right away. I gardened for many years without one, and have tried gardening with mostly transplants, gardening with mostly direct seedling, broadcast-seeding, carefully sprinkling seed in rows, and many variations. Many people garden with mostly transplants/plant starts and would not get much use out of this tool, but if you have been gardening for many years, grow a lot of annual food crops, prefer not to grow from transplants, and have trouble getting seeds to come up evenly, this might be a tool to look into.
Precision seeders like the ground to be flat and even, so some preparation is needed. On rough ground and in chicken tractored mulch, I make small trenches, and then fill the trenches in with a couple of spadefuls of compost, using the rake or hoe to flatten out the compost and compact it slightly. I used to do this for direct seeding small seeds without the seeder, instead making furrows with the rake, sprinkling the seed in, and using the rake to cover it.
Strong hand trowel
For transplanting vegetable seedlings, small perennials, harvesting roots, and working with pot plants, it’s worth having a strong hand trowel – weak and flimsy ones can bend or break on anything but the softest soil.
Rice knife
A rice knife or Japanese rice sickle is a serrated blade that can be useful for ‘chop and drop’ of non-woody plants, and for harvesting grain.
Going beyond organicgardening
If you’d like to learn more about growing all your food garden fertility on your own land with no inputs, and lots more information to help you become a better organic gardener, I’d recommend checking out this 30 hour master gardener video course with an organic permaculture focus, currently on Kickstarter here.
Tasty organic tomatoes, ready to preserve for the winter months
In A Year in an Off-Grid Kitchen I included recipes for five of my favourite ways to preserve tomatoes with water bath canning – as tomato passata, tomatoes in brine, pizza sauce, salsa, and tomato relish. I’ve recently tried a couple of different methods that I’d like to share here.
Fermenting tomatoes
I’ve been intrigued about fermenting tomatoes for a while, ever since reading Shannon Stonger’s Traditionally Fermented Foods. it seems like such a simple and low energy way to preserve tomatoes, and perfect for preserving the garden harvest as it makes it to the kitchen, because you don’t need a huge amount of tomatoes to justify boiling up the canner, you can just preserve one jar at a time. Tomato season is a busy time on the homestead, and having a way to just quickly preserve things without much fuss is very welcome!
I tested this recipe out, left them alone for nearly a year, and they were still good to eat after that long. Tomatoes are a bit naughty in the jar and have a habit of rising above the fermenting weight (which is why in the photo you can see lots of tomatoes trying to jump out of the jar!), even then in my Fido jar, they were still really good to eat. I definitely recommend checking out Shannon’s fermenting book for more tasty fermenting recipes.
Fermented tomatoes
How to ferment tomatoes:
Pack whole, firm tomatoes up to the ‘shoulders’ of a fermenting jar – I use Fido jars, but mason jars can work too if you remember to ‘burp’ them once a day for the first week or two, or until the bubbling stops.
Add around 3 tablespoons unrefined salt, plus an optional tablespoon of fresh whey or sauerkraut juice for every litre (quart) jar.
Top with non-chlorinated water to above the level of the tomatoes
Weigh the tomatoes down with a fermenting weight, or with a cabbage leaf weighed down with a boiled rock or other heat-sterilised heavy thing.
Put the lid on and leave it at around 23ºC (73ºF) for a week or two, or until the bubbling dies down, then move to root cellar, larder, or fridge conditions of around 15ºC (59ºF) or lower where they will store for up to a year.
Use these fermented tomatoes anywhere that you’d normally add tomatoes – salads, soups, stews, sauces, and more. This is a great low energy way to preserve tomatoes.
Drying tomatoes
One of my favourite tomato varieties to grow is Principe Borghese, In my garden, this is a resilient variety that fruits very early, produces an abundance of tasty red cherry tomatoes that are great either raw or cooked, and it seems pretty resistant to pests. Last tomato season here was rainier and colder than usual, and I grew both this and “Gold Nugget” which is the earliest fruiting tomato that I know of, and Principe Borghese was the first to have ripe fruit, and was very plentiful. It’s also grown well for me in dry warm summers.
Principe Borghese is well-known as a good tomato for drying, but I’ve never grown it for that reason, just for all the reasons above. Last season I experimented with drying them in the wood stove.
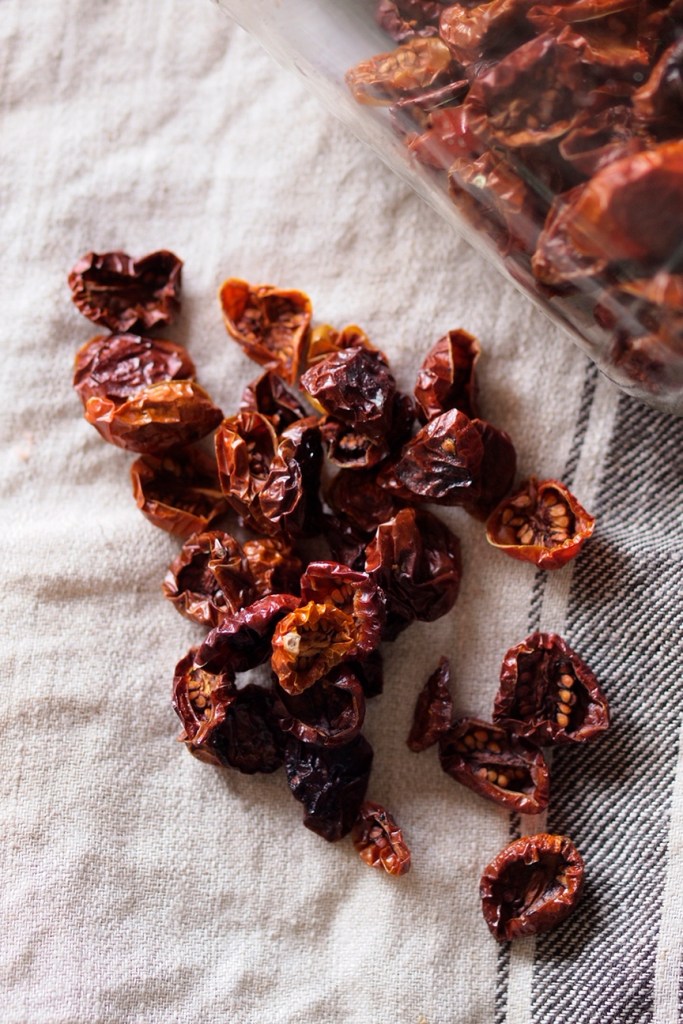
Crispy dried tomatoes
How to dry tomatoes:
Slice them in half. Place them cut-side up on a baking sheet. Put them in a very low oven with the door ajar – I dried mine at the bottom of the top oven of the wood stove as it died down for the night, and also in the warming oven all day. Once the tomatoes have mostly dried out on that side, flip them over and dry the other side.
Once the tomatoes are fully dry, they will be crispy and full of flavour.
Tomatoes can also be dried in a solar dehydrator in a similar way – just dry cut-side up until that side is almost dry, then flip over and dry until crisp.
Tomatoes with more flesh and less juice and seeds, such as Amish Paste, Roma, Principe Borghese, and other sauce-type tomatoes are the best choices for drying, but any tomato can be dried in this way.
Store dried tomatoes an airtight container such as a glass jar with lid. If kept dry, they will keep well for a year or more.
Dried tomatoes are great smashed up and sprinkled on salads, on top of pizza, or added to stews, soups, sauces, and more.
Some of my friends and readers are ordering seeds at the moment, so I thought I’d share some of my favourite varieties of greens to grow. The varieties below are all fairly easy to find at the moment from online seed sellers, and all are open pollinated, so if you end up liking them as much as I do, you can save seeds from them too.
Tokyo bekana in early stages of growth. This is an all-purpose green that’s great used raw, fermented, or cooked.
Why grow greens?
Greens yield a lot of nutrition in a small amount of space, and take a short time to yield.
Greens can be a good staple food in a survival diet – just have some calories from stored grains or homegrown potatoes, a source of fat and protein such as bacon or goats milk, and you basically have all that you need.
To make it on to my list, all of these greens have to be easy to grow, produce some food even on poor soil, not bolt to seed right away, and be easy to prepare and cook.
All of these greens will produce in soil that is not that great, but for larger, tastier leaves I try to add some organic matter in the form of compost or manure, along with minerals to adjust the soil pH when needed. Keeping them watered in dry weather will also help.
My favourite greens
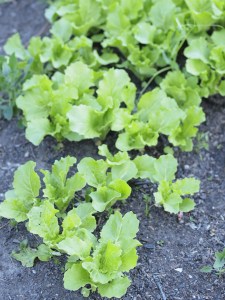
Green wave mustard greens – the earliest green
These are the earliest cooking green to be ready. I direct sow mustard greens as early as possible, and they start growing in the earliest days of spring, with small leaves ready to pick in a few weeks. As the season progresses, they have larger leaves that are easier to harvest and just as tasty as the small leaves. If you want your greens ready even earlier, you could probably start the seeds in soil blocks or trays indoors and then transplant them.
Mustard greens bolt towards the end of spring, but not before producing many tasty and nutritious meals. The flowerheads can be cooked like tiny broccoli.
My main focus for these greens is as an early spring crop, but they can also be sowed towards the end of summer, to grow quickly and provide a crop in autumn, as they are ready around 6 weeks after sowing in warm weather.
For the spring crop, I usually sow at least 25 metres (80 feet) of row to feed our family of eight.
Mustard greens have a strong bite to them when raw, and almost all wildlife ignore them. As a cooking green, just leave them whole, or chop up, there’s no need to remove the stems. Either, boil, steam, or stir fry. My favourite use for these is to first fry up bacon, stir fry the greens in the bacon fat, and then stir the crispy bacon back in. They are also good in many soups, stews, and stir fries, or just cooked like spinach as a side vegetable to any meal.
Red Russian kale – all-round staple
I start this any time from the earliest days of spring through to the middle of summer. The smallest leaves are good to add to springtime salads, and by the later days of spring the leaves are getting large and ready to use in all kinds of cooked dishes.
Kale can either be direct sown, or started in trays or soil blocks. Kale self seeded really well for me last year, so that this year I had many tiny seedlings popping up around the garden, ready to be grown to full size or transplanted.
The standard advice where I live (Tasmania, cold zone 8b) is to start kale off after the summer solstice, and to use it as an autumn/winter crop, but I find that the weather in spring grows these much better than the dry days of summer, so I sow most of mine in spring, and it just keeps growing through the summer, into autumn and winter.
If you don’t have much irrigation water, Red Russian kale is perfect to grow if planted when rains are naturally falling in spring – the roots sink right down, and it survives through the summer, looking a little sad in the driest times, but then picking up again in autumn when the rains come.
I am trying to put kale pretty much everywhere in the garden – in the garden beds, as well as under fruit trees and in far-off corners. It is such a great staple green for us. As a minimum, I’d probably want to grow around 40 metres (130 feet) of row for our family, and I even feel as though this is not enough… I don’t think it’s possible to have too much kale growing!
Kale stands through the frost right through the winter here, it will bolt to seed the following spring. The flowerheads can be used like broccoli, and the tiny leaves on the towering plants can be used in salads or cooked. The yellow flowers can be eaten in salad, or let them develop into seed for planting.
Red Russian kale is tender enough to use in salads if the stems are removed. My main use for it is as a cooking green, where the stems can be left on, or taken off. The leaves can be cooked whole, or chopped up. I serve it in the same ways as I would for mustard greens, above, but it also can be made into crispy kale ‘chips’ by coating it in some fat and salt, and then baking it at around 180ºC (350ºF) in a single layer until crisp (around 10-15 minutes) – my easy way of doing this is to add it to the vegetables towards the end of a roast, stir it through to coat in the fat and salt from the vegetables, then move to the top of the roast pan to crisp up.
Tokyo Bekana – another adaptable staple green
Tokyo Bekana is a kind of loose-leaf Chinese cabbage. This can be planted any time from spring through to early autumn. Early spring plantings tend to bolt fairly quickly once it’s ready to eat, so it’s best to plant this in succession, with several plantings over the season.
I’d usually plant around 12 metres (40 feet) of row for every succession planting, so maybe around 36 to 48 metres (120-160 feet) or more over the whole season. It’s a fast-growing green in the summer (ready in around 6 weeks after sowing) and can be snuck in as a ‘catch crop’ every time there’s a bit of space in the garden.
The leaves of Tokyo Bekana are mild enough to use as a lettuce substitute in salads, and they can also be fermented, or cooked in any of the ways I cook mustard greens. Just keep the leaves whole, or chop them up, no need to remove stems.
Freckles – the lazy gardener’s lettuce
After trying many different lettuce varieties over the years, if I had to choose from only one to plant from now onwards, I would choose freckles, also known as “flashy trouts back” after it’s beautiful spotted leaves.
Freckles grows beautifully either direct sown or started in trays. I’ve even transplanted trays that have been left unplanted much longer than ideal, and it’s still grown well.
In summers when I haven’t had much irrigation water, once established, freckles has handled the lack of water better than other lettuces, and hasn’t bolted or gone bitter in the heat. Areas that have afternoon shade are the best for growing lettuce in summer.
Freckles grows quickly and doesn’t seem to be bothered much by slugs and snails.
The taste of freckles is a mixture of red and green lettuce taste – like having a good mixed salad but with only one kind of lettuce to harvest.
Like any lettuce, freckles is best grown in succession, as lettuces do bolt to seed eventually (freckles seems a bit slower to bolt than others though), so make a new planting of it every month in between early spring and early autumn and you’ll never run out of lettuce.
I use lettuce a lot in polycultures and in between larger plants such as cabbage, zucchini, and kale, where it seems to thrive below the taller plants while not harming anything.
Dandelion and other edible weeds
I like to encourage my favourite edible weeds at the edges of my garden, under fruit trees, and pretty much everywhere. For dandelions, I taste the leaves in spring and choose the ones with the biggest, tastiest leaves, I don’t overharvest from these ones, I keep an eye on them, and once they go to seed I take their wishing flower/fairy clock seedhead and blow or sprinkle the seeds in areas where they are most wanted.
Dandelions have a deep taproot which brings up nutrients from deep in the soil, not competing with common garden vegetables, and excellent to have around fruit trees and pastures.
I prefer dandelions as a cooked green, but the mild-tasting ones also go well raw in salads or pesto in spring.
Mallow is a good cooking green, the leaves can be a bit annoying to harvest compared to giant kale leaves, but it’s worth having around.
Sow thistle is a bit like spinach. My children love it. The leaves are a reasonable size, and it can be used either raw or cooked.
Wild rocket seems to pop up every year once established, the leaves are quite small but it has a lovely taste and is so easy to grow.
For more recipes and ideas for cooking with homegrown greens, see my book A Year in an Off-Grid Kitchen