Simple baked cheesecake

To celebrate the launch of my new book Natural Small Batch Cheesemaking, I’m sharing an easy recipe for cheesecake.

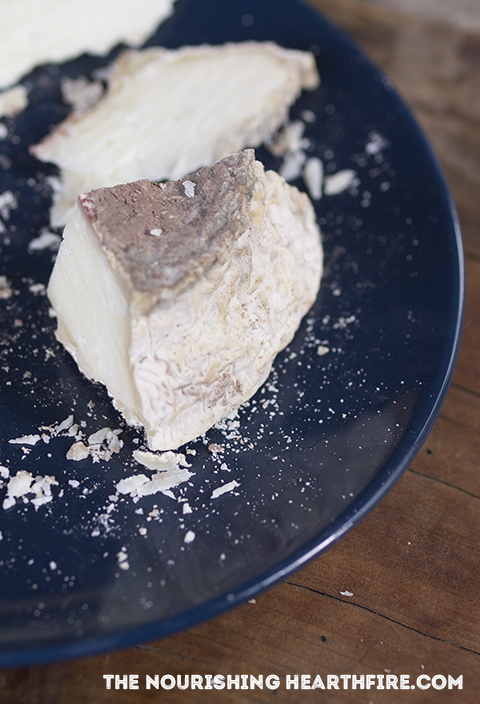
Cheesecake is one of my favourite foods, but not something I used to make very often until I created this recipe. The recipe I’m sharing today is from A Year in an Off-Grid Kitchen, and could not be simpler. It features the easiest cheese to make at home – a simple whole milk ricotta. Or you can use whatever soft cheese you have around the house, as long as it is drained well and is not too salty.

I usually make this without a crust so that it comes together in minimal time, but if you prefer, you can bake this in your favourite cheesecake crust.

This recipe scales up or down well – just weigh your ricotta and then adjust the amount of eggs and honey to suit – use 1 large egg and 60g (3 tablespoons) honey for every 200g (7oz) ricotta.

Ingredients 

170g (1/2 cup) honey 

650g (23oz) well-drained salted ricotta

3 large eggs, whisked

(Optional) zest of 1 medium lemon, or a dash of vanilla

Method 

Preheat the oven to around 180ºC (350ºF). 

If your honey has crystallised, gently melt it until it’s runny. 

Thoroughly mix the honey with all the remaining ingredients using a fork or whisk until evenly blended. Place in a greased 9” (23cm) pie pan or cake tin. 

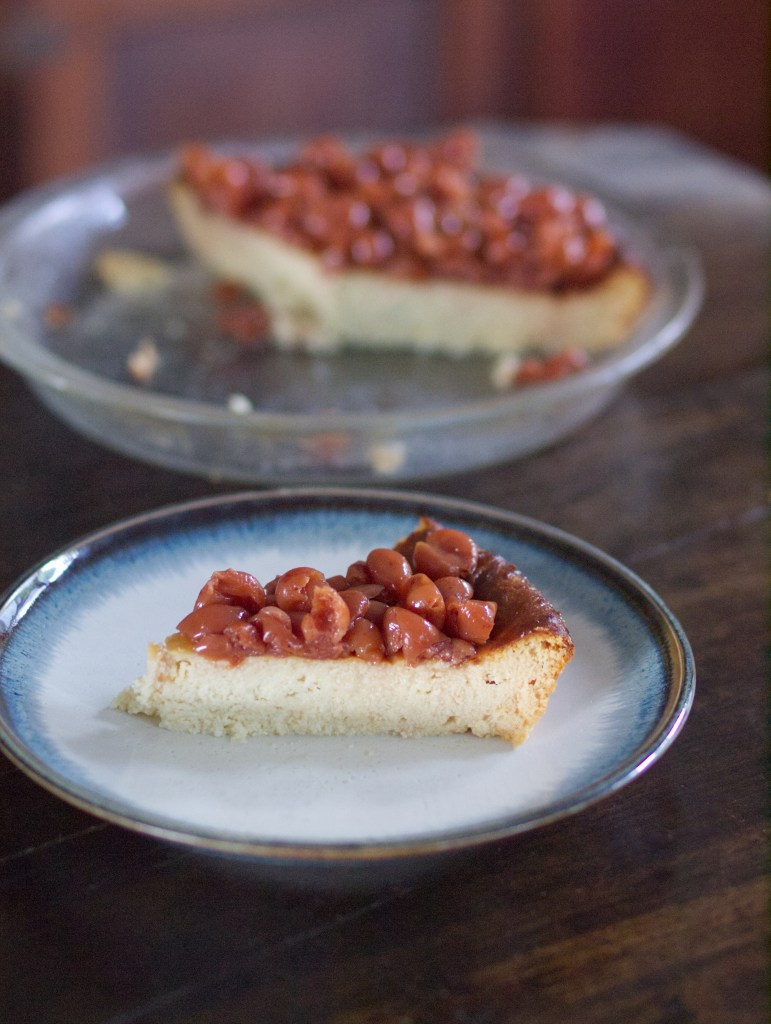
Bake for around an hour, until golden and set. The middle will puff up while it bakes, and then sink down once it’s removed from the oven. 

Serve on its own, or topped with jam, bottled fruits, or fresh berries. 

My new book Natural Small Batch Cheesemaking is now available from several places online, and can also be ordered into any local shop.

Enter your email address here to get new recipes and blog posts from The Nourishing Hearthfire.

Homemade French Onion Soup

The secret to a great French onion soup is the quality of the bone broth – it should be lovingly made at home from beef bones which have been first roasted to create extra flavour before being slowly simmered for 24 hours or longer, or until the broth is so infused with flavour and minerals that it smells delicious on its own when hot, and sets like a jelly when cold.

Allowing plenty of time for the onions to slowly caramelise also helps to bring out the best of a few simple ingredients. The caramelising can be happening in the background while other kitchen tasks are being done, making this an easy hands-off meal for the most part. Sometimes I run the onions through the slicing bit of my food processor to make the preparation extra quick.

The classic presentation for French onion soup is to serve it in ovenproof bowls, with a slice of crusty bread on the top, covered with cheese and briefly baked or broiled to melt the cheese. I just make toasted cheese sandwiches with my usual everyday homemade bread and serve these on the side.

This soup reheats well. I often make a bigger batch and serve it for a few meals.

Makes around 8 serves. 

bowl of french onion soup with toasted cheese sandwiches

Ingredients

12 tablespoons butter (180g)

3 pounds onions (1.35kg), thinly sliced into half moons

Optional 1 cup red wine (or a splash of brandy, or extra broth)

8 to 9 cups (2 litres) beef bone broth

Salt, to taste

Method

Melt the butter in a large stewpot over medium heat. Mix through the onions and allow them to cook, stirring every now and then, until very fragrant, dark golden-brown, and soft. This can take anywhere between 30 and 60 minutes.

Once the onions are ready, stir through the wine for a few seconds, then add the broth. Put the lid on the pot and allow it to simmer for 20 minutes, before adding salt, to taste.

Serve with some combination of crusty bread and melty cheese, such as toasted cheese sandwiches.

If you want to know how to make the cheese for this meal, check out my cheese book on Kickstarter. The Kickstarter ends in 4 days and is a great opportunity to order books directly from me at a reduced price and get extra bonus ebooks. Here’s the link: https://www.kickstarter.com/projects/706848724/make-your-own-cheese-natural-small-batch-cheesemaking-book?ref=dm283q

If you’d like to learn about my favourite way to use whey leftover from cheesemaking, Norwegian whey cheese, check out my guest post at Practical Self Reliance here: https://practicalselfreliance.com/gjetost-recipe/

Enter your email address here to get new recipes and blog posts from The Nourishing Hearthfire.

How Homemade Dairy can Transform your Homestead

homemade goat cheeses on plate

Self reliance

I sometimes get asked “how do you live without a fridge”, or “how do you get by without having to go grocery shopping all the time” and my answer every time is the same thing: We raise dairy animals and make the most of the milk they produce. When we have dairy, we have the key to self reliance.

When you have milk coming into the kitchen fresh every day, there is no need for refrigeration. Milk is often the most common item people will regularly rush out to the grocery store for, and home-produced dairy, especially when combined with cooking from scratch, gardening, chickens, and bulk good storage gives us much more resilience in the face of any crazy stuff that might happen.

Frugality

Keeping to a budget and noting down everything we spend, I can clearly see that the months with fewer shopping trips are the months when it’s been easiest to stay within budget. Going out frequently for milk, yoghurt, cheese, and other dairy products not only means we’re exposed to a bunch of tempting foods on the shelves at the same time, but also means more fuel costs for the car, more of a sense of our food coming from the grocery store rather than our own land, and more time away from our home, when we could have been working in the garden or doing something else productive.

If you have a taste for high quality cheeses, these can drain the food budget very quickly. When you make your own cheese, even if its not from your own dairy animals, you can create fantastic cheeses that will make you ignore the expensive gourmet cheeses on store shelves.

Homemade yoghurt and other cultured milks are even more affordable to make at home – yoghurt is often around four times more expensive than milk, but can be made very easily at home with nothing more than milk and some leftover yoghurt to use as culture.

Focus

Dairy animals need care every day, and once you’re outside caring for them, it’s easy to fit in other homestead chores, feel more like “real” homesteading, and have a more productive homestead overall. There is nothing like the feeling of bringing in fresh milk every day, and I like the rhythm and stability that dairy animals give to our lives: No matter what is happening around us, I know that every morning begins with milking.

Food and health

Dairy foods are simply delicious. The cheeses I make are tastier and healthier than any cheeses that I can buy, and we can eat as much of them as we like. There is not much that gives a feeling of abundance than having shelves full of many varieties of delicious homemade cheeses at varying stages of aging – some are food for now, others are food for later, all are absolutely delicious and truly make a meal. Cheese is a staple food in my house and can easily become a staple food in your home too.

Next on the blog I’ll be sharing some helpful information about making great yoghurt every time: this is something that I had trouble with for many years and I’m excited to be sharing my tips with you all soon.

Enter your email address here to get new recipes and blog posts from The Nourishing Hearthfire.

My book is now published!

For over two years I was deeply immersed in writing about goats. I dreamed of the goat book I wish I’d had when I first started, and began to create it. I wrote all about keeping dairy goats on a small scale, and making natural cheeses from their milk. Over 50,000 words later, with all kinds of unexpected surprises and struggles, I now hold the hardcover edition in my hand and know that it’s completed!

_2253566-480.jpg

I didn’t do this alone, but with the help of many wonderful people that supported the book on Kickstarter. Thank you!

You can now find my book ’Backyard Dairy Goats’ on Amazon, Book Depository, Permies, and anywhere else you would normally buy books.

Since the book launch I have been putting a lot of creativity into writing the cookbook that’s been brewing in my mind for the past few years, and will still be a bit quiet on this blog, hopefully I will find some recipes to share with you all soon, and some baby goat photos in October.

I have also recently been a guest poster at Permablitz, writing about keeping dairy goats in suburbia, and I will be doing some more goat-related posts in the next few months.

More Goaty Goodness

kickstarter2tnh.jpg

Just a quick post to let you all know that for this week (until the 12th I think) I will be officially answering goat questions over on the Permies forums. Here is the link. If you have any questions about goats at all, feel free to ask over there (or in the comments here if you like).

I would also like to thank everyone who has contributed to my Kickstarter campaign so far. Here is the link for that. There’s now less than two weeks to go, so if you’d like to get a discounted book, a signed book, or books with extra goodies please select a reward and make a pledge there.

Perfection

_6113221-480.jpg

I am not that great at describing foods. I sometimes laugh at the descriptions on the back of wine bottles, and at the obsessions that plague the cosmopolitan boomer-inspired worlds of recipes and restaurants, when to me there is just nothing like simple foods created traditionally, and there’s not much to say except ‘perfect’.

This cheese deserves praise though. I will post pictures of it and tell its story.

_6113226-480.jpg

This cheese was the last cheese I made this year, towards the end of March when I switched back to once a day milking. I’ve had a few hard cheesemaking fails this season due to my rennet being old and stored badly, but there is just nothing like homemade hard cheese, raw and full of flavour from wild cultures, so I persist in trying them every so often. This one used a ‘washed curd’ technique that gouda and havarti use, I used some of my homemade viili yoghurt as starter, and I probably made it on a fruit day in the biodynamic calendar. I used an 800g cheese mould, using 5-6 litres of goats milk.

Lately my land and house have been wanting to grow camembert-style rinds. As this cheese became soft-looking as it aged, and the sides of the rind ‘splooged’ (for lack of a technical word) I noticed a beautiful white rind forming on the splooged bits. At some point it stabilised, but I eyed this off every time I tended to the cheeses, wondering if it would be similar to camembert when I cut it open.

_6113223-480.jpg

We cut it open the other night, it was like no other cheese I’ve had. Cheese perfection that doesn’t fit into any little cheese category in a book. This cheese can’t be replicated with packets of cultures and milk from the shop, it is just like all good foods should be, an expression of the land that makes it.

I sat it next to the ripening chorizos and saucisson secs in the larder, to spread the white bloom.

_6113232-480.jpg

Enter your email address here to get new recipes and blog posts from The Nourishing Hearthfire.

An easier way to make soft cheese

OLYMPUS DIGITAL CAMERA

Chévre. After fermenting for 12 hours you can see the curd has separated from the whey.

Chévre is pretty easy to make to begin with, but it usually begins with boiling water and sterilising everything in the boiling water, which adds extra time and hassle to the process.

I’ve been getting massive cravings for chèvre, so much that I even looked at soft goats cheese in the shop (before quickly moving away, knowing that I can make better stuff at home) and knew I had to make some soon, so instead of my usual method of boiling water, sterilising everything that’s going to touch the milk with the boiling water, then heating cold milk up in a saucepan to the right temperature I just added some milk kefir (around 2 tablespoons) and diluted rennet (the tiniest amount possible, a drop or less diluted in a bit of water) to a jar of fresh milk warm from the goat, moved the jar around a little to mix it in, then left it to sit for around 12 hours, before draining for around 6 hours, mixing salt through, and letting it drain for a little longer. Great cheese with less trouble than the other way.

We’ve sold the cow. I have mixed feelings about this, but it’s something we had to do, and I’m glad she has a good home with another family. I have one hard cheese aging in the makeshift cheese cave that I made from her milk, an asiago with a natural rind. I’ve never been successful with natural rinds before, mainly from forgetting to brush them every week, but this one seems to be going well, and we can probably start eating it next month.

This post is a part of Simple Homestead Blog Hop

Enter your email address here to get new recipes and blog posts from The Nourishing Hearthfire.